38 Fun and Easy Spring Crafts Kids Will Love
Share
Jump into spring with creative art projects that bring the season to life—think blooming flowers, playful animals, and sometimes rainy skies!
Spring Craft Activities: Table of Contents
Spring crafts let kids celebrate warmer weather, blooming flowers, and buzzing wildlife through hands-on art activities. Pick from a variety of projects, including fun spring crafts that incorporate alphabet practice, crafts dedicated to spring holidays, and ideas designed to spotlight nature. Plus, each activity offers a great way to enjoy spring’s rainy days while cozy indoors.
Our spring craft ideas for toddlers, preschoolers, and kindergarteners utilize household supplies and don’t require a big time commitment. While each craft is designed for young children, it’s best to provide adult supervision while they work.
After you finish your crafts, keep enjoying the season with these 30+ spring activities for indoors and outside.
Spring Animal Crafts
Coffee Filter Butterfly Craft
Supplies:
- White coffee filters
- Small rubber band
- Pipe cleaners
- Spray bottle with water
- Washable markers
Instructions:
1
Lay down paper towels or cover the surface to protect it from marker stains and water. Flatten a coffee filter on the protected surface.
2
Use washable markers to draw various patterns and designs on the filter. Encourage creativity with colors and shapes.
3
Lightly spray the colored coffee filter with water using the spray bottle. The water will cause the marker colors to blend, creating a tie-dye effect. Let dry.
4
Once dry, pinch the center of the coffee filter and gather it together to create wings. Wrap a pipe cleaner around the center, twisting it to secure the filter. The ends of the pipe cleaner will serve as the butterfly’s antennae–just curl the ends of them to form an antennae shape.
Pom Pom Caterpillar on a Leaf Craft
Supplies:
- Pom poms, 1 medium and 5-6 small
- Green construction paper
- Scissors
- Pencil
- Glue
- Small googly eyes
Instructions:
1
Trace a leaf shape on the construction paper and cut it out. (You can also use a large real leaf instead.)
2
Arrange the pom poms to form a caterpillar body, using any pattern you like. Glue them in place on the leaf.
3
Place the large pom pom at the head of the caterpillars and glue in place. Use glue to attach the googly eyes, then display your little critter!
Tip: Look up real caterpillars, like monarchs, and choose pom poms to replicate their pattern!
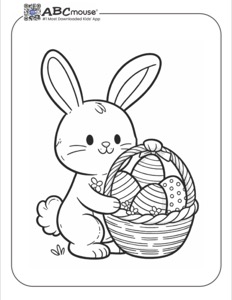
Somebunny Loves You Photo Card Craft
Supplies:
- Bunny Holding Heart Coloring Page
- Crayons or markers
- Photo of your child, sized to fit in the heart on the coloring page
- Construction paper or cardstock
- Scissors
- Glue stick
Instructions:
1
Color in the picture of the bunny, leaving the heart blank. Cut out the bunny and glue it to the construction paper or card stock.
2
Trim the photo to fit the heart on the coloring page, and glue it in place.
3
Add the text, “Somebunny Loves You!” to your card, along with a personalized message.
Paper Plate Duck Craft
Supplies:
- Yellow disposable plate (if you can’t find one, you can paint a white one with craft paint)
- Yellow craft feathers
- Orange construction paper
- Googly eyes
- Scissors
- Pencil
- Glue
Instructions:
1
Cut a beak from the orange construction paper, and glue it in place on the plate along with the eyes.
2
Cut two strips of construction paper, about one inch wide. Accordion-fold the strips, then glue one end of each to the bottom of the plate as legs.
3
Draw two webbed feet on the construction paper and cut them out. Glue them into place at the bottom of the legs.
4
Glue several yellow feathers to either side of the plate for wings, and your ducky is ready for display!
Need a no-fuss duck activity? Try our free printable duck coloring pages!
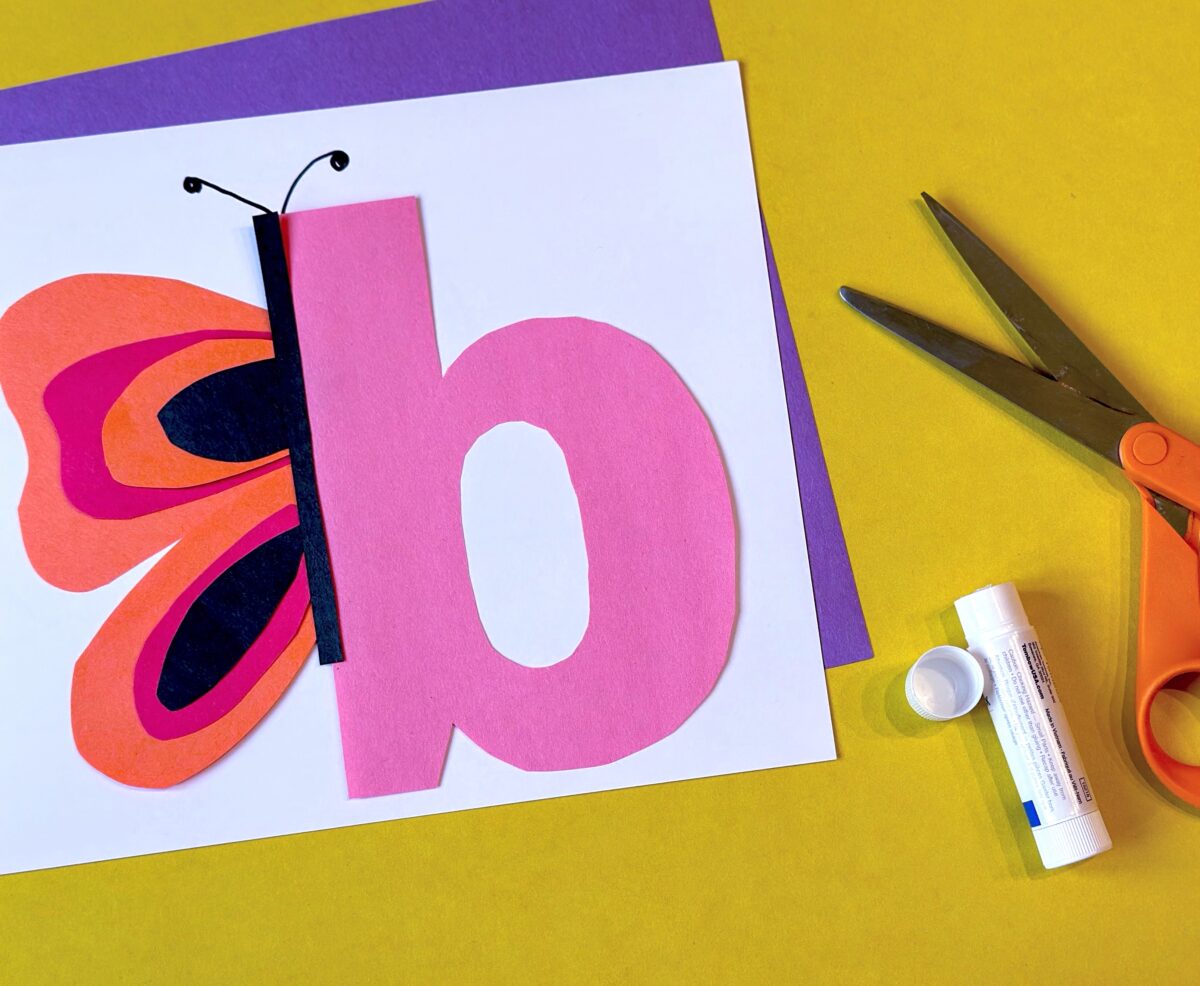
B is For Butterfly Craft
Supplies:
- White card stock paper
- Colored construction paper
- Scissors
- Black marker
- Glue
Instructions:
1
Begin by looking for inspiration for your butterfly, either from pictures of butterflies in books or online or by observing real ones outside. Notice their wing shapes and colors to try using in your craft.
2
Draw or cut out an uppercase B or lowercase letter b on paper. Alternatively, print out a letter B template to use as a base.
3
Use construction paper to cut out butterfly wings. Layer different colors and sizes of paper to make the wings unique.
4
Position and glue the wings behind the letter B to create the butterfly shape. Use a black marker to draw curved antennaeat the top of the butterfly.
More Letter B Crafts! Keep exploring the letter B with these letter B crafts and activities.
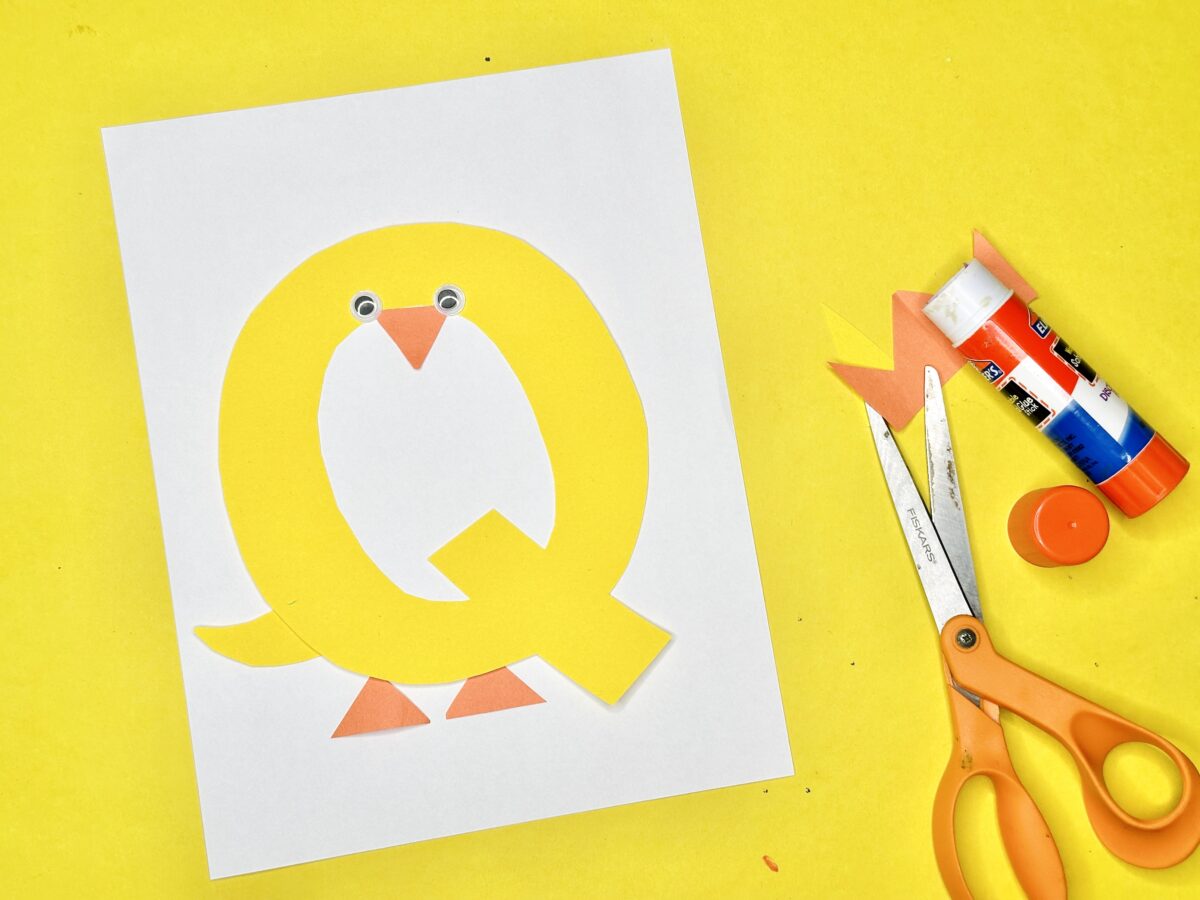
Q is for Quack Craft
Supplies:
- Yellow and orange construction paper
- White card stock
- Scissors
- Googly eyes
- Glue
Instructions:
1
Trace the shape of an uppercase letter Q onto a piece of yellow construction paper, and cut it out to form the duck’s body. Use this letter Q as a template if needed.
2
Cut three small triangles—two for the feet and one for the beak–from the orange construction paper.
3
Work with your child to position the tail, feet, and beak onto the letter Q. Glue all the pieces down securely.
4
Glue a googly eye near the top of the letter Q to complete the duck’s face. Then have fun making quacking sounds together to reinforce the letter Q sound!
More Letter Q Crafts! Kids can continue learning the letter Q shape and sound with these hands-on letter Q crafts.

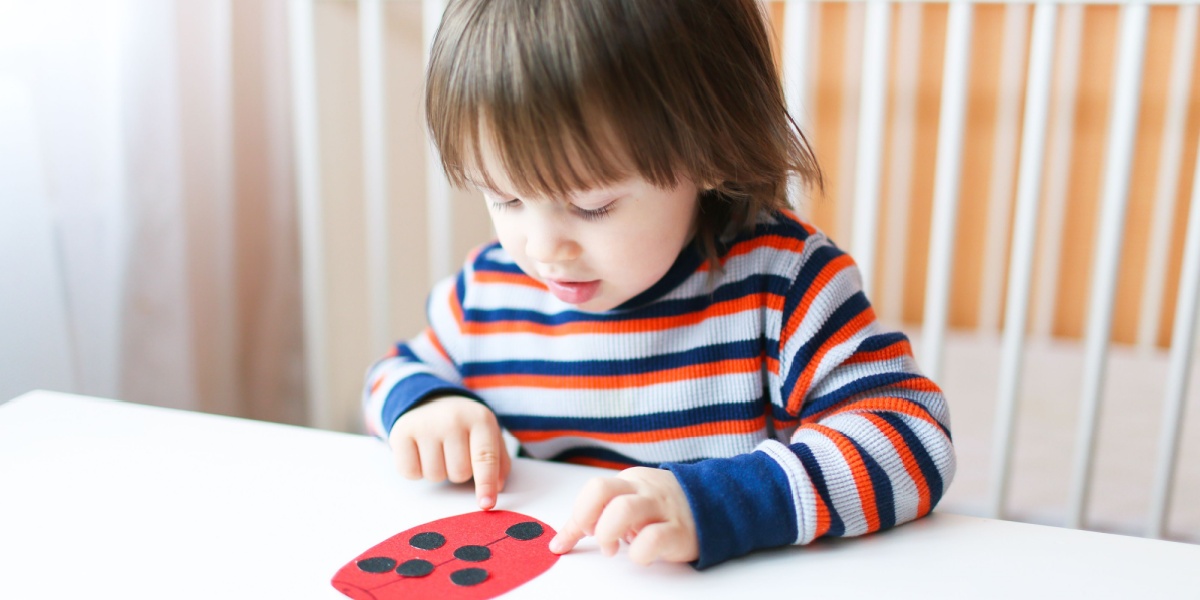
Count the Dots Ladybug Learning Craft
Supplies:
- Red and black construction paper
- Black marker
- Scissors
- Glue
- Bowl and cup to use as templates
- Pencil
Instructions:
1
Trace around the bowl on the red construction paper to create the ladybug bodies. Cut out 10 bodies.
2
Repeat with the cup on the black construction paper to make 10 heads. Glue the heads to the bodies and let dry.
3
Use the marker to add dots to each lady bug. Add 1 dot to the first ladybug, 2 dots to the second, 3 to the third, and so on up to 10.
4
Use your ladybugs for learning games, like putting the numbers in order, skip counting by twos, counting on, or other number skills activities.
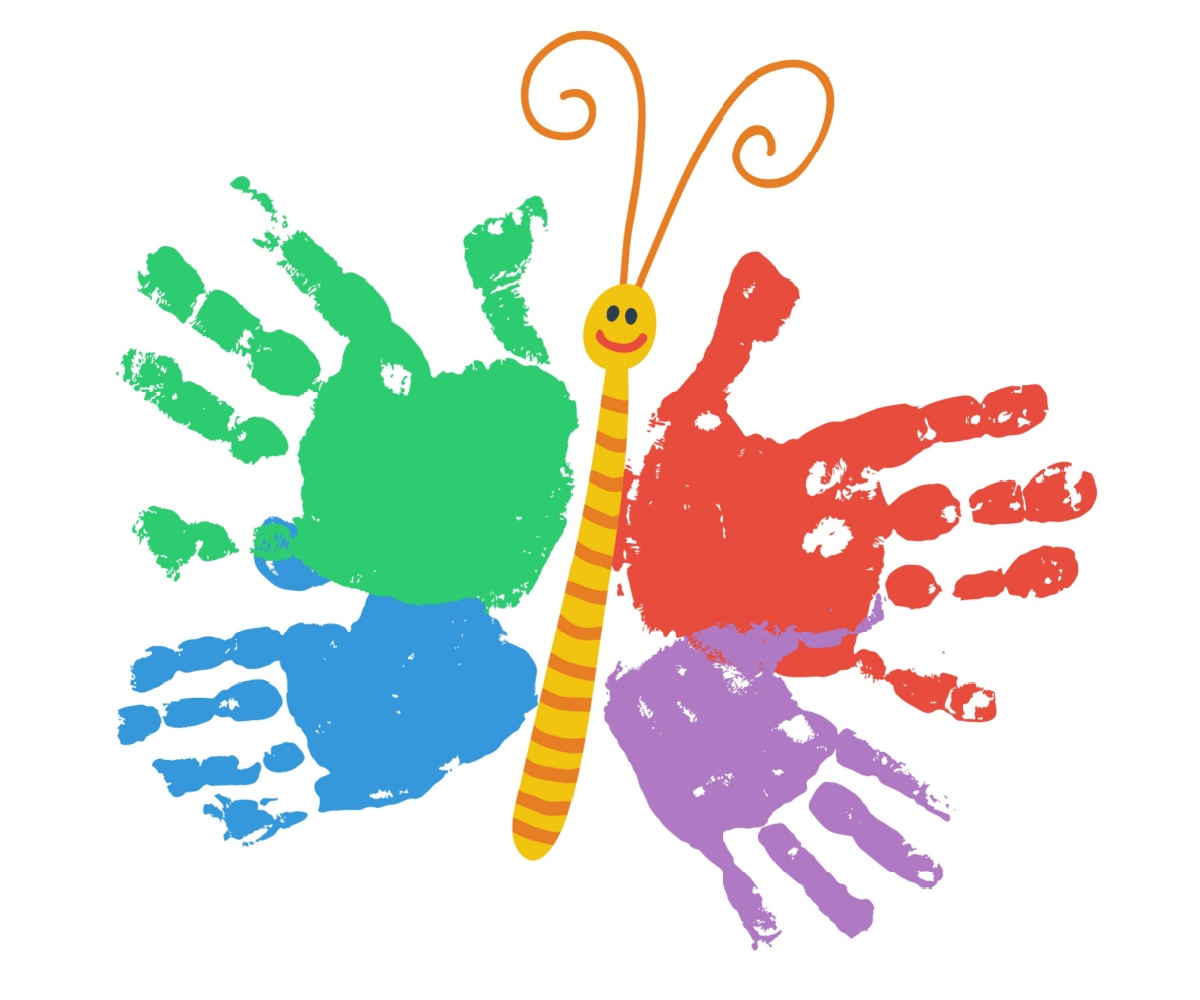
Handprint Butterfly Craft
Supplies:
- Fingerpaint or washable craft paint
- Construction paper
- Shallow dish or paper plate
- Markers
Instructions:
1
Pour some paint into the plate or dish. Press your palms into the paint, then press them on the page with your fingers outspread in the shape of a butterfly. Leave a bit of space in between where your palms meet on the paper.
2
When the paint is dry, use markers or construction paper to add a body and antennae.
Get more butterflies! Print out our free butterfly coloring pages to keep exploring these unique insects.
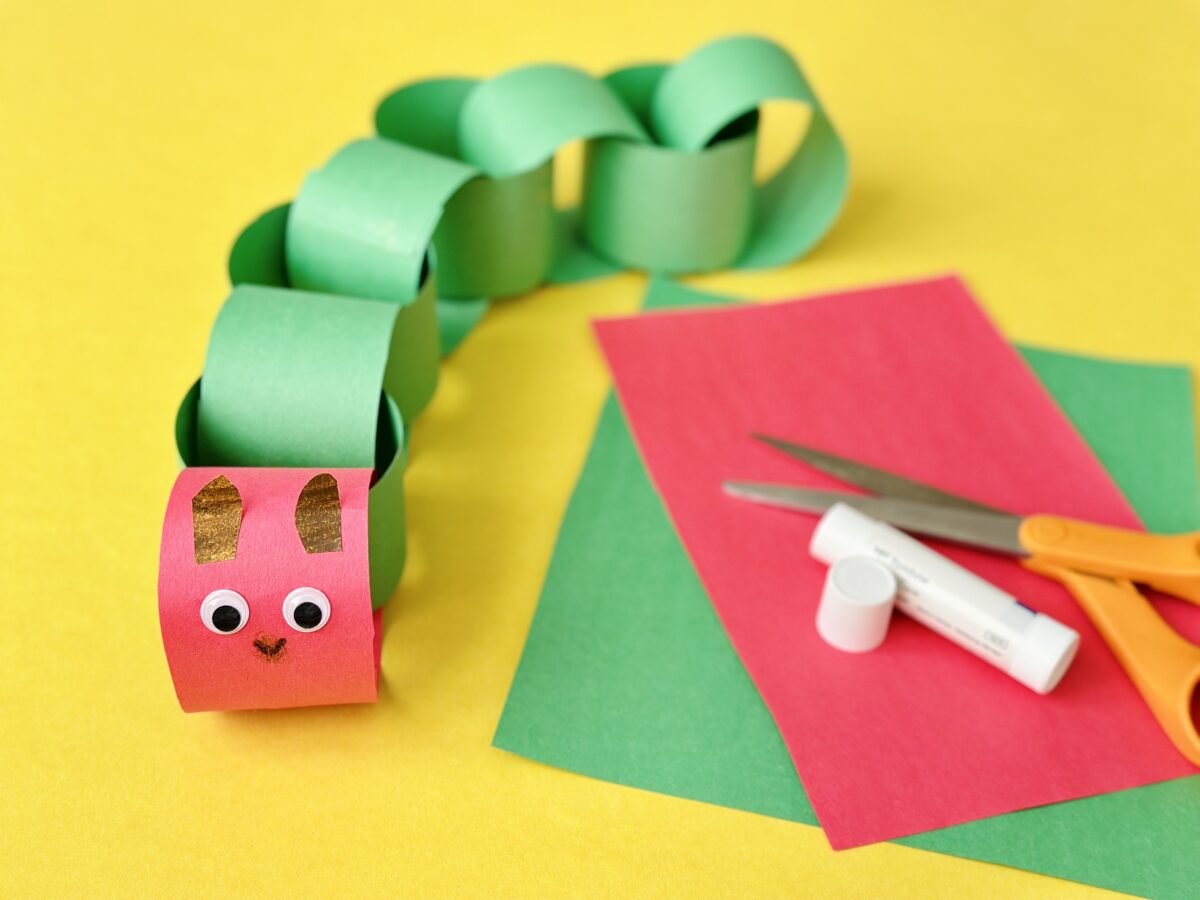
Caterpillar Paper Craft
Supplies:
- Red and green construction paper
- Scissors
- Black marker
- Googly eyes
- Glue
Instructions:
1
Trim the construction paper or card stock into long 2-inch-wide strips. You will need about 8 to 10 strips for the caterpillar’s body.
2
Take one strip and curve it into a circle, overlapping the ends. Use glue or tape to secure the ends together.
3
Take the next strip and loop it through the first circle before gluing or taping the ends together. Repeat this process with the remaining strips, continuing until you have 8 to 10 links forming a chain.
4
Choose either the first or last link to be the caterpillar’s head. Use markers, stickers, or googly eyes to add a fun face. For a more colorful look, use a different-colored strip for the head.
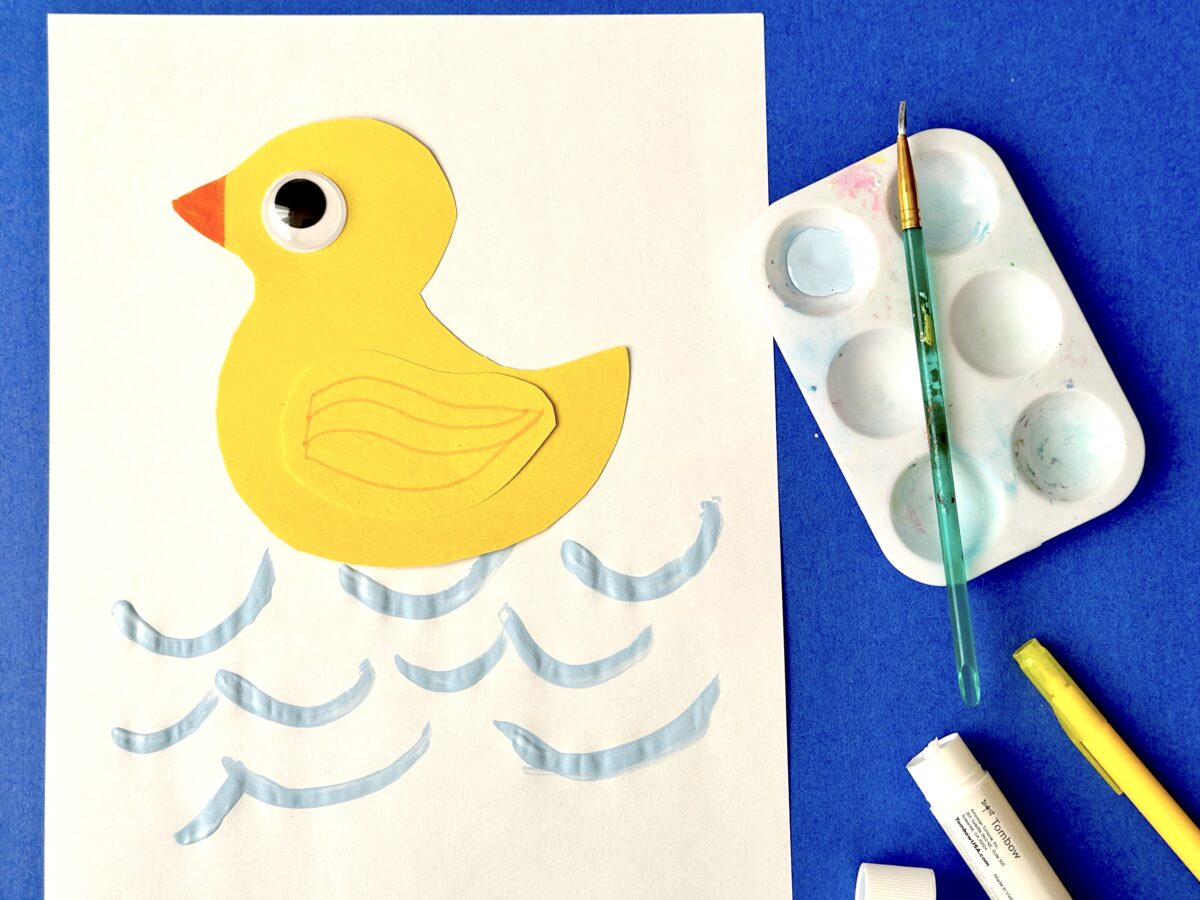
Swimming Duck Craft
Supplies:
- Yellow and orange construction paper
- White card stock
- Scissors
- Yellow marker
- Googly eyes
- Blue paint
- Paint brush
- Glue
Instructions:
1
On yellow construction paper, draw a simple outline of a duck and cut it out. Cut a small, separate piece from the same yellow paper to form the wing.
2
Use an orange marker to draw the beak. Attach a large googly eye, or draw an eye with a black marker.
3
Glue the wing onto the duck’s body to give it a more realistic look, and attach the duck to a white piece of paper.
4
Use blue paint, markers, or crayons to draw waves around the duck to make it look like it’s floating in water.
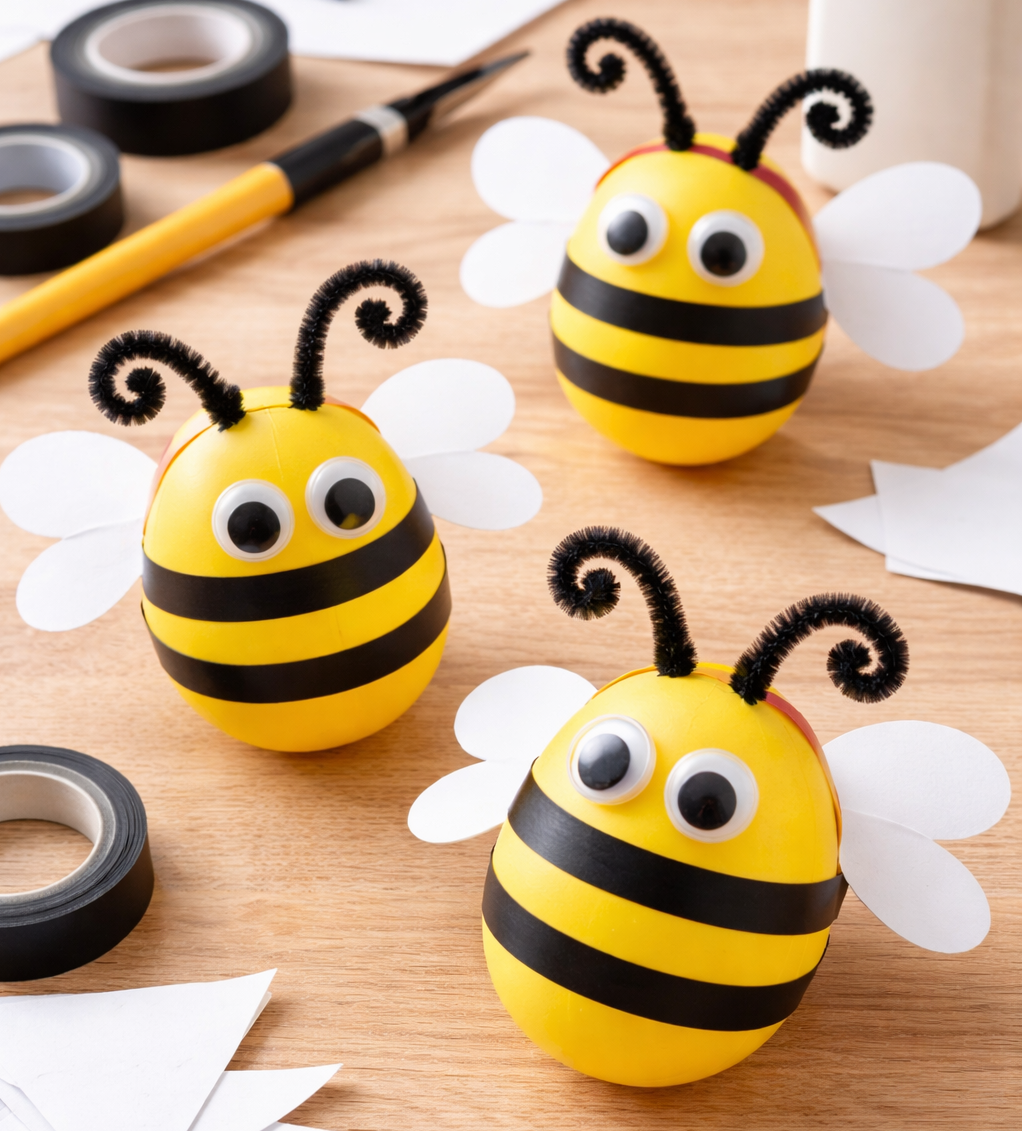
Plastic Egg Bee Craft
Supplies:
- Yellow plastic easter eggs
- Thin black washi tape or electrical tape
- White construction paper
- Black pipe cleaner
- Pencil
- Scissors
- Glue
Instructions:
1
Trim two short pieces of pipe cleaner for the antenna. Twist one end of each around the pencil to form a loop. Bend the other end at a 90 degree angle.
2
Wrap a piece of black tape around the middle of the egg to form the first stripe. Add several more stripes to either side.
3
As you add the last stripe at the fatter end of the egg, tuck the bent ends of the antennae underneath to hold them in place. (Very young children may need help with this part.)
4
Draw wings on the white construction paper and cut them out. Glue them into place on the bee’s back, and attach the wiggle eyes below the antennae. Your bee is ready to buzz!
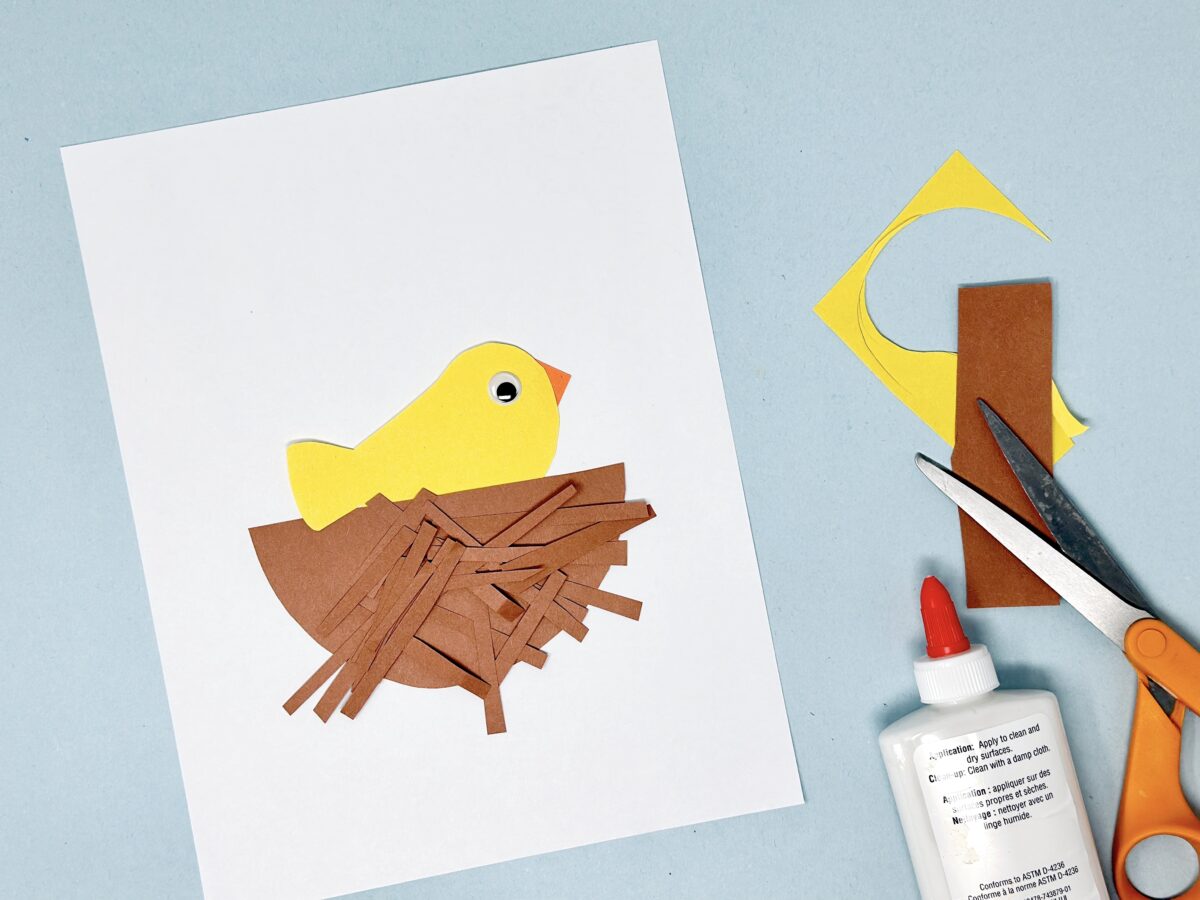
Bird and Nest Craft
Supplies:
- Yellow, brown, and orange construction paper
- White card stock
- Scissors
- Googly eyes
- Glue
Instructions:
1
Cut a medium-sized semi-circle from brown construction paper to form the nest. Then, cut or tear skinny strips of brown construction paper, paper bags, or packing paper and glue them onto the semi-circle to create a textured nest.
2
Have your child select a colored piece of paper for their bird. Draw a bird shape (a teardrop with a curve at the end and a triangle for the tail) on the paper.
3
Cut a small orange triangle for the beak and glue it onto the bird. Attach a googly eye (or draw one on with a marker) to complete the bird’s face.
4
Glue the nest and bird onto a piece of paper to create the scene.
Keep it simple: As an alternative, print out and color one of the birds from our bird coloring pages. Then cut it out and place it in the nest.
Fluffy Lamb Craft
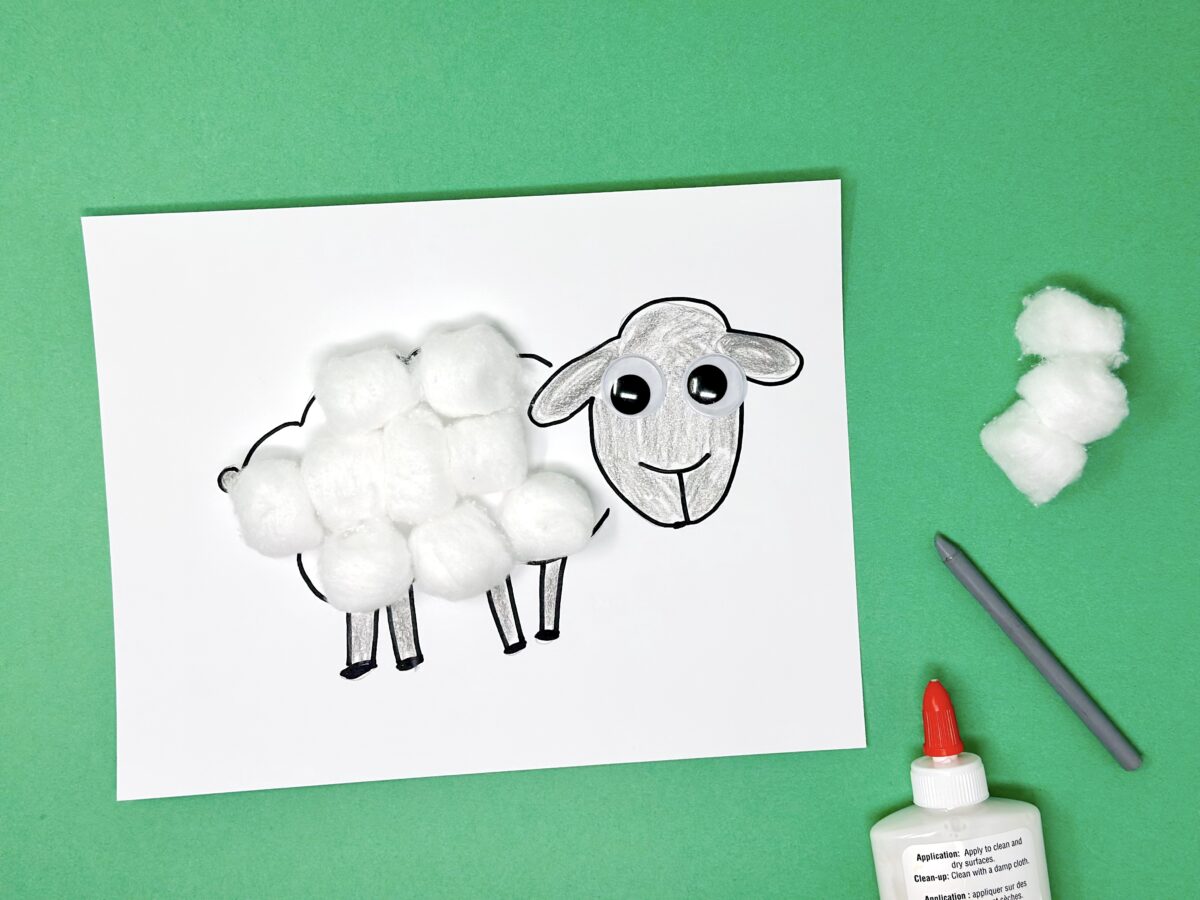
Supplies:
- Paper
- Markers
- Cotton balls
- Liquid glue
- Googly eyes
Instructions:
1
Use a marker to draw the outline of a lamb on a piece of paper. Include a fluffy body, an oval head with two ears, four rectangular legs, and a small tail.
2
Have your child glue cotton balls onto the lamb’s body to create fluffy fur, covering the entire body for a full, woolly look.
3
Glue googly eyes onto the lamb’s head, then use a marker to draw a small nose and mouth to complete the lamb’s face. Finally, use a marker to draw a small nose and mouth to complete the lamb’s face.
R is for Rabbit Craft
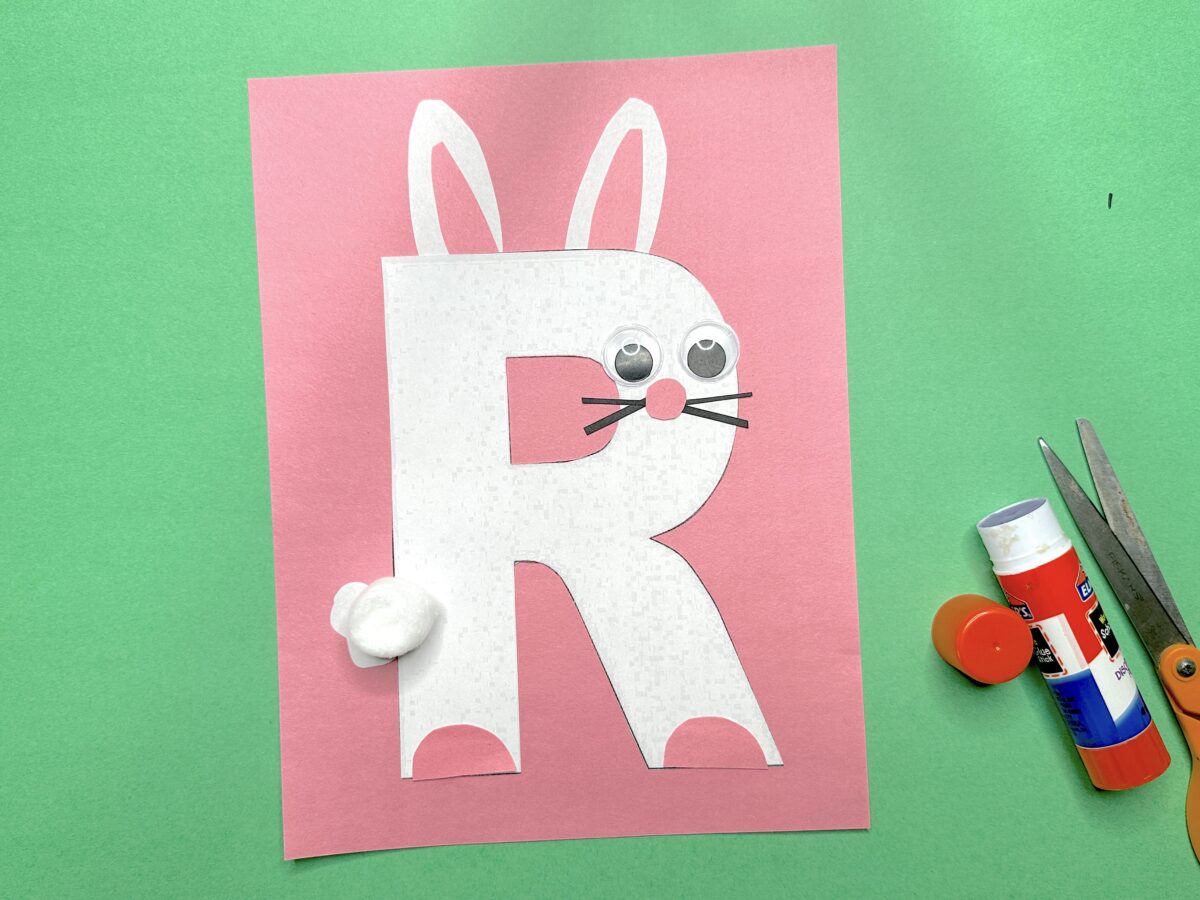
Supplies:
- Pink, white, and black construction paper
- Cotton ball
- Letter R outline
- Scissors
- Glue
- Googly eyes
Instructions:
1
Draw or print out an uppercase letter R on white paper and cut it out.
2
Cut two long ear shapes from white construction paper (slightly wider and longer). Cut two smaller ear shapes from pink construction paper and glue them on top of the white ears. Attach the ears to the top of the letter R with glue.
3
Glue a cotton ball to the lower back side of the R to create a rabbit tail.
4
Cut two semi-circle shapes from pink construction paper for the feet. Glue them to the bottom of the letter R
5
Glue on googly eyes near the top of the R. Create whiskers using black construction paper, string, pipe cleaners, or a marker, and attach them below the eyes.
Does some bunny loves rabbits? If your child is a fan of these cotton-tailed creatures, they’ll love our free bunny rabbit coloring pages.
Bowtie Noodle Butterfly Craft
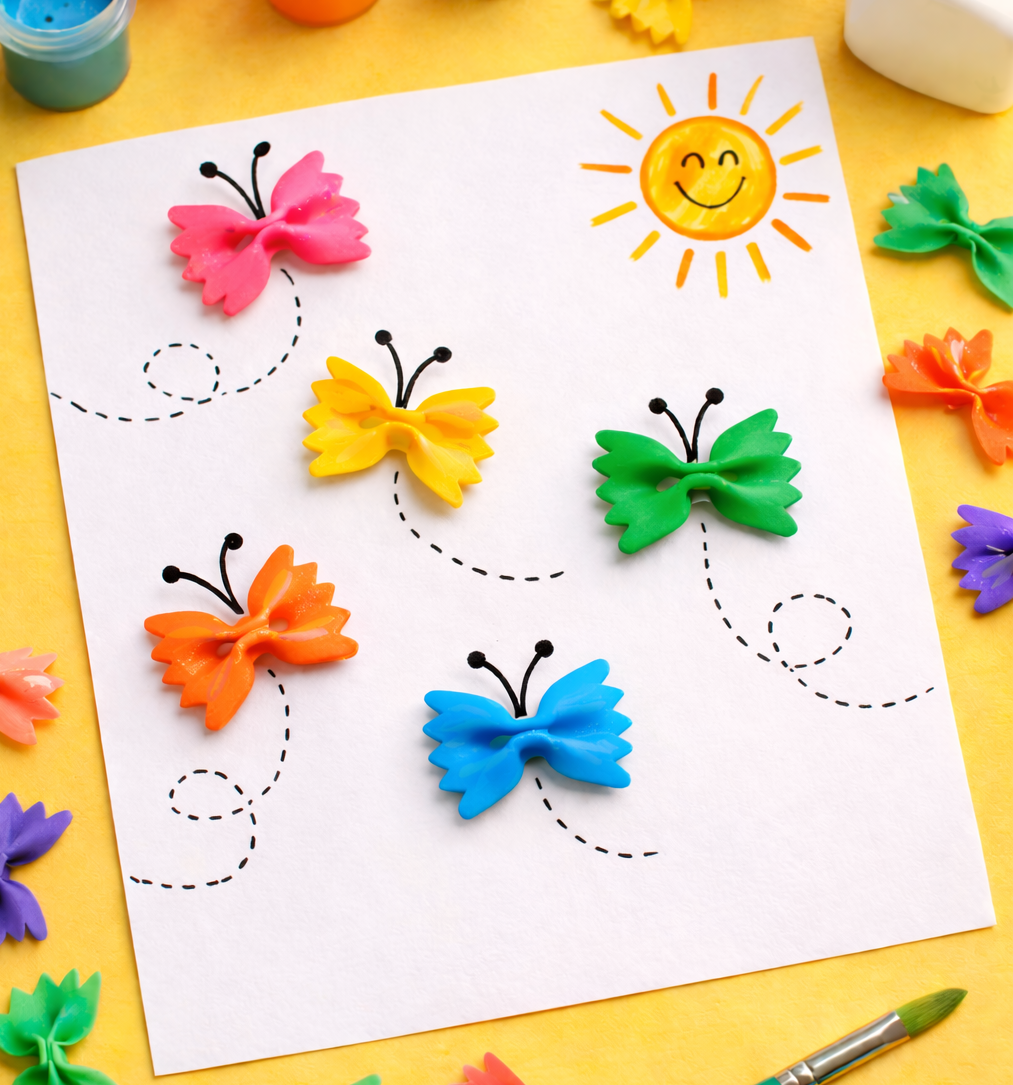
Supplies:
- Thick paper
- Paint in various colors
- Paint brush
- Uncooked bowtie pasta
- Liquid glue
- Markers or crayons
Instructions:
1
Let your child pick several colors of acrylic paint and choose how many butterflies they’d like in each color.
2
Have your child paint one side of each piece of bowtie pasta and let them dry completely. You can create multi-color butterflies by using two or three different colors on each piece of pasta, letting the paint dry in between coats.
3
Glue down the unpainted side of the pasta butterflies onto the paper and let it dry completely.
4
Use a marker or crayons to draw in antenna and any other decorations or scenery you’d like.
Spring Weather and Nature Crafts
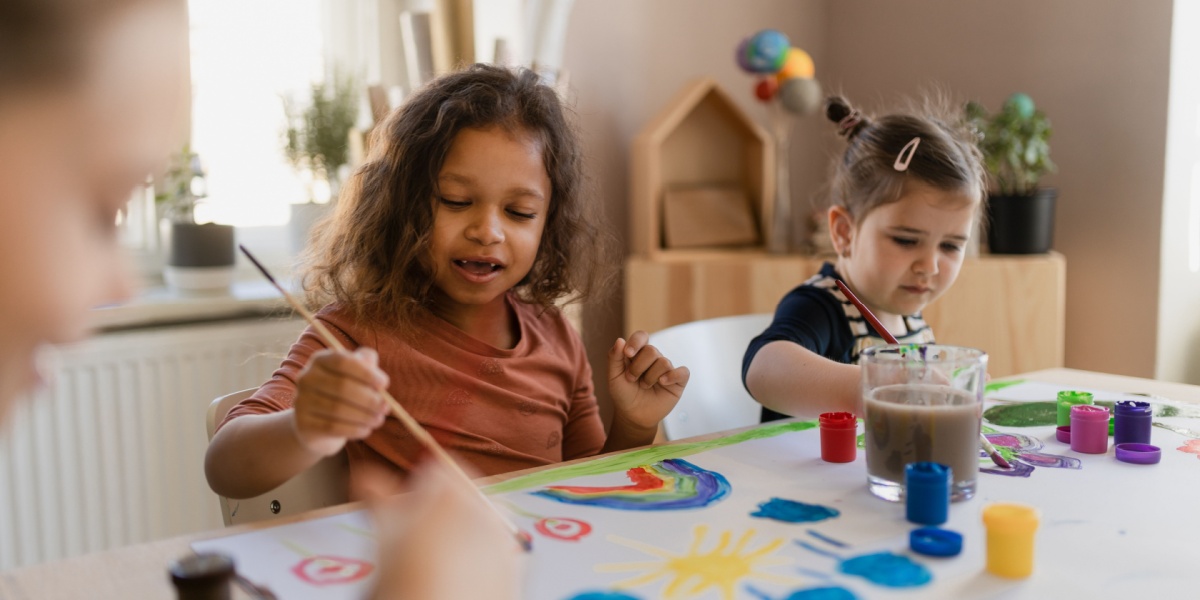
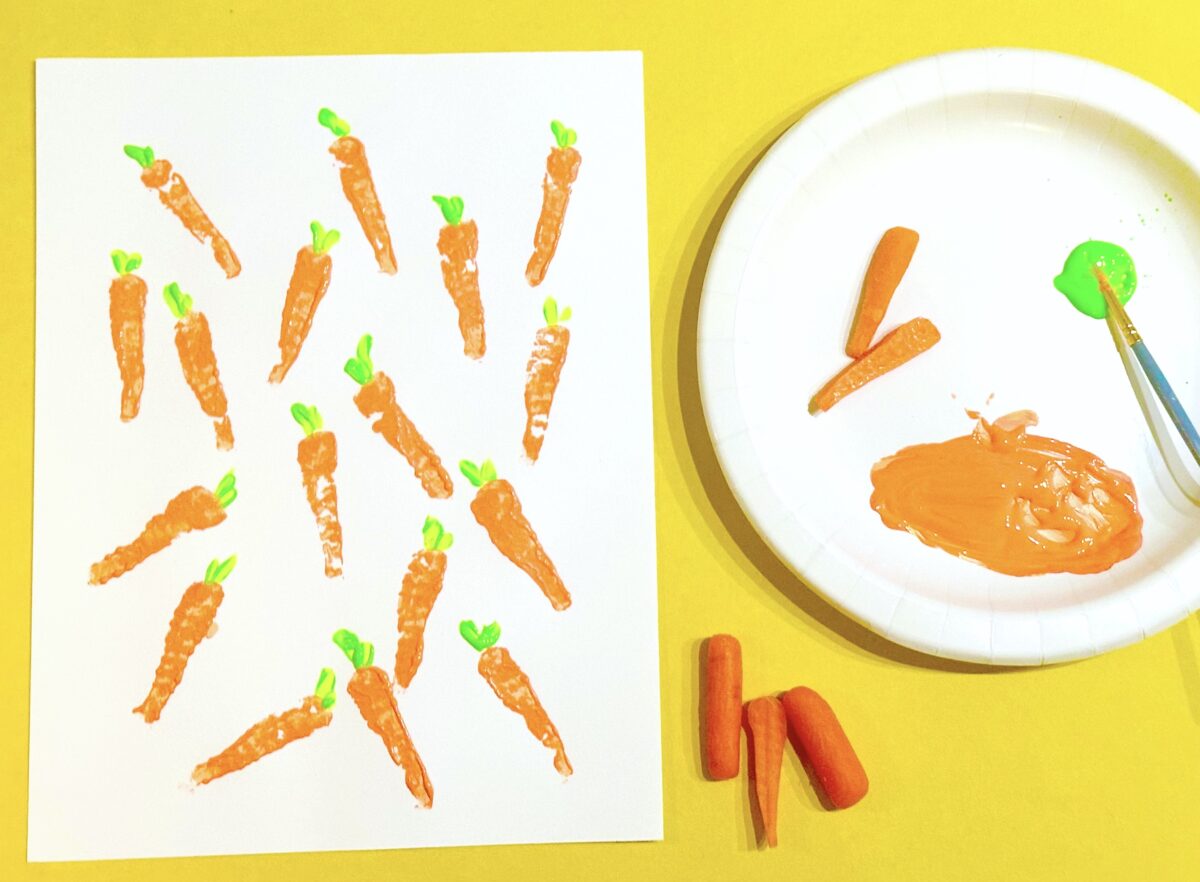
Carrot Painting Craft
Supplies:
- Card stock paper
- Baby carrots
- Orange and green acrylic paint
- Paper plate
- Paint brush
Instructions:
1
Cut baby carrots in half to create a flat stamping surface. Trim one end into a point. Pat them dry with a towel to ensure a crisp stamp edge.
2
Add a small amount of orange and green acrylic paint onto a paper plate.
3
Dip the flat side of a carrot half into the orange paint and stamp it onto the paper. Alternatively, use a paintbrush to apply the orange paint to the carrot before stamping.
4
Repeat the stamping process to make a fun carrot pattern on the paper. Use a paintbrush to paint green leaves on top of each carrot stamp. Let dry completely.
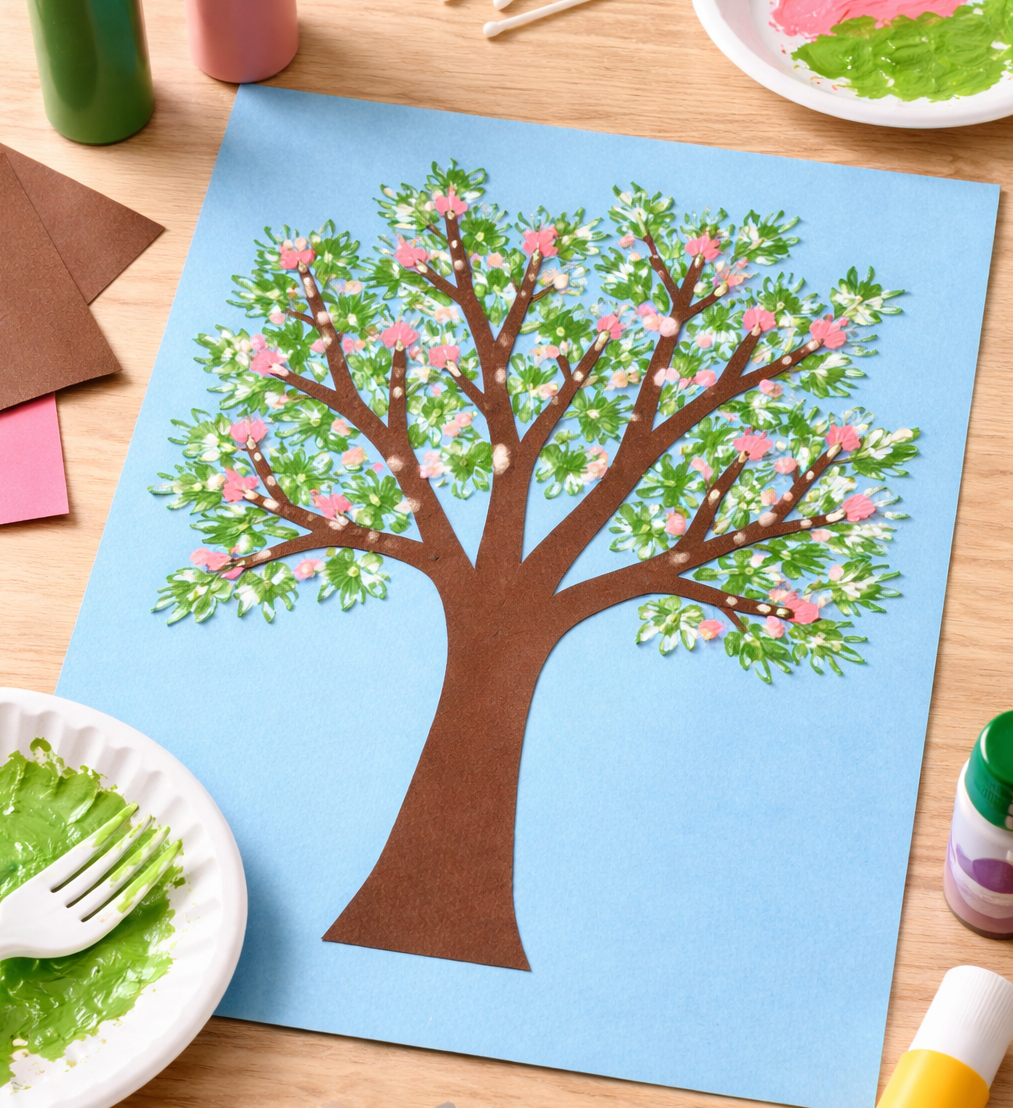
Fork and Cotton Swab Painted Tree Craft
Supplies:
- Blue and brown construction paper
- Green, white, and pink craft paint
- Disposable fork
- Cotton swab
- Scissors
- Pencil
- Glue stick
Instructions:
1
Draw the trunk and branches of a tree on the brown construction paper, cut them out, then glue them to the blue construction paper.
2
Pour some green paint onto a shallow dish or paper plate. Press the back of the fork into the paint, then onto the branches of the tree to make leaves. Repeat until you’re happy with the look of the tree, and let the paint dry.
3
Dip the cotton swab into some pink and white paint and press dots all over the leaves to represent spring blossoms. Let your tree dry and display your creation!
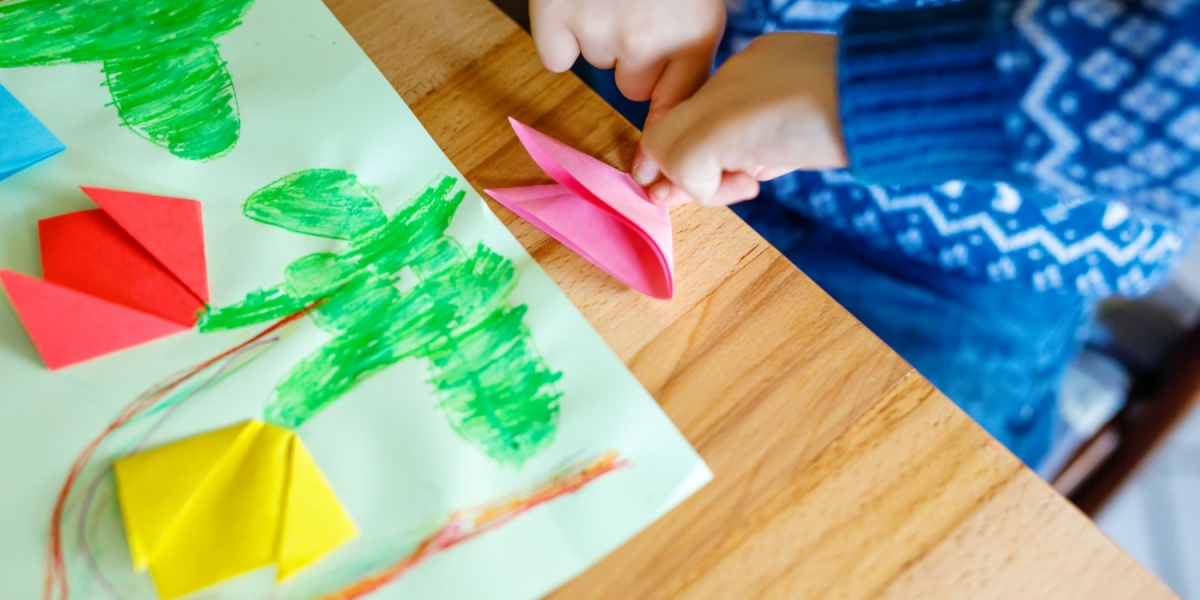
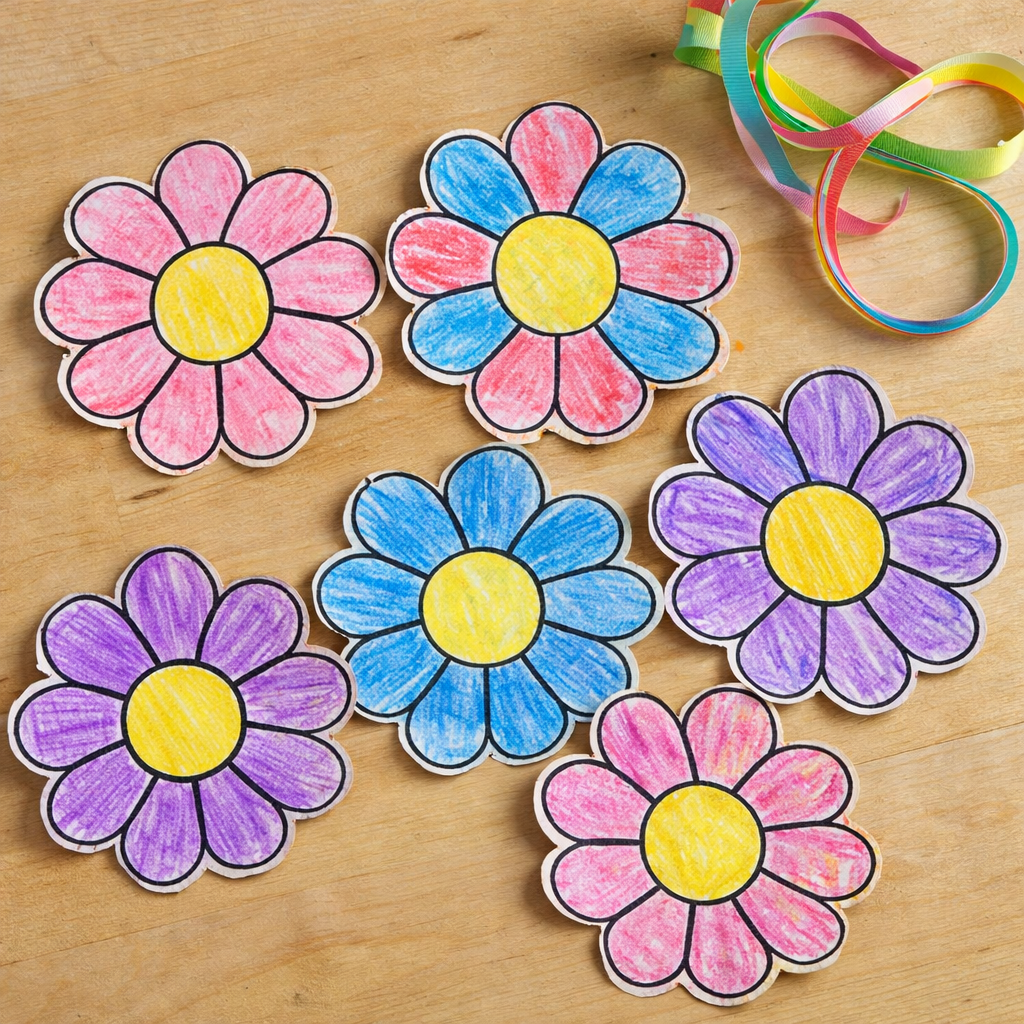
Paper Flower Garland Craft
Supplies:
- Single Simple Flower Coloring Page, multiple copies
- Six Simple Flowers Coloring Page, multiple copies
- Crayons, markers, glitter glue, or other decorations
- Ribbon or yarn
- Hole punch
Instructions:
1
Color the flowers any way you like, then cut out each one.
2
Punch two holes in the top of each flower, then string them along the ribbon or yarn. Alternate one large flower with several small ones. Hang your garland to welcome spring!
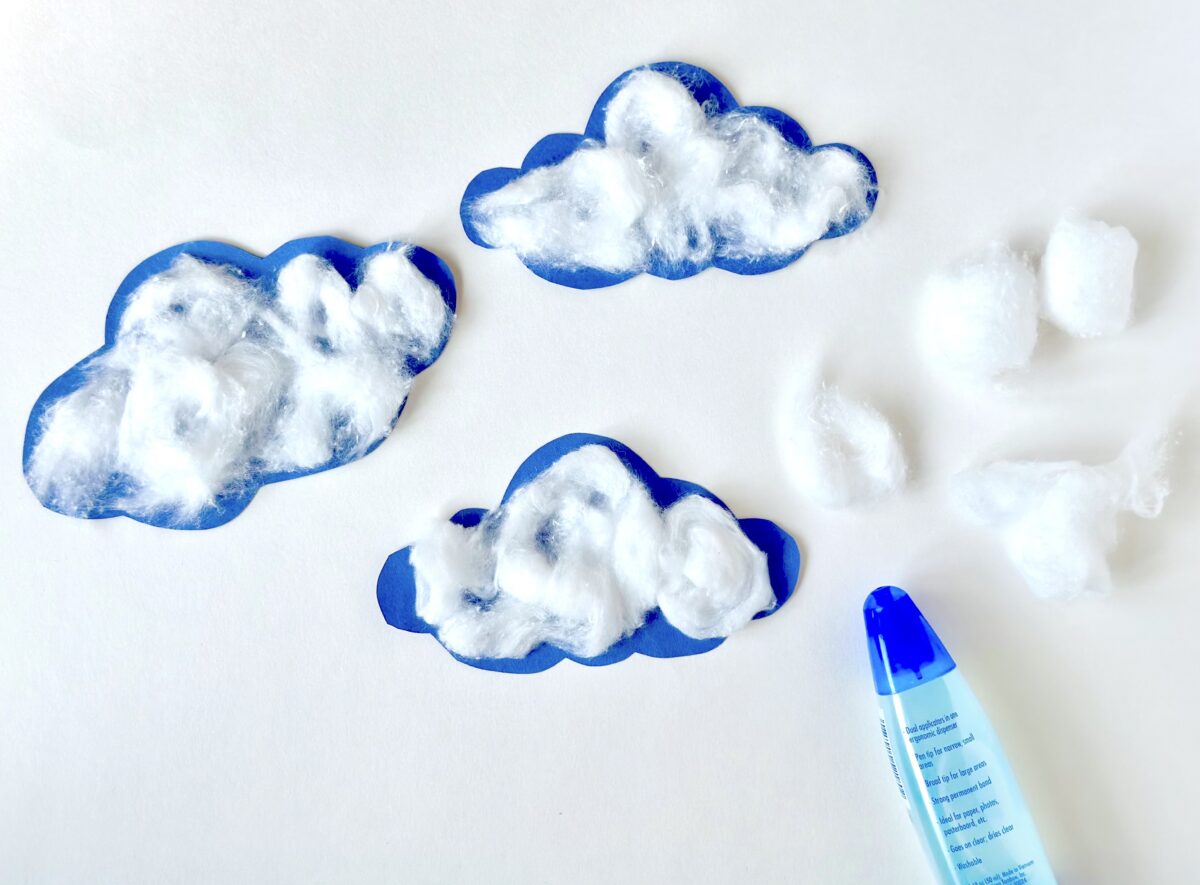
Cotton Ball Cloud Craft
Supplies:
- Blue construction paper
- Scissors
- Glue
- Cotton Balls
Instructions:
1
Cut simple cloud shapes from blue or white construction paper. Then, help your child pull apart cotton balls to create soft, fluffy pieces.
2
Spread glue over the paper clouds and press the fluffy cotton pieces onto them. For larger clouds, use whole cotton balls and glue them down for extra dimension.
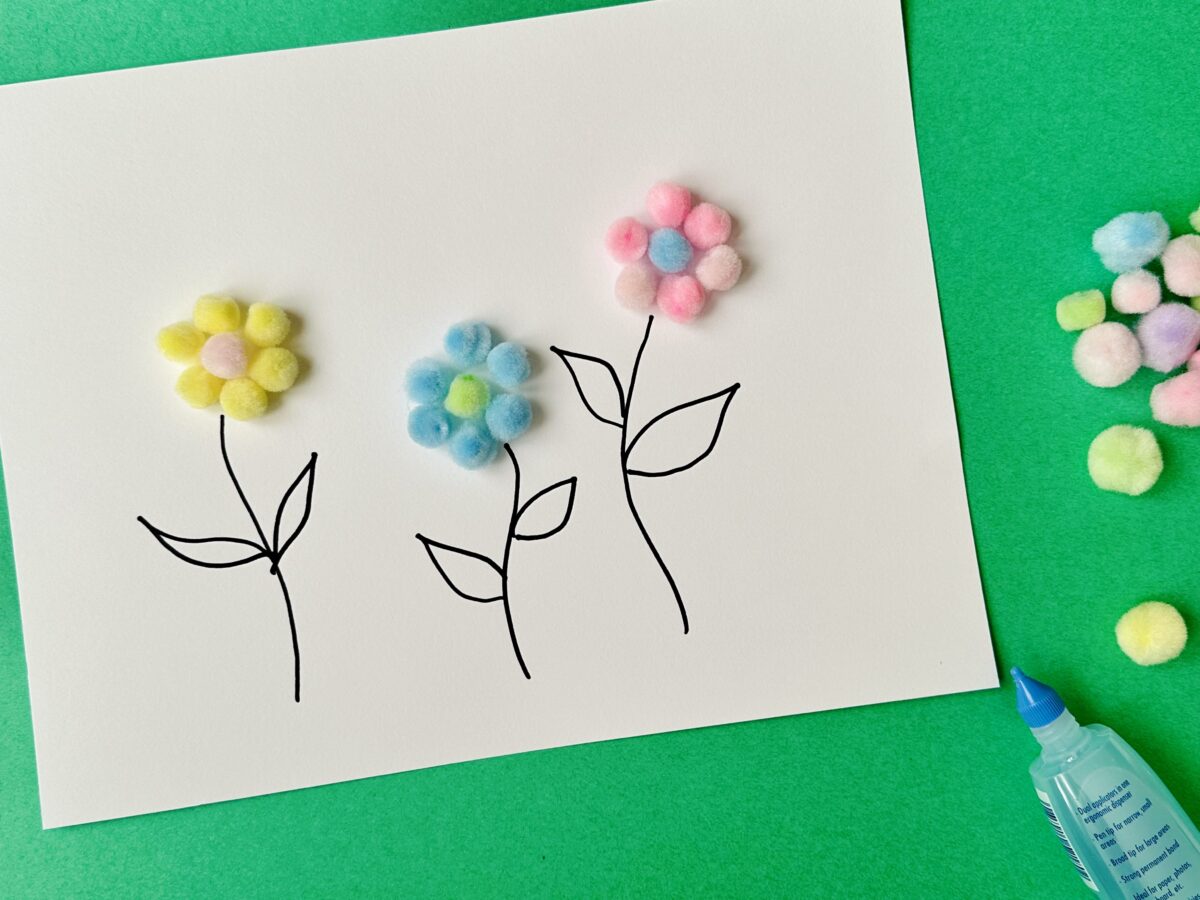
Spring Flower Pom Pom Craft
Supplies:
- Paper
- Pom poms
- Liquid glue
- Marker
Instructions:
1
Use a marker or crayon to draw several flower stems with leaves on a white sheet of paper. Set out small pom poms in a variety of colors for your child to choose from.
2
Have your child arrange the pom poms on top of each stem to create colorful flowers. Encourage them to experiment with different color patterns and flower shapes.
3
Once your child is happy with their flower designs, help them glue each pom pom in place.

Get more flowers! From roses and tulips to sunflowers and daisies, we’ve got pages and pages of flower coloring pages to explore.
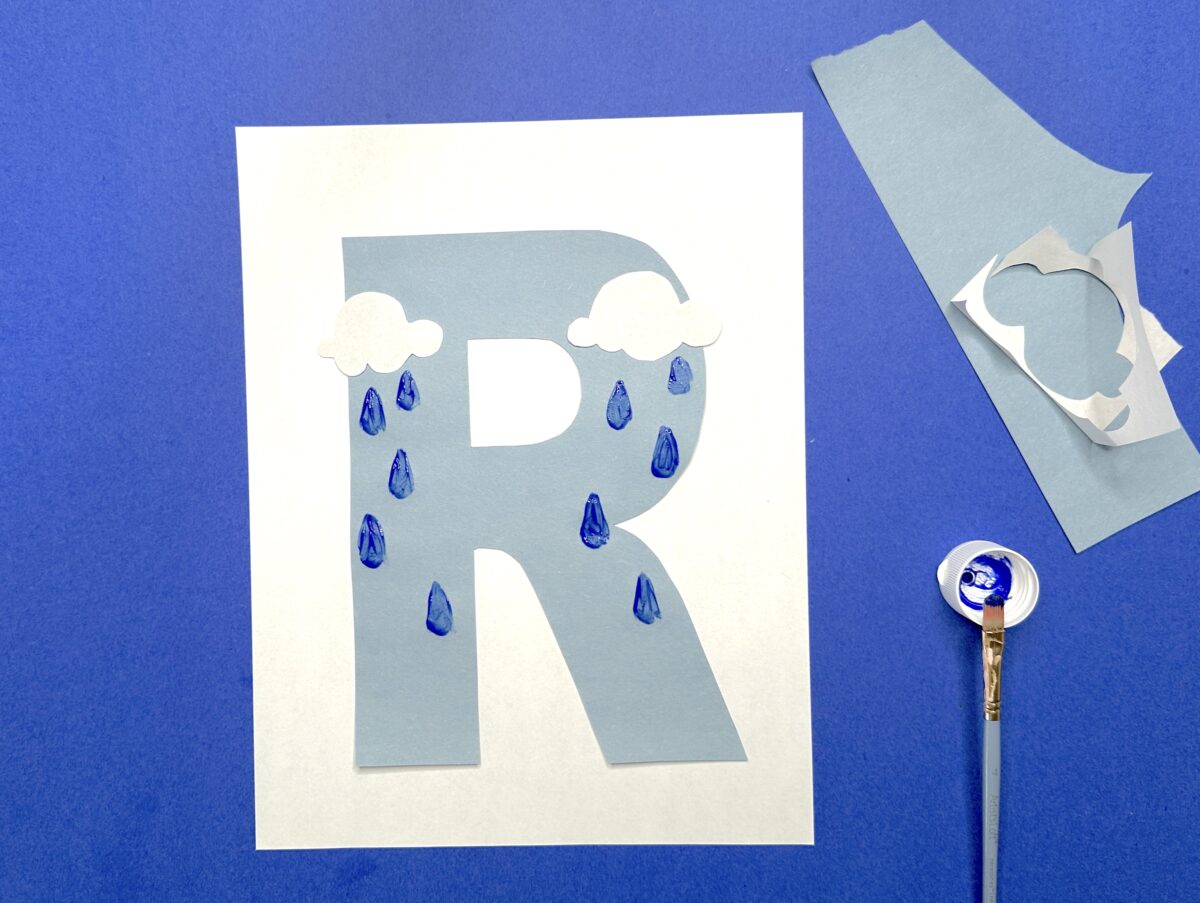
R is for Rain Craft
Supplies:
- White and light blue aper
- Blue paint or marker
- Scissors
- Letter R outline
- Glue
Instructions:
1
Draw the outline of an uppercase letter R onto a piece of blue construction paper. Use this letter R outline as a template if needed.
2
Cut out clouds from white paper (or create clouds from cotton balls) and glue them onto the letter R.
3
Use a blue marker or crayon to add raindrops under the clouds, creating a letter R craft that illustrates R is for Rain!
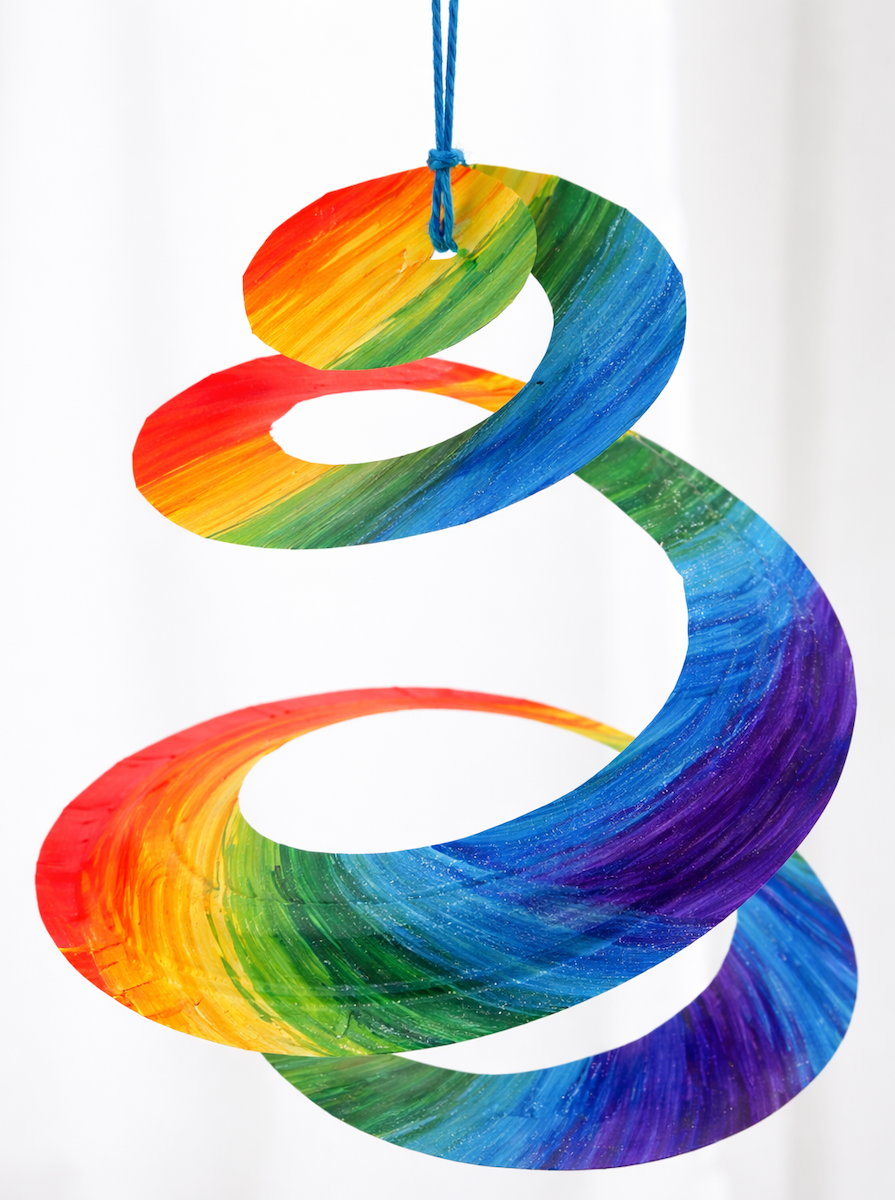
Paper Plate Wind Spinner Craft
Supplies:
- Paper plate
- Crayons or markers
- Scissors
- Yarn
- Pencil
- Hole punch
Instructions:
1
Color the paper plate in a colorful design, front and back.
2
Lightly trace a spiral from the middle of the plate to the end, leaving a circle in the middle about 2 inches across. Use the scissors to carefully cut along the spiral line.
3
Use the hole punch to make a hole in the circle left in the middle. Cut a piece of yarn and thread it through the hole to make a hanger, knotting it to make a loop and hold the yarn in place. Hang your spinner in a windy place and watch it twirl!
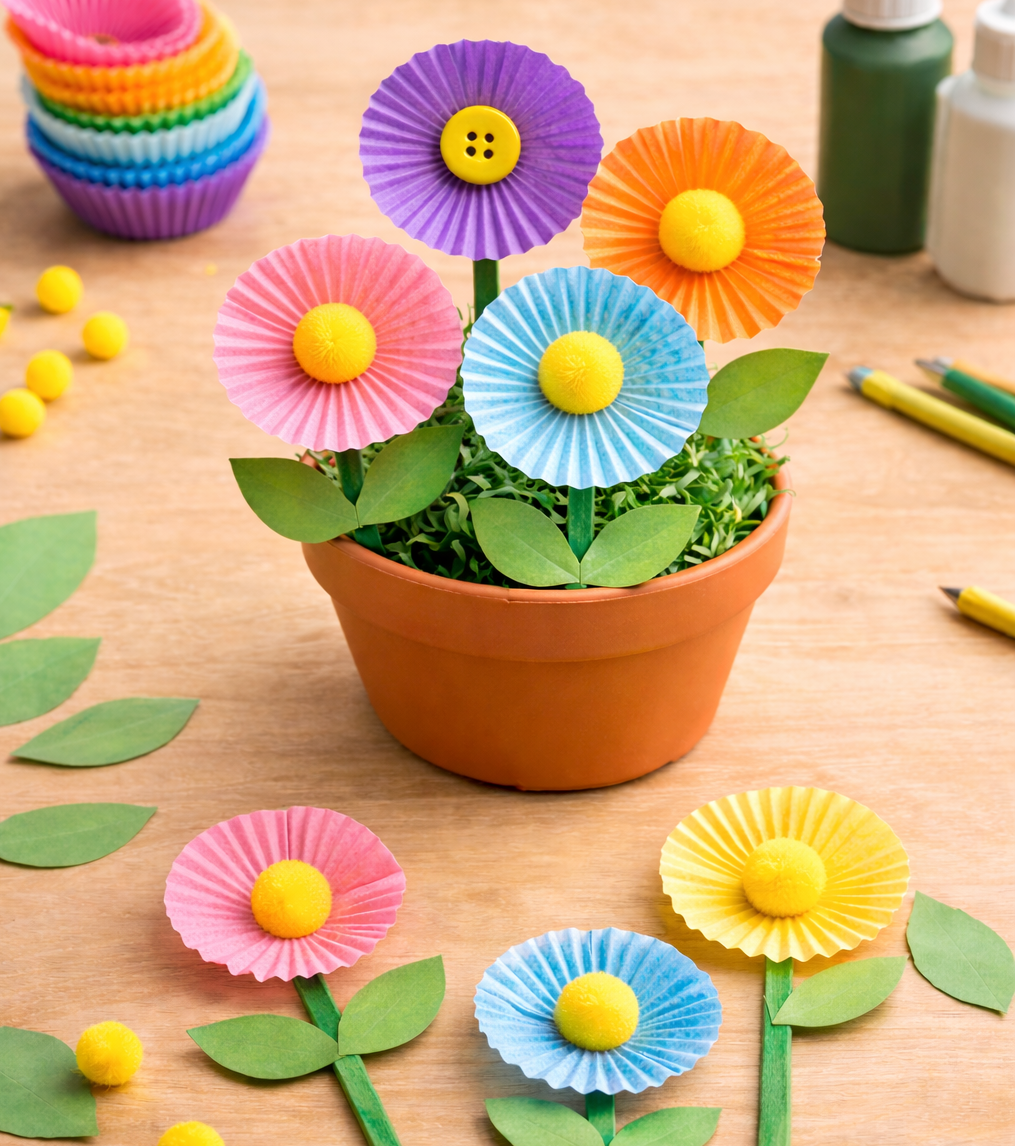
Cupcake Liner Flowers Craft
Supplies:
- Colorful cupcake liners
- Large pom poms or buttons
- Craft sticks
- Green craft paint and paint brush
- Green construction paper
- Scissors
- Glue
Instructions:
1
Paint the craft sticks green and let them dry.
2
Glue the bottom of a cupcake liner to the end of each craft stick. Glue a pom pom or button in the middle of the liner for the center of the flower.
3
Cut out leaves from the construction paper, and glue them onto the craft sticks below the flowers. When the glue is dry, display your flowers in a cup or stick them into potted houseplants!
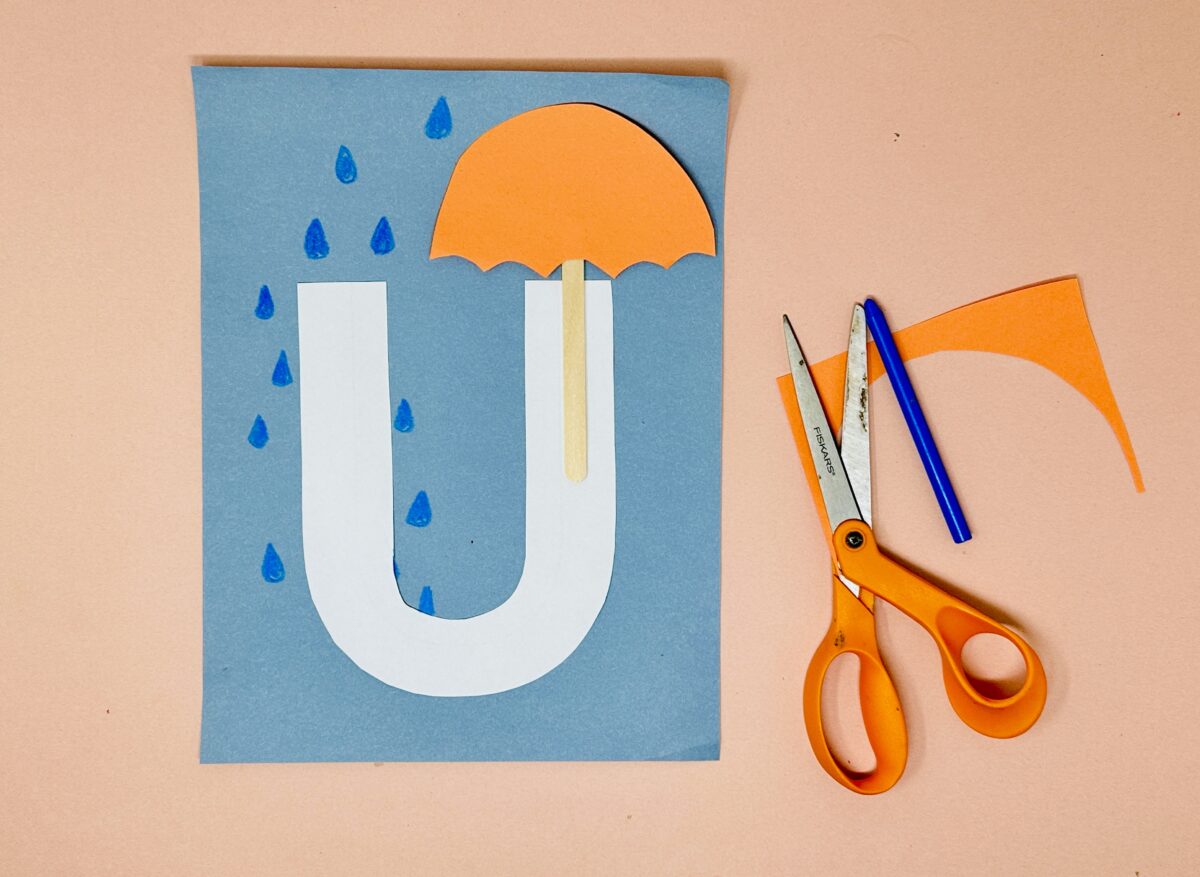
U is for Umbrella Craft
Supplies:
- White, blue, and orange paper
- Blue marker or crayon
- Scissors
- Letter U outline
- Glue
- Popsicle stick
Instructions:
1
Draw or print the outline of a letter U on paper and cut it out, and glue it onto a piece of colored paper that reminds you of a rainy day, such as shades of blue or gray.
2
Cut an umbrella shape from construction paper by making a semi-circle with wavy edges on one side. Glue the umbrella shape onto the paper above the letter U.
3
Glue a popsicle stick underneath the umbrella to form the handle. Then, use a blue crayon or marker to draw raindrops around the umbrella.
Rainbow In a Cup Craft
Supplies:
- Five clear cups
- Warm water
- Sugar
- Food coloring
Instructions:
1
Line up the five clear cups. Using increasing increments, fill the first cup with two tablespoons of sugar and then increase by one tablespoon for each of the following five cups. The last cup should have six tablespoons of sugar.
2
Fill your five cups with ¼ cup of warm water each. Then, drop different colors of rainbow food coloring into each cup. Stir each cup until the color is blended and the sugar is dissolved.
3
Begin with the heaviest cup (the one with the most sugar). Pour it gently into a larger clear cup. Take the next heaviest mixture and let it gently cascade over the back of a spoon into the cup so the layers don’t break apart. Keep going until you’ve used all your cups of colored sugar water.
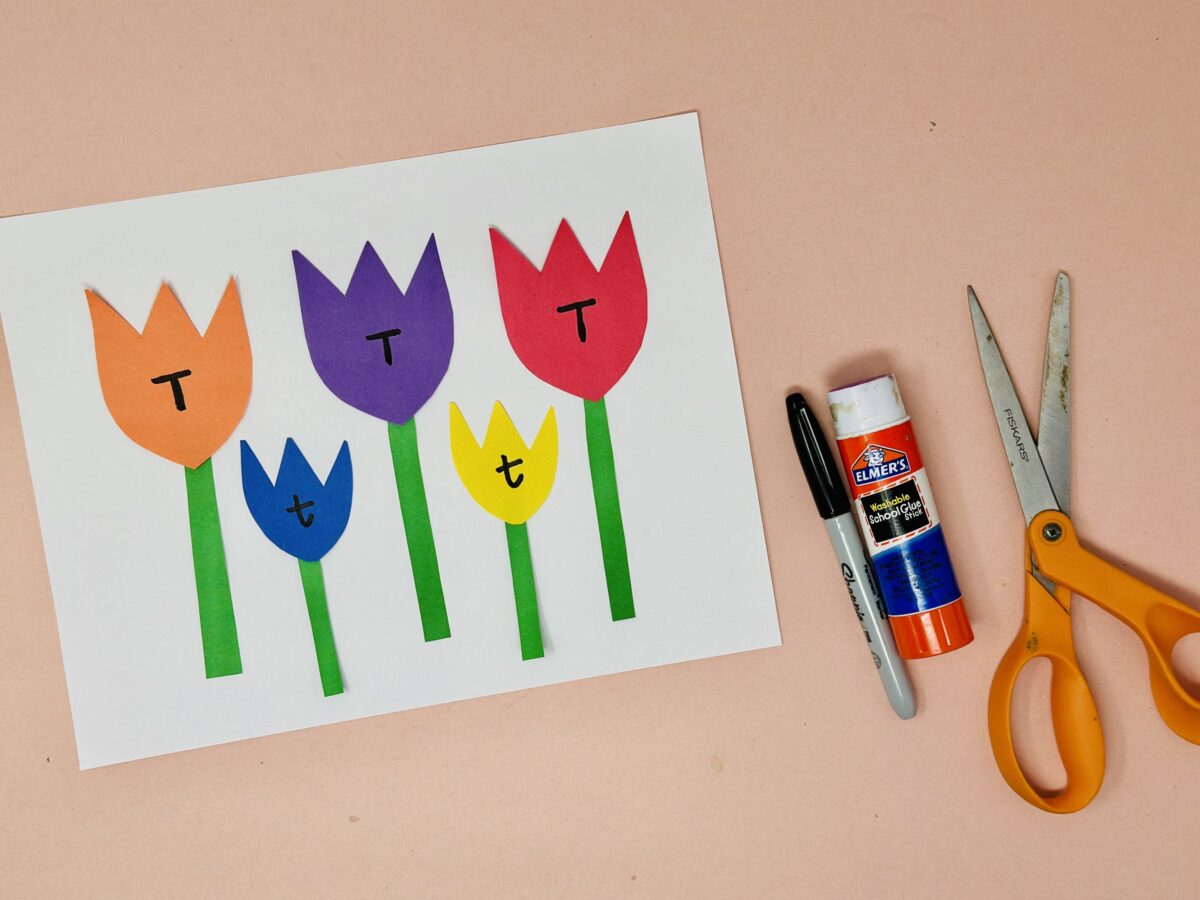
Tulip Garden Letter T Craft
Supplies:
- Various colors of construction paper
- Black marker
- Scissors
- Glue
Instructions:
1
Cut a U shape from construction paper to form the tulip. Then, cut small triangles along the top edge to create the tulip petals. Make some tulips larger and some smaller.
2
Trim long green strips from construction paper to create the stems. Have your child arrange and glue the tulip heads onto the stems. Attach the completed tulips onto a larger sheet of paper to form a tulip garden.
3
Depending on your child’s skill level, have them write uppercase Ts onto the large tulips and lowercase Ts onto the smaller tulips. Alternatively, write the letter Ts yourself and ask your child to identify them.
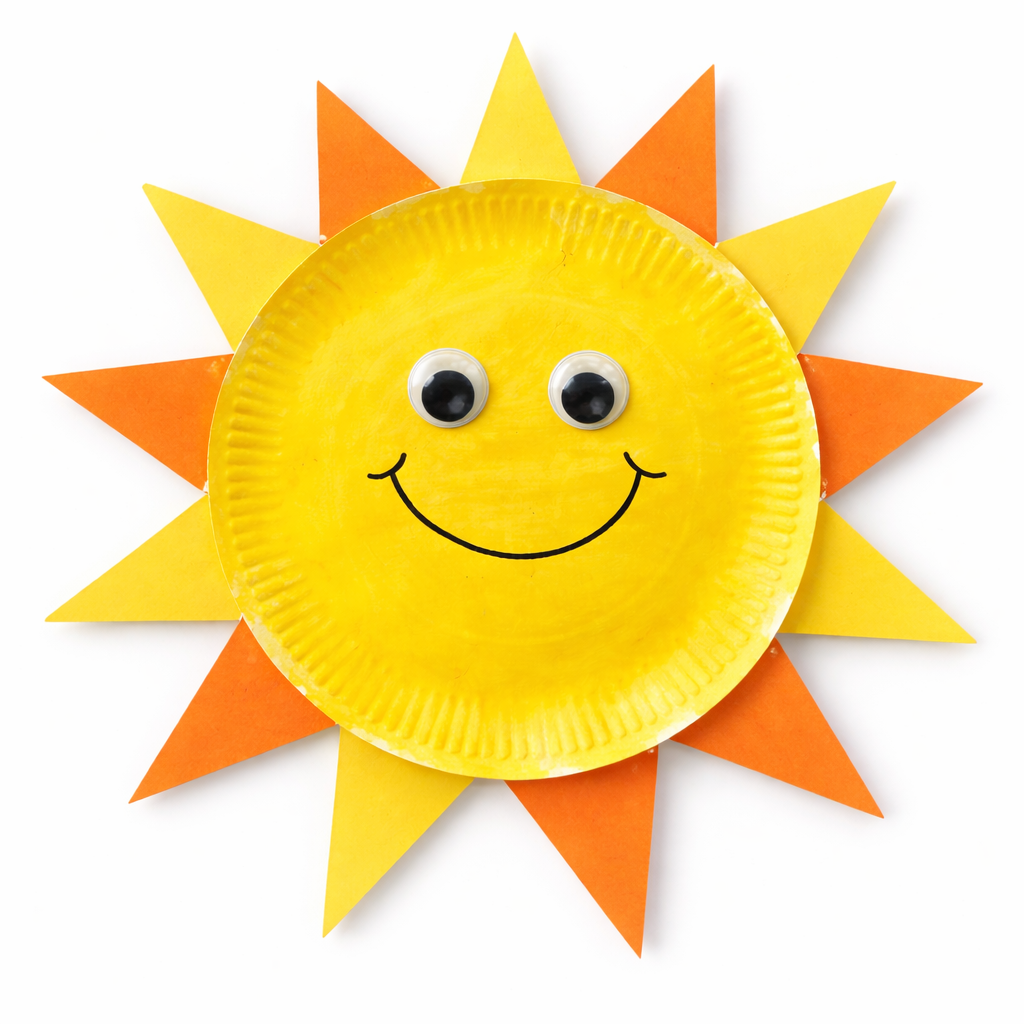
Paper Plate Sun Craft
Supplies:
- Paper plate
- Yellow paint
- Scissors
- Orange and yellow paper
- Googly eyes
- Marker
Instructions:
1
Paint a white paper plate yellow, and let it dry completely.
2
Cut several triangles from orange and yellow paper, using this template if needed.
3
Glue the triangles to the back edge of the painted paper plate, placing them all around the plate. Then glue on the googly eyes and draw in a mouth.
Learn your shapes! Help young children explore the differences between circles, squares, triangles, and more with our free printable shape worksheets.
Rainbow in Motion Craft
Supplies:
- Shallow, neutral-colored plate
- Food coloring
- Milk
- Liquid dish soap
- Cotton swabs
Instructions:
1
Pour enough milk onto the plate to just cover the bottom. This will be the canvas for your moving rainbow.
2
Ask your child to pick out food coloring that matches the colors in the rainbow. Gently add a few drops onto the milk. Space them out for a better effect.
3
Dip a cotton swab into the dish soap. You only need a small amount. Gently touch the soapy cotton swab to the surface of the milk and hold it there. Watch as the colors of the rainbow magically begin to move!
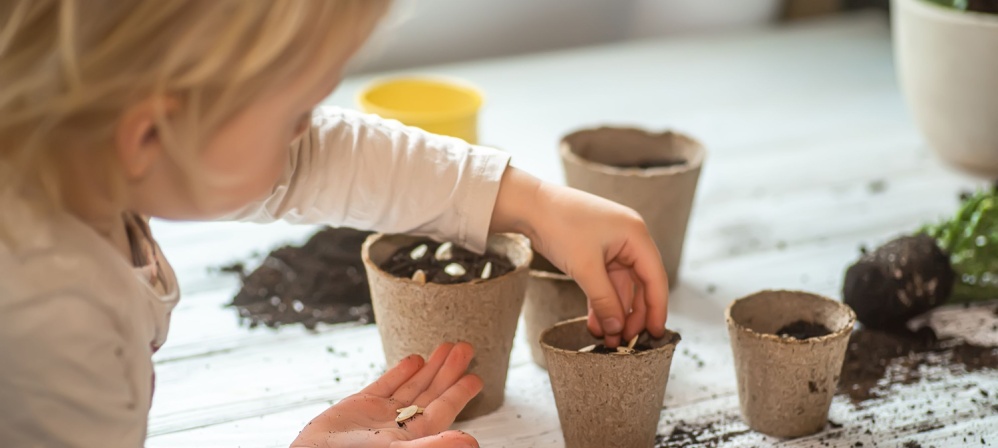
Silly Seed Spring Craft
Supplies:
- Soil
- Old pantyhose or tights
- Small rubber bands
- Glass jars
- Googly eyes, felt, pom poms
- Liquid glue
- Grass seed
Instructions:
1
Grab a jar and place tights over it with the closed end inside it. Add the seeds inside the tights, then add the soil. The soil should be moist, but not dripping wet.
2
Remove the tights with the seeds and soil inside from the glass jar and tie a knot at the top. Make sure the knot is secure and tight around the soil and seeds.
3
Tie the rubber bands around the tights to create ears, a nose, and more to form your silly seed animal’s facial features.
4
Using a small dot of Elmer’s glue, add googly eyes, felt, and/or pom poms to decorate your silly seed animals. You can also use felt pieces to accent the ears to make a cat or a happy face.
5
Place it back in the glass jar or a smaller container. Put your seed animal in a warm, sunny spot and spray it with water. The grass should sprout in about seven days.
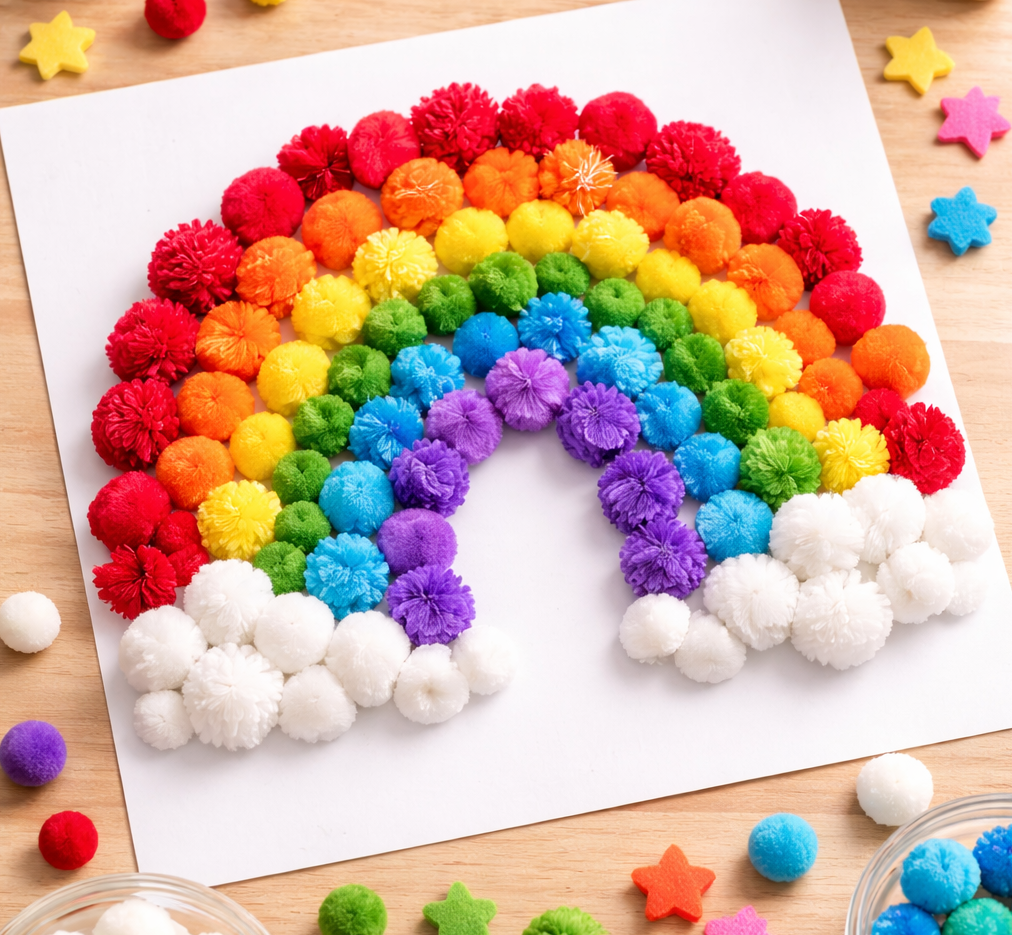
Pom Pom Rainbow Craft
Supplies:
- Pom poms in red, orange, yellow, green, blue, indigo, and violet
- White cardstock
- Glue
- Yarn
- Scissors
Instructions:
1
Use a pencil to create a rough outline of the rainbow you want to create on the card stock, making sure there’s enough room on the paper to fit it.
2
Make a half-circle of red pom poms on the card stock, and glue them in place.
3
Just below, make a row of orange pom poms. Repeat with the rest of the colors to make the rainbow. Let the glue dry.

Tip: Turn your rainbow into a hanging art display! Carefully trim around the pom poms to cut out your finished rainbow. Cut a piece of yarn for a hanger, and glue or tape it to the back.
Spring Holiday Crafts
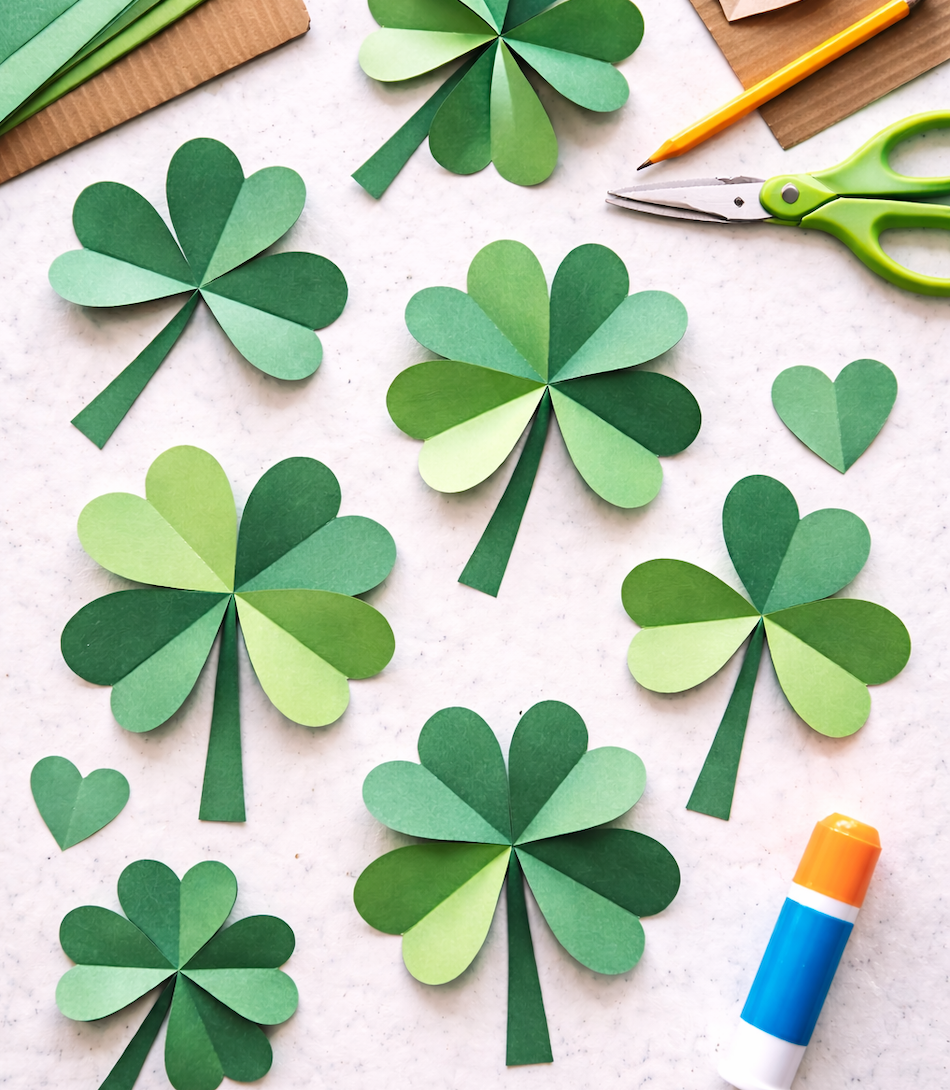
Paper Heart Shamrocks and Four-Leaf Clovers Craft
Supplies:
- Green construction paper
- Pencil
- Cardboard
- Scissors
- Glue stick
Instructions:
1
Trace half a heart along the edge of the cardboard and cut it out to use as a template. This will ensure your paper hearts are all the same size.
2
Fold the construction paper in half. Place the flat half of the template along the edge and trace it with the pencil. Then cut out the heart and unfold. Repeat to make as many hearts as you’ll need for your shamrocks (3) or clovers (4).
3
Cut a stem from the green construction paper. Arrange your leaves in sets of three for shamrocks, or four for clovers. Use the glue stick to attach them to the stem.
Tip: Get 30+ more St. Patrick’s Day crafts here!
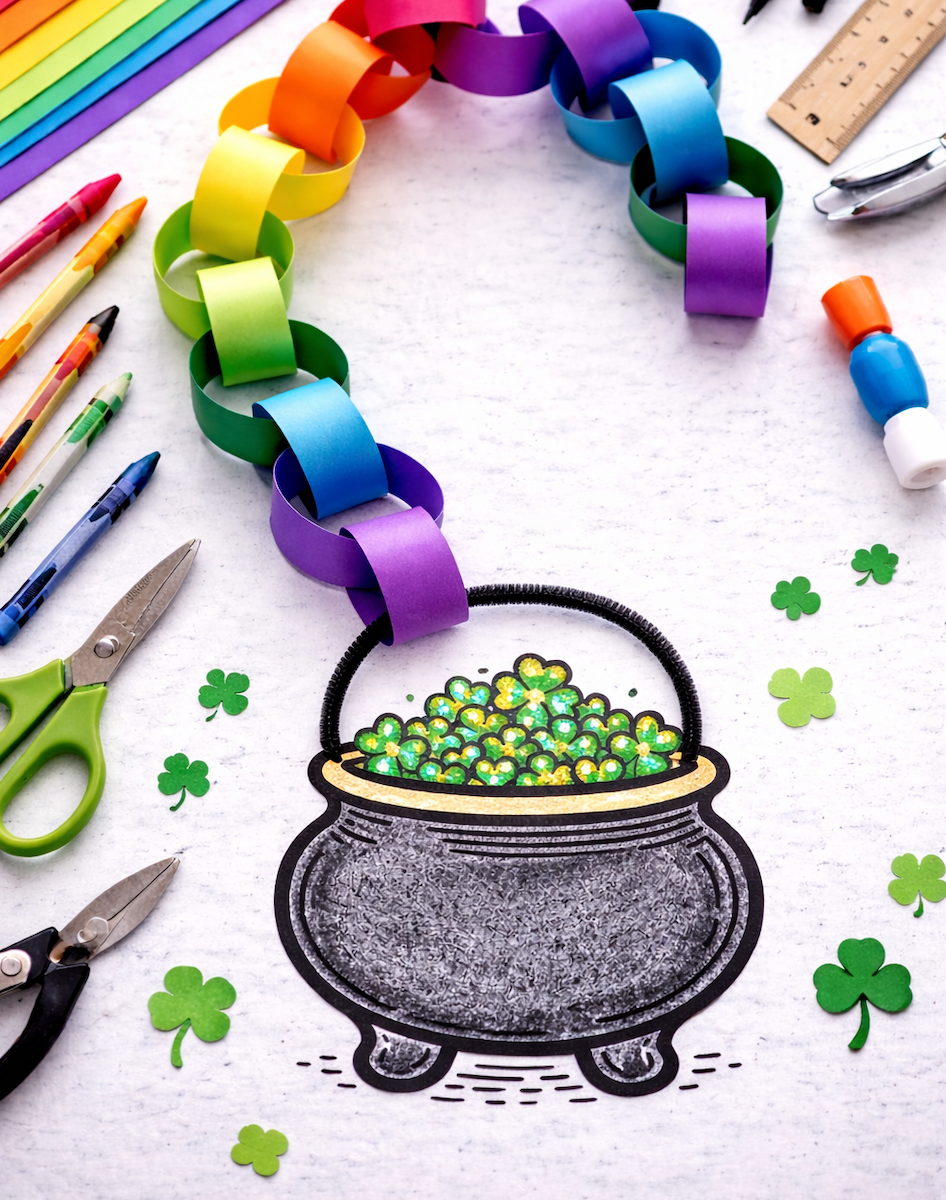
Pot of Shamrocks Rainbow Chain Craft
Supplies:
- Construction paper in red, orange, yellow, green, blue, indigo, and violet
- Lucky Pot of Shamrocks Coloring Page
- Black pipe cleaner
- Hole punch
- Crayons or markers
- Scissors
- Ruler
- Pencil
- Glue stick
Instructions:
1
Color the pot of shamrocks and cut it out. Punch a hole in each of the top corners of the pot, and use the pipe cleaner to create a handle.
2
Use the ruler and pencil to mark a 1” wide strip on each piece of construction paper. Cut out the strips.
3
Bend the red strip to form a loop, and glue it in place. Feed the orange strip through the red loop, then bend it around to form the next loop and glue in place. Repeat with the yellow, green, blue, and indigo strips.
4
Feed the purple strip through the indigo loop, and also through the pipe cleaner handle of the pot. (You can repeat colors if you’d like to make your paper chain longer.) Glue it in place, then display your rainbow chain with the lucky pot at the end!
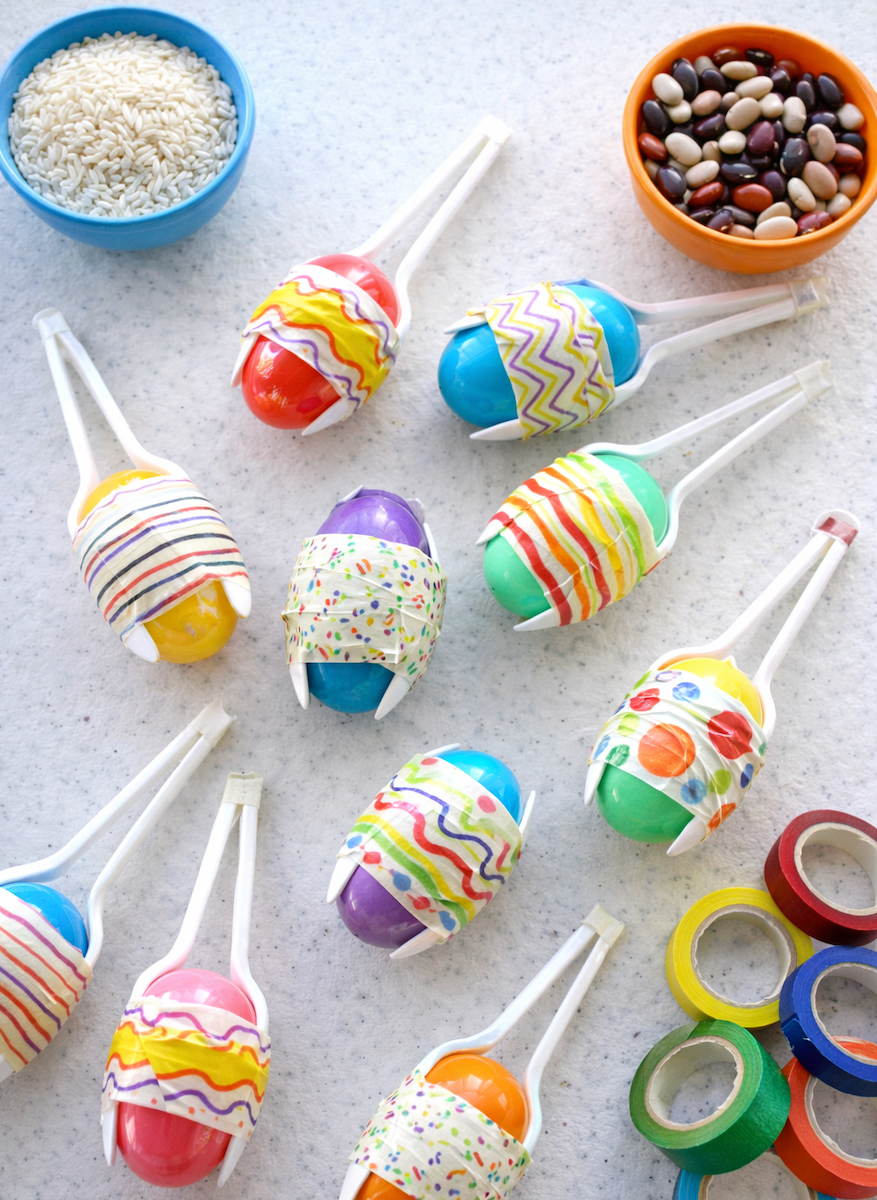
Plastic Egg Maracas Craft
Supplies:
- Plastic Easter eggs
- Plastic spoons
- Dried rice and/or beans
- Washi tape or colorful duct tape
Instructions:
1
Fill each egg with a few beans or a spoonful of rice, and click them closed.
2
Place two spoons around the egg, one on either side. Use the washi tape or duct tape to hold them in place.
3
Wrap the tape around the spoon handles to hold them together. Your maracas are ready to shake, shake, shake!
Tip: Need to simplify your Easter crafts? Try our Easter coloring pages instead!
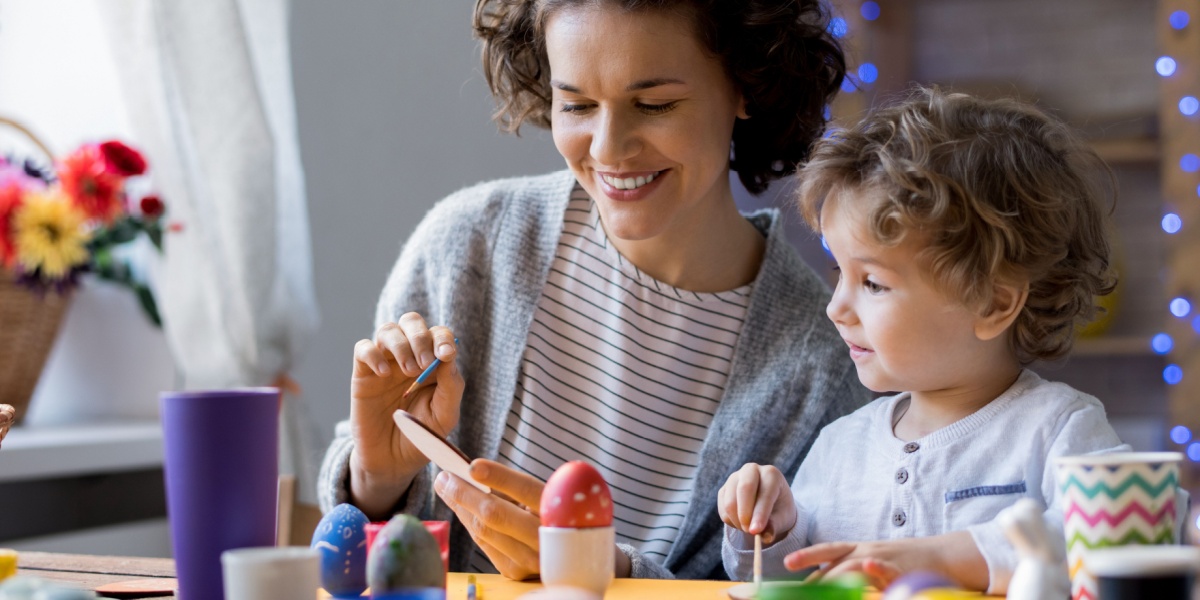
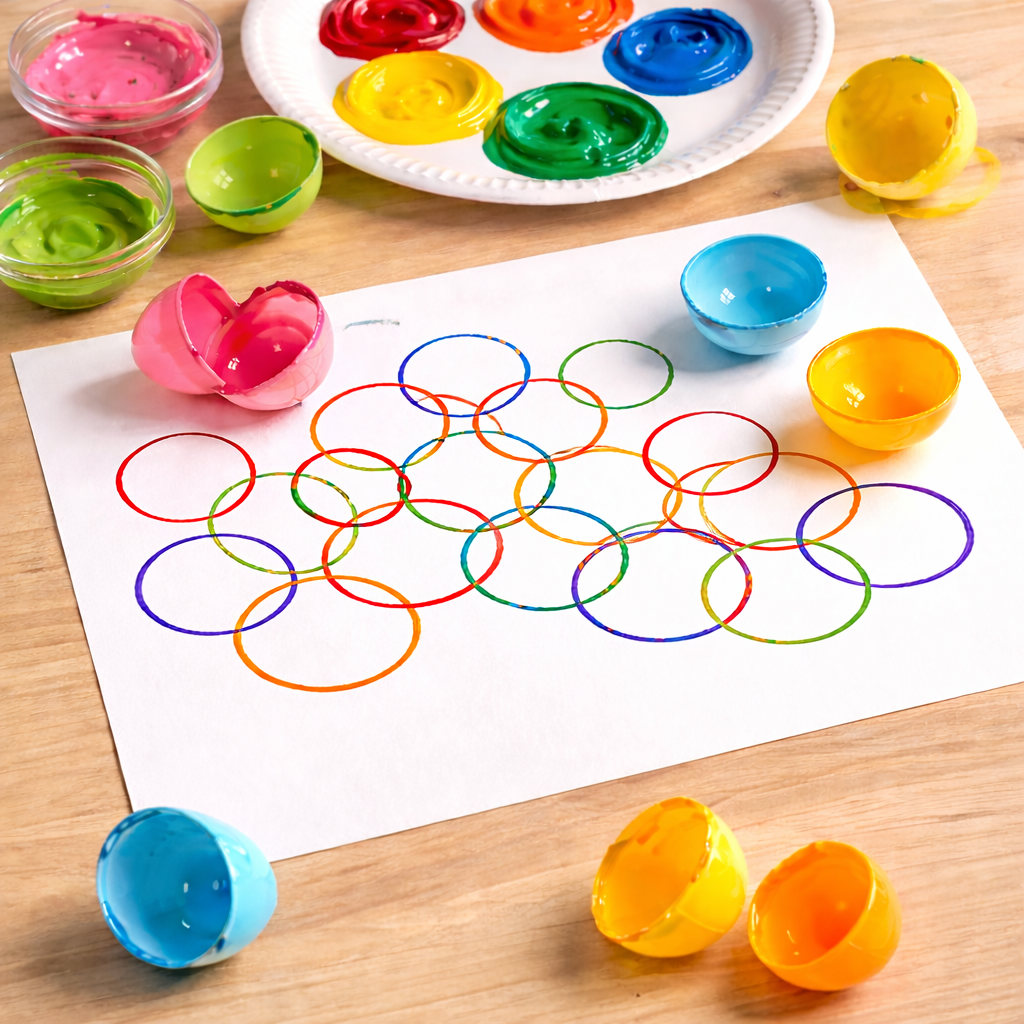
Plastic Egg Circle Painting Craft
Supplies:
- Plastic Easter eggs
- Craft paint in a variety of colors
- Small disposable plates
- Plain white paper
Instructions:
1
Spread a little of each color of paint onto each plate, and lay out the plain white paper.
2
Open an egg and dip the open end of one half into the paint. Press it carefully onto the white paper to create a circle.
3
Repeat with other colors of paint, using different egg halves for each color. Have fun creating all sorts of interesting designs and patterns!
Bunny Basket Craft
Supplies:
- Egg carton
- Paint
- Paint brushes
- Yarn
- Fork
- Scissors
- Liquid glue
- Pipe cleaners
- Photograph
Instructions:
1
Using a scissors, carefully cut out one section of an egg carton. This will become the mini basket that holds the bunny.
2
Paint the outside of the egg carton section. Let it dry completely before moving on.
3
Take a pipe cleaner and poke each end into the sides of the egg carton. Bend and secure it inside to create a sturdy basket handle.
4
Wrap yarn around the prongs of a fork about 40 times. Tie a separate piece of yarn around the middle of the loops, securing tightly. Cut the loops on both sides to create a fluffy pom pom. Trim the edges to shape the pom pom evenly.
5
Use a second smaller pom pom for the bunny’s head and glue it on top of the larger pom pom body. Bend two small pieces of pipe cleaner into bunny ears and glue them on top. Glue a small picture of your child’s face to the top, smaller pom pom. Carefully place or glue the bunny inside the painted egg carton basket. Allow to dry completely.
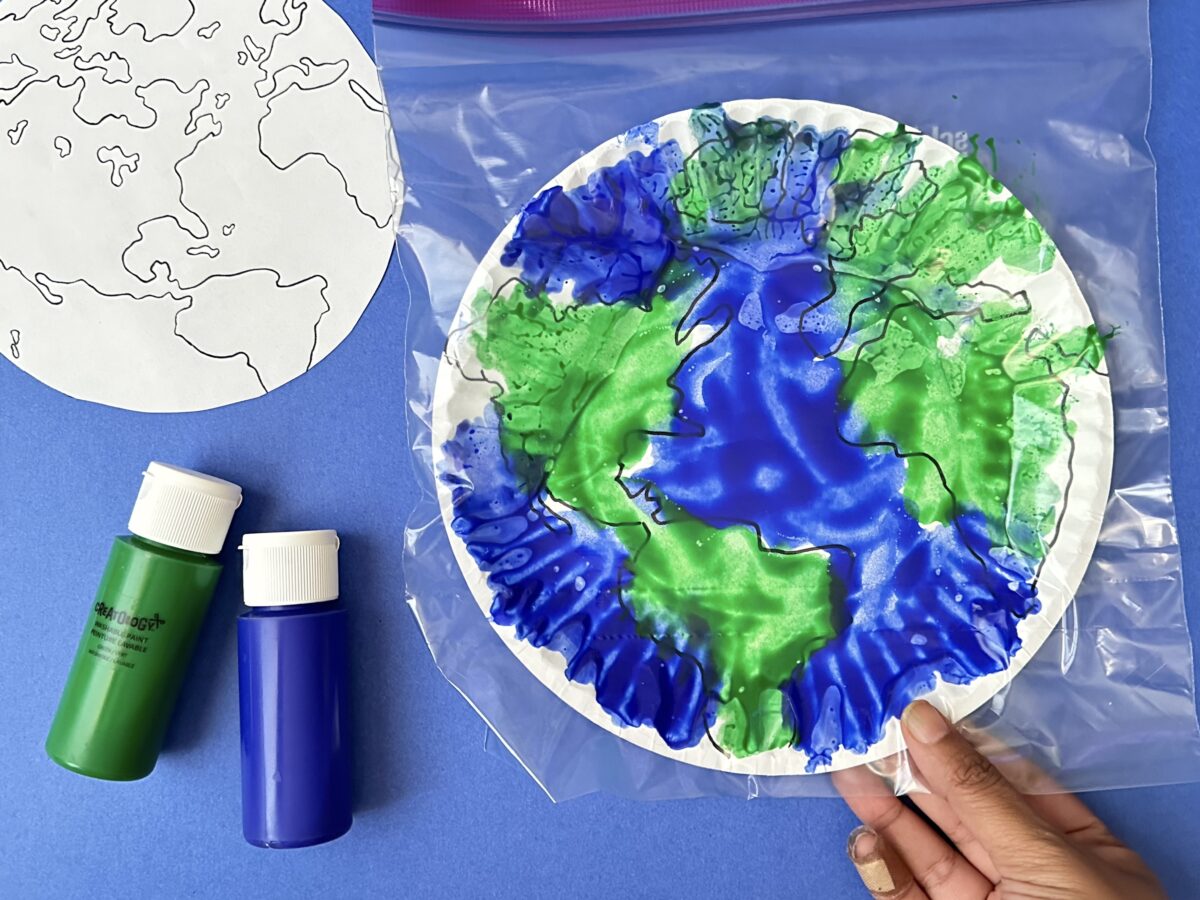
Earth Day Craft
Supplies:
- Green and blue paint
- Paper plate
- Earth print out
- Resealable plastic bag
Instructions:
1
Print and cut out an image of the Earth, or draw it freehand. Glue or tape the Earth cutout onto the center of a paper plate.
2
Squirt small dollops of blue paint on the sections representing water (oceans). Squirt small dollops of green paint on the sections representing land (continents).
3
Carefully place the paint-covered paper plate Earth into a large plastic bag. Seal the bag tightly to prevent leaks and mess.
4
Have your child press and spread the paint with their fingers through the plastic bag, encouraging them to blend the colors to fill in the ocean and land areas.
5
Once the paint is evenly spread, carefully remove the Earth from the plastic bag. Allow the painted paper plate to dry completely before displaying.
More Earth Day Fun! Use our Earth Day coloring pages to keep exploring the concepts of conservation and recycling. Combine them with our Earth Day scavenger hunts!
Mother’s Day Craft
Supplies:
- Yarn
- Cardboard or foamcore
- Toothpicks
- Pom poms
- Liquid glue
- Note for Mom
Instructions:
1
Cut your cardboard or foamcore into a circle to form the bottom of your basket. You can make the circle whatever size you’d like, but a good starting point is about 4 inches in diameter.
2
Glue the toothpicks or straws standing up around the edge of the circle base. They should be evenly spaced. Allow the glue to dry completely.
3
Start weaving the yarn around the toothpicks or straws. Begin at the base, near where they connect to the cardboard, and work your way up. You can weave in and out of the toothpicks or straws, wrapping the yarn around each one as you go.
4
Once you’ve reached the top of your toothpicks or straws, you can tie off the yarn with a secure knot. If you have excess yarn, you can weave it back down through the basket for extra decoration or trim it close to the knot.
5
Glue pom poms onto your basket to decorate it. You can create patterns, spell out “Mom” or simply dot them around for a festive look. Fill the basket with a note for Mom or Grandma or with small candies for them to enjoy.
Keep the Mother’s Day Creativity Going! Get free printable Mother’s Day cards and coloring pages here.
Check Out These Spring Craft Ideas on Our Instagram Page!
Legal Disclaimer: Any links to third-party resources are provided for informational purposes only. We are not affiliated with and do not sponsor/endorse these third parties and bear no responsibility for the accuracy of content on any external site.
Check out more activities from ABCmouse…
-

Father’s Day Craft for Kids: Create a Dad Frame
Create a heartfelt Father’s Day photo frame craft kids can make with simple supplies, family photos, and easy step-by-step instructions.
-

Kids Science Experiment: How to Build a Simple Catapult
Build a craft stick catapult in this fun STEM activity for kids. Launch pom-poms and explore force, motion, and simple engineering concepts.
-

20+ Homemade Mother’s Day Card Ideas
Creative homemade Mother’s Day card ideas for kids, from flower crafts to heart designs and easy printables for meaningful, handmade gifts.
-

20+ Plant Science Experiments & Activities for Kids and Toddlers
Explore 20+ easy plant science experiments for kids, from growing seeds to photosynthesis, with simple supplies and hands-on learning at home or school.
-
30+ Flower Crafts for Kids: Easy Ideas for Preschool and Up
30+ flower crafts for kids—easy ideas for preschool, kindergarten, and beyond. Includes paper flowers, spring projects, and fun Mother’s Day crafts using simple materials.
-
40 Easter Crafts for Kids (Easy DIY Ideas)
40 fun and easy Easter crafts for kids, from bunnies and chicks to egg decorating and DIY baskets—perfect for home or classroom creativity.