Share
20+ Plant Science Experiments & Activities for Kids and Toddlers
Try these easy, hands-on plant and garden science experiments (for toddlers through second graders) to make discovering nature more fun than ever!
Table of Contents
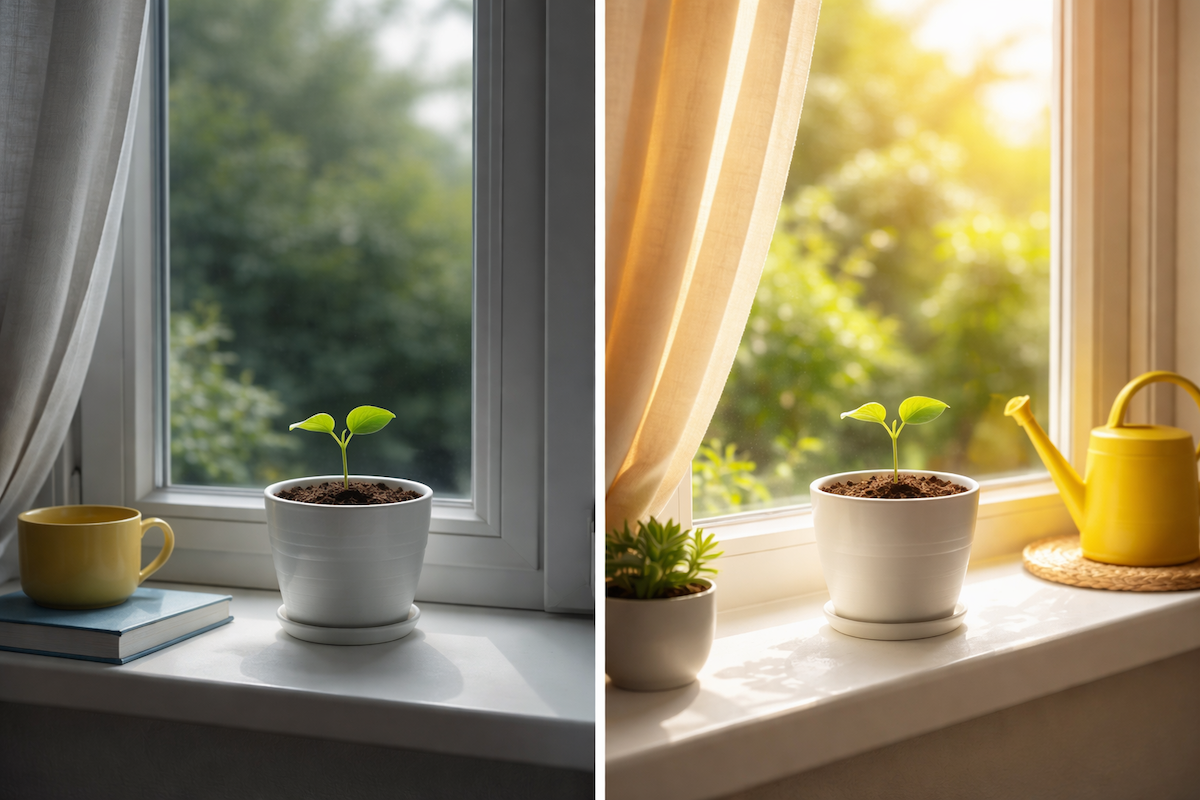
Plant science experiments for kids don’t have to be complicated, and this collection of 20+ easy, hands-on activities proves it! From growing seeds and learning plant anatomy to photosynthesis, transpiration, and more, kids get a great introduction to plants, gardening, and botany.
Each experiment and activity is easy to do with basic supplies, and many of them don’t require anything more than a sunny windowsill, plastic cups, soil, and seeds. While designed for children ages 2–8, we recommend adult supervision for every science experiment. Try these garden science experiments in the classroom or at home, and help kids develop a lifelong for appreciation nature and grow their understanding of plants!
Think Like a Scientist: Tips to Maximize Learning
Before starting any science projects with kids, introduce them to the idea of scientific thinking. Approaching experiments with this mindset can help children make more impactful connections about the concepts they’re learning. We recommend following these steps for each of the kids’ plant experiments you try below.
How to Use Scientific Thinking During Experiments:
- Encourage curiosity: Invite kids to ask “why” and “how,” and explore answers together.
- Record observations: Have children draw or describe what they notice in a simple journal.
- Make predictions: Ask what they think will happen before every experiment.
- Compare results: Talk about what actually happened and why.
- Embrace mistakes: Show that unexpected results are part of learning and discovery.

Talk Like a Scientist: Helpful Words to Know for the Plant Science Experiments & Activities
As you and your children or students complete the plant science experiments below, you may encounter a few unfamiliar terms and concepts. Use the following vocabulary words with simple explanations to help kids better understand these terms and ideas.
Plant Vocabulary Words for Kids
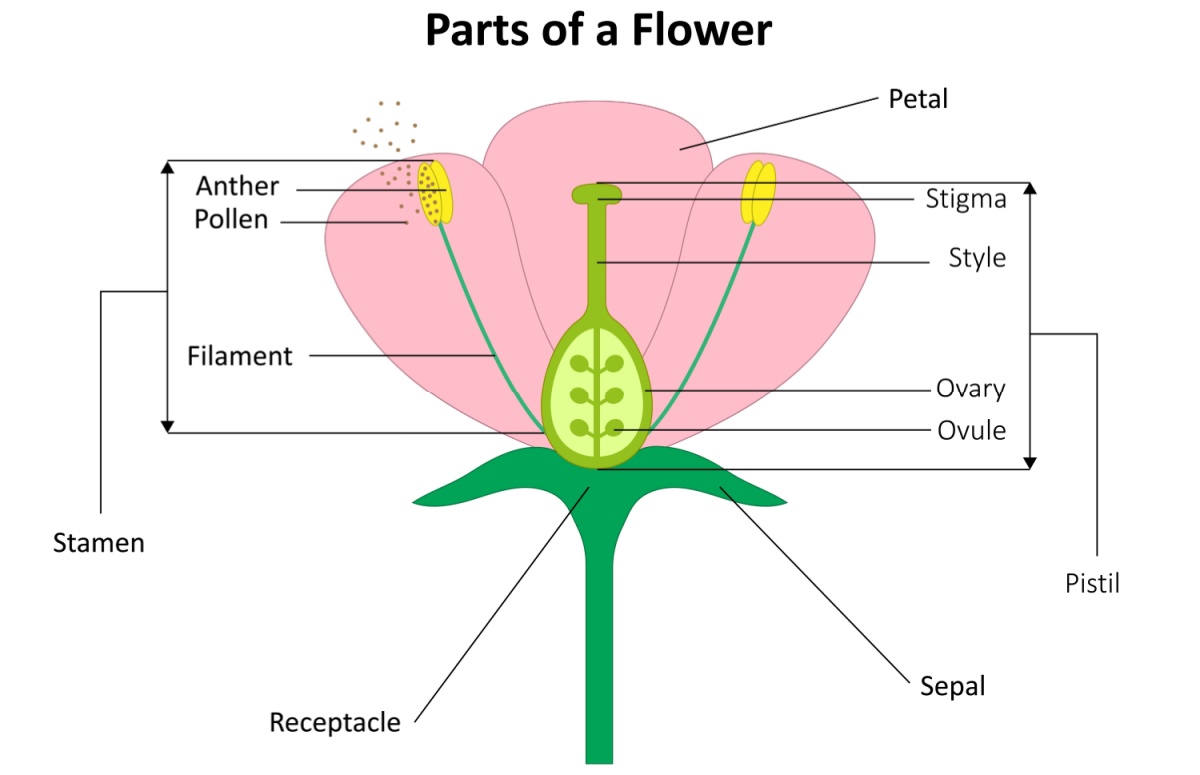
- Anther – The part of a flower that makes pollen.
- Capillary action – How water moves up through a plant, even against gravity.
- Chlorophyll – The green part of plants that helps them make food from sunlight.
- Comparison – Looking at two or more things to see how they are the same or different.
- Dispersal – How seeds travel away from the parent plant to grow in new places.
- Filament – The thin stalk that holds up the anther in a flower.
- Germination – When a seed starts to grow into a new plant.
- Optimal conditions – The best conditions (like the right amount of water and sunlight) for something to grow.
- Photosynthesis – The process plants use to make their own food using sunlight, air, and water.
- Phototropism – When a plant grows toward light.
- Pistil – The part of a flower that receives pollen and helps make seeds.
- Pollinator – An animal (like a bee or butterfly) that moves pollen from one flower to another.
- Sepal – The small leaf-like parts that protect a flower before it opens.
- Sprout – A young plant just beginning to grow.
- Stamen – The part of a flower that includes the anther and filament and makes pollen.
- Stomata – Tiny holes on leaves that let plants take in air and release oxygen and water vapor.
- Transpiration – When plants release water into the air from their leaves.
- Variables – Things that can change in an experiment (like how much water or sunlight a plant gets).
- Xylem – Tiny tubes inside a plant that carry water from the roots to the rest of the plant.
Easy Garden and Plant Science Experiments for Preschool and Kindergarten
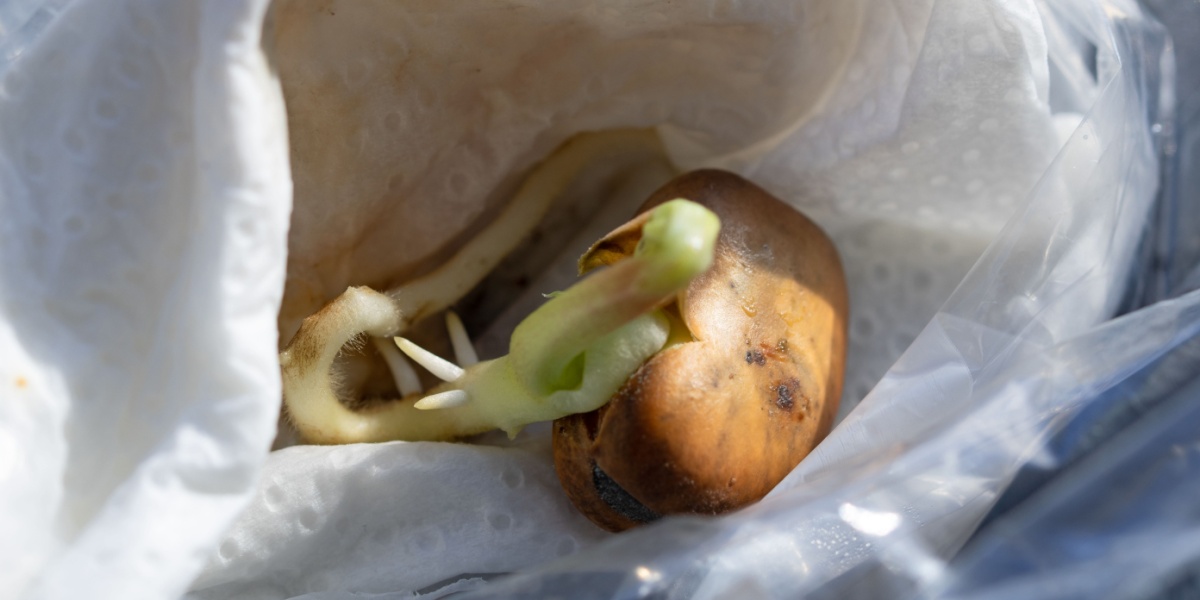
Bean in a Bag
Kids Will Learn: Seeds need water, air, and warmth to sprout. They’ll observe germination up close, including how roots emerge first and shoots follow.
Supplies:
- Lima bean seeds
- Plastic zipper bag
- Paper towel
- Water
- Painter’s tape
- Sunny window
Instructions:
1
Fold the paper towel so it will fit in the bag. Dampen it with water (don’t oversaturate).
2
Place a few beans in the folds of the towel, and slide the towel into the bag. Close the bag, leaving a small opening for air circulation.
3
Tape the bag onto a sunny window. Check the paper towel each day—if it dries out, spray it with some water to rewet it.
4
Watch over the next few days as the seeds begin to sprout before your eyes!
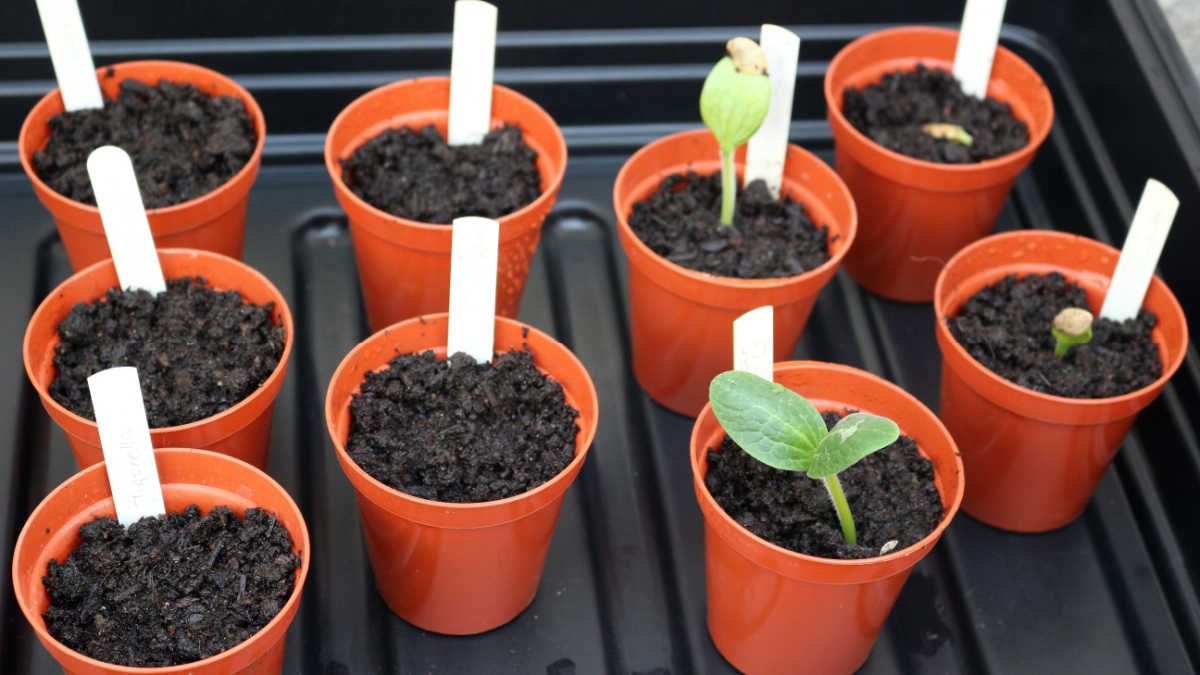
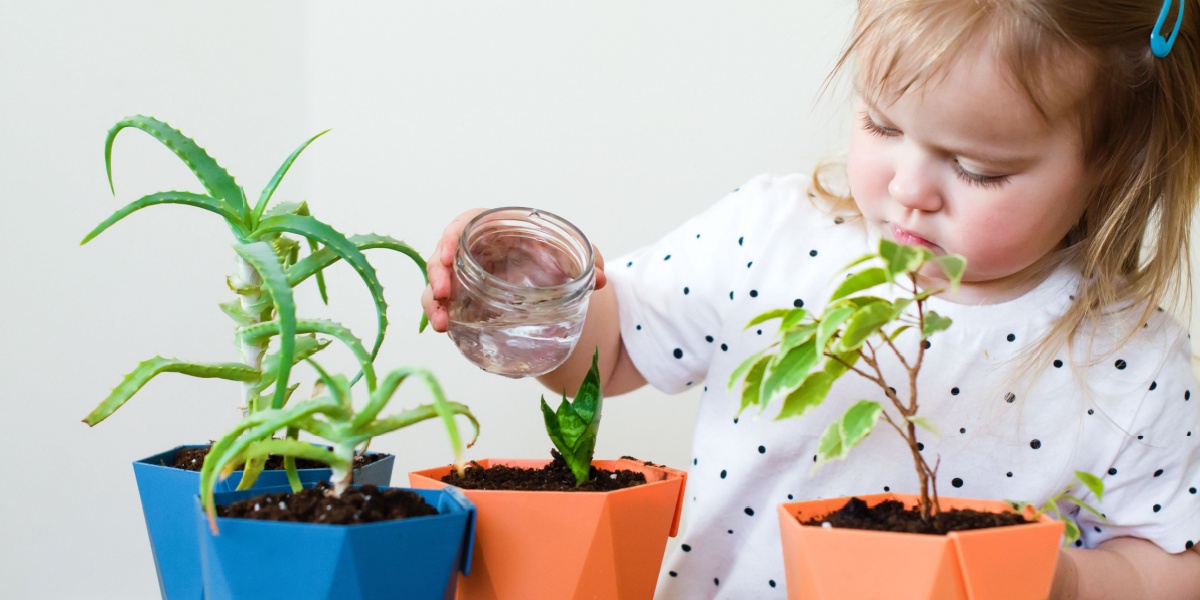
Germination Race
Kids Will Learn: Different seeds grow at different speeds based on their type and conditions. This introduces the concept of comparison as kids examine the different seed types.
Supplies:
- 3 to 4 different types of seeds (bean, pea, grass, flower, etc.)
- Plastic cups or small pots
- Masking tape and marker
- Shallow dish
- Potting soil
- Watering can (or plastic cup with holes poked in the bottom)
Instructions:
1
Start by making some predictions. Which seed do you think will sprout first? Why?
2
Use the masking tape and marker to label each cup with the name of one of the seed types.
3
Poke a few holes in the bottom of each cup for drainage, and fill each about ⅔ of the way with potting soil.
4
Use your finger to poke a hole in the soil of one cup about an inch deep. Drop one seed in and cover it lightly with more soil. Repeat with the other cups.
5
Set the cups in the shallow dish and sprinkle each with water gently until water just starts to flow out the bottom of the cup. Place the dish on a sunny windowsill.
6
Check the soil each day by poking your finger gently into it. If it feels dry, water as before.
7
Keep track of which seeds sprout first. How does this match your predictions?
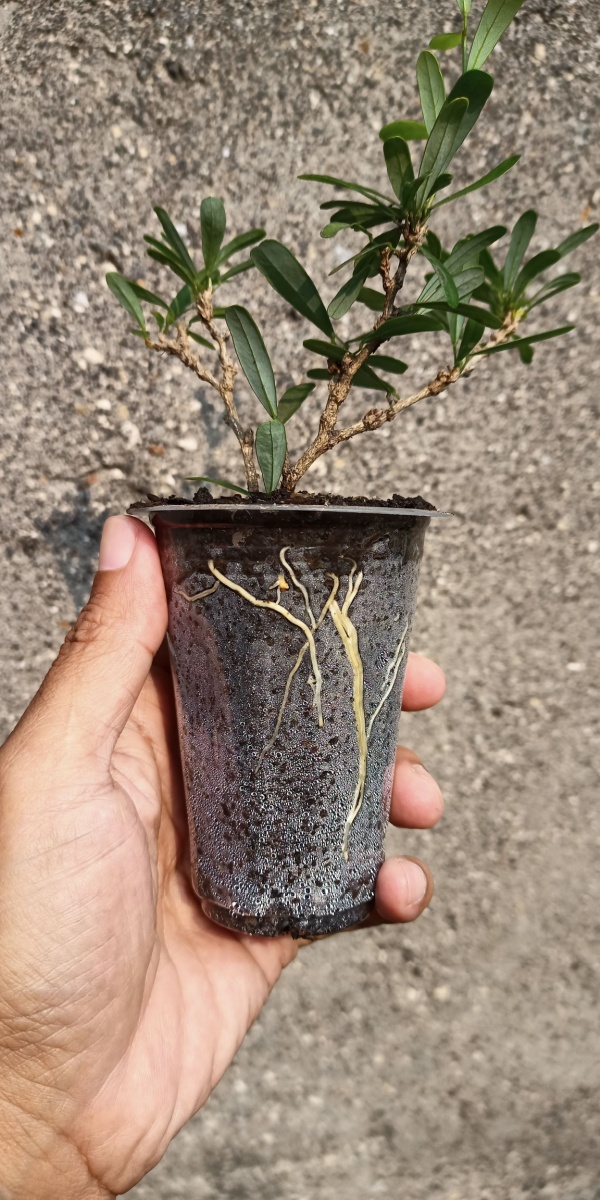
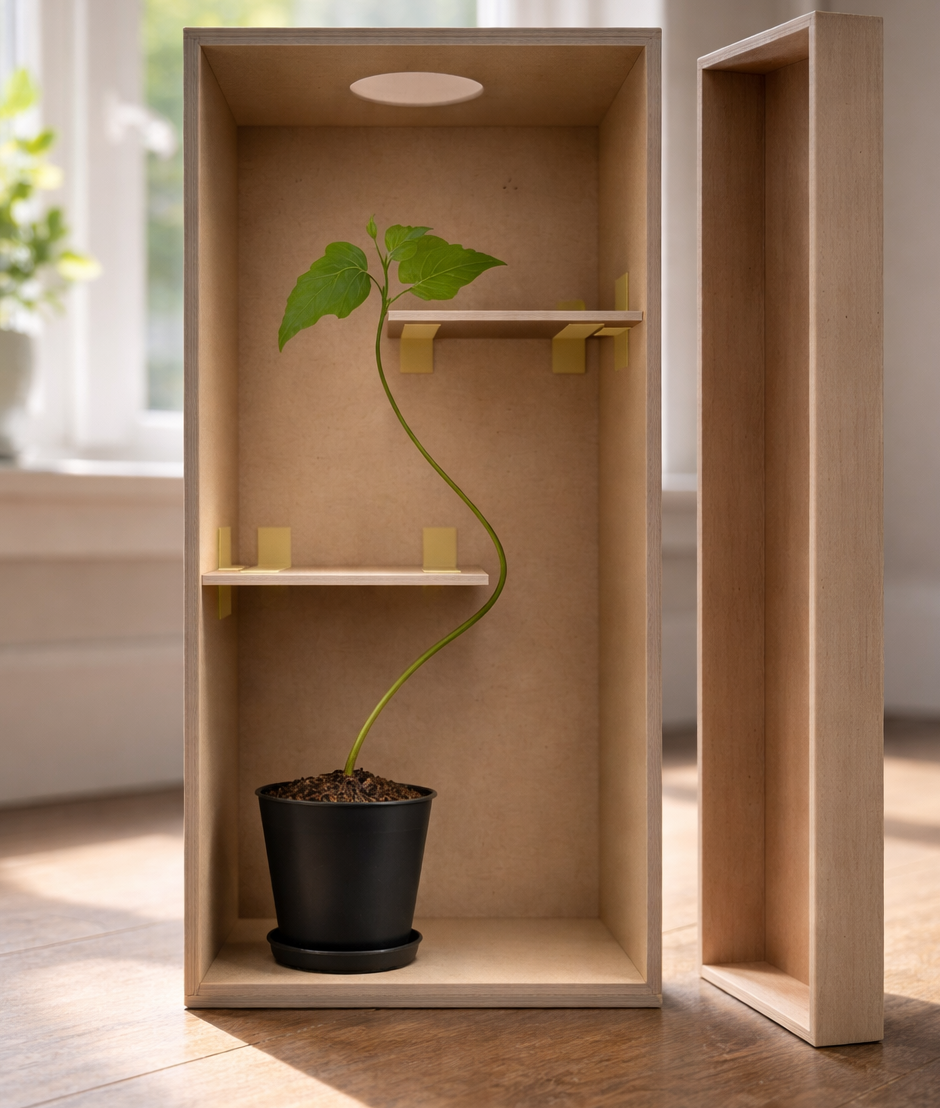
Visible Roots
Kids Will Learn: Roots grow downward to anchor the plant and absorb water and nutrients. Kids can see root systems develop in real time.
Supplies:
- Seeds of your choice
- Clear plastic cups
- Saucer or shallow dish
- Potting soil
- Watering can (or plastic cup with holes poked in the bottom)
Instructions:
1
Poke a few holes in the bottom of the cup for drainage, and fill it about ⅔ of the way with potting soil.
2
Use your finger to poke a hole in the soil about an inch deep along the edge of the cup. Drop the seed in and cover it lightly with more soil.
3
Set the cup in the saucer and sprinkle with water gently until water just starts to flow out the bottom of the cup. Place the dish on a sunny windowsill.
4
Check the soil each day by poking your finger gently into it. If it feels dry, water as before.
5
Watch your seed sprout and grow! You’ll be able to see the roots spread and grow through the side and bottom of the cup.
Sun vs. Shade
Kids Will Learn: Plants need sunlight to grow strong and healthy. Light affects both how fast plants grow and how tall they become. This experiment also introduces the concept of variables as kids see how different environments impact plant growth.
Supplies:
- Seeds
- 2 small pots or plastic cups with holes poked in the bottom
- 2 saucers or shallow dish
- Potting soil
- Watering can (or plastic cup with holes poked in the bottom)
Instructions:
1
Make some predictions: Which seed will sprout first? Which will grow taller?
2
Poke a few holes in the bottom of each cup for drainage, and fill each about ⅔ of the way with potting soil.
3
Use your finger to poke a hole in the soil about an inch deep in each cup. Drop a seed in each and cover it lightly with more soil.
4
Set each cup in a saucer and sprinkle with water gently until water just starts to flow out the bottom of the cup.
5
Place one cup in a sunny spot, and one in a shady area. Check the soil each day by poking your finger gently into it. If it feels dry, water as before.
6
Watch your seeds sprout and grow. Were your predictions correct?
Watering Experiment
Kids Will Learn: Plants need the right amount of water—too little or too much can affect growth. This introduces the concept of optimal conditions.
Supplies:
- Seeds
- Plastic cups or small pots
- Potting soil
- Watering can
Instructions:
1
Make some predictions: Will seeds grow better with more water? Can you water a seed too much?
2
Poke a few holes in the bottom of each cup for drainage, and fill each about ⅔ of the way with potting soil.
3
Use your finger to poke a hole in the soil about an inch deep in each cup. Drop a seed in each and cover it lightly with more soil.
4
Set each cup in a saucer and sprinkle with water gently until water just starts to flow out the bottom of the cup.
5
Water each cup on a different schedule: one only when the soil seems dry, one every day, one twice a day, one once a week, etc.
6
Watch your seeds sprout and grow, and see if your predictions were right!

Tip: Number the cups to help you remember which ones should be watered when!
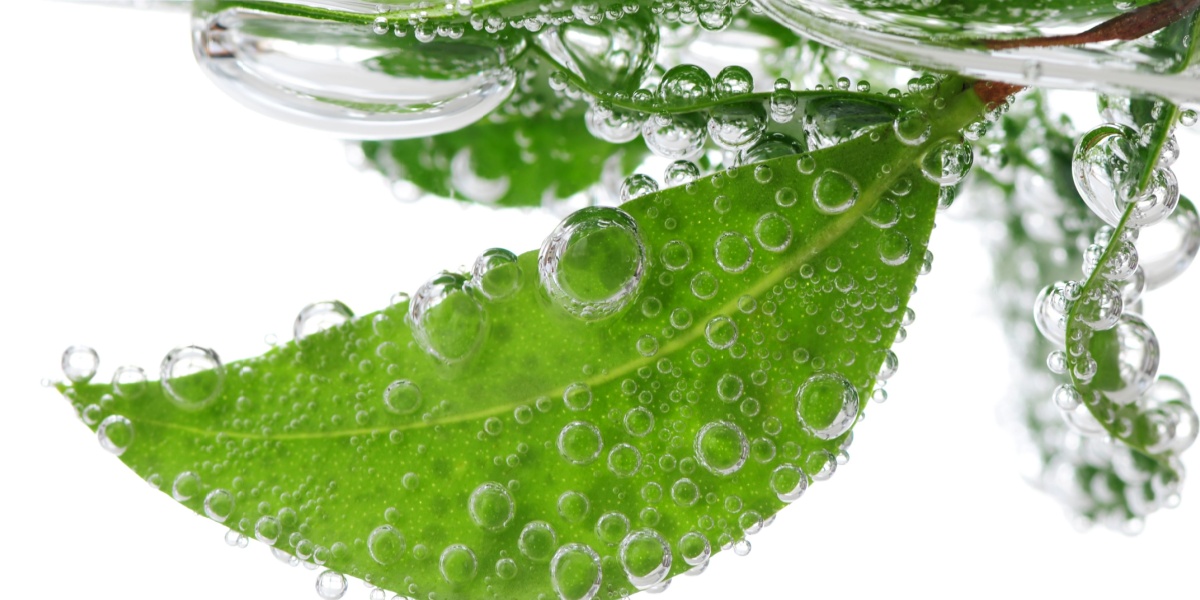
Breathing Leaves
Kids Will Learn: Plants release oxygen through tiny openings in their leaves (called stomata) during photosynthesis, showing that plants “breathe” in their own way.
Supplies:
- Shallow container
- Water
- Fresh leaves
- Small rock
Instructions:
1
Fill the container with water. Place a few fresh green leaves in the container, and use the rock to hold them under the water.
2
Set the container in a sunny spot for a few hours. When you check the container again, you’ll see tiny bubbles on the surface of the leaves! This is evidence that the leaves are “breathing” out oxygen from their pores (stomata) as part of photosynthesis.
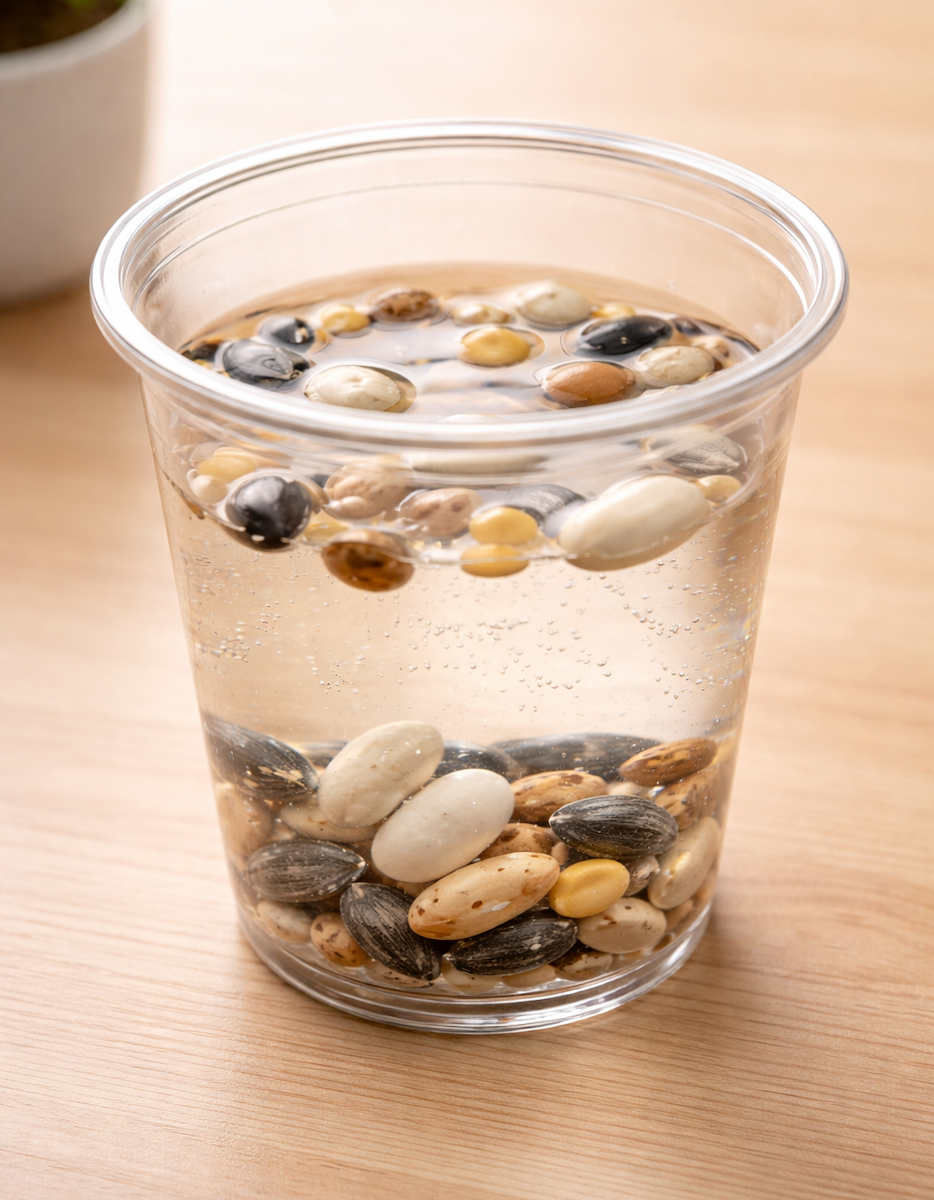
Floating Seeds
Kids Will Learn: Seeds have different densities, structures, and dispersal methods.
Supplies:
- A variety of different types of seeds
- Container of water
Instructions:
1
Start by examining the seeds closely and making predictions. Which ones do you think will sink right away? Which ones will float? Could some of them float first and then sink, or vice versa?
2
Drop the seeds one by one into the water, and see what happens. Were your initial guesses right?
3
Leave the container overnight, and check the seeds again. Have any of them changed their position? (It helps to take a picture before and after, so you can compare.)
4
Why do you think the various seeds behave as they do? Why would some seeds float while others sink?

Did you know? Some seeds sink because they are dense, while others float to help them travel by water. Sometimes a floating seed can mean it is no longer healthy and it may not germinate.
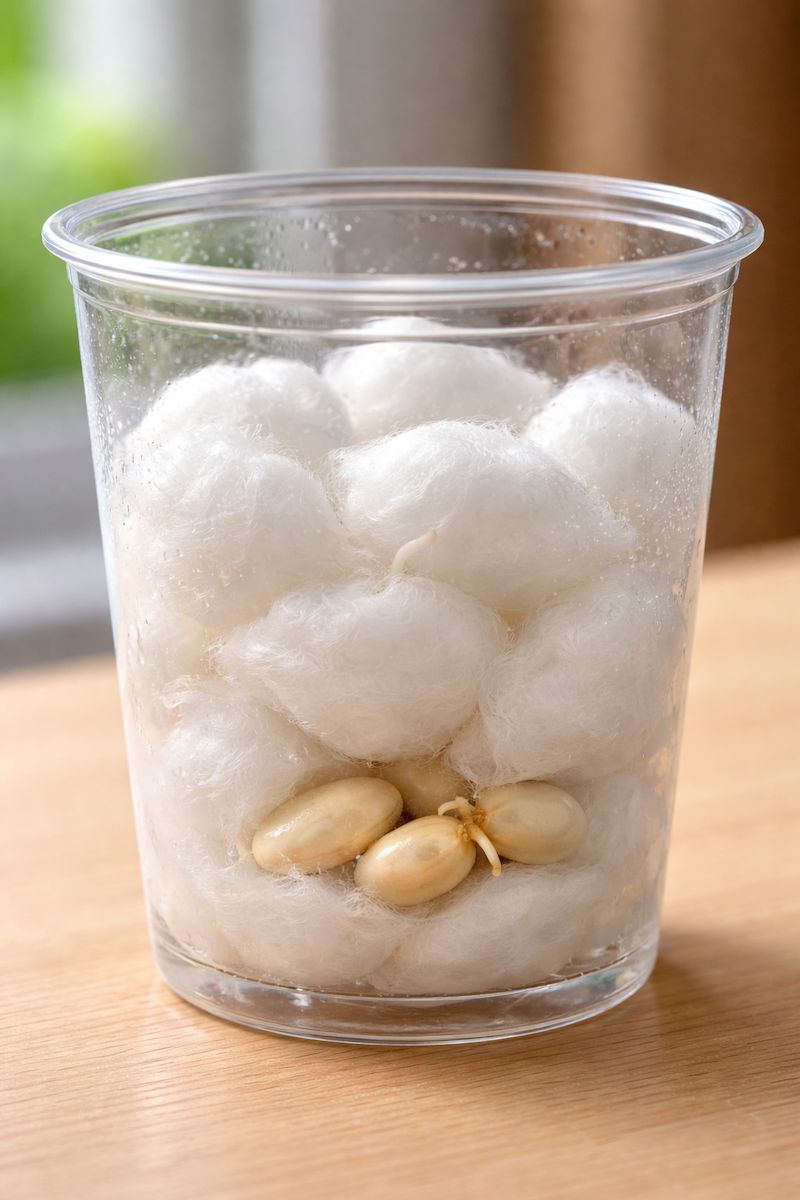
Soil vs. Cotton Balls
Kids Will Learn: Seeds can sprout in different environments, but soil provides nutrients plants need for long-term growth.
Supplies:
- Bean seeds
- Potting soil
- Cotton balls
- Small pots or disposable cups with holes poked in the bottom
Instructions:
1
First, make some predictions: Will seeds sprout faster when planted in soil or in cotton balls? Which will help the plants grow faster?
2
Next, add soil to one pot until it’s about ¾ of the way full. Poke a hole in the soil with your finger about an inch deep, and drop in the seed. Cover the seed lightly with more soil.
3
Fill the other pot with cotton balls to the top. (They’ll sink down a bit when you water them.) Lay a bean seed on top, and press it down into the cotton.
4
Water both pots gently until water runs out the bottom. Set them both in a sunny windowsill. Watch your seeds sprout and grow! Were your predictions correct?
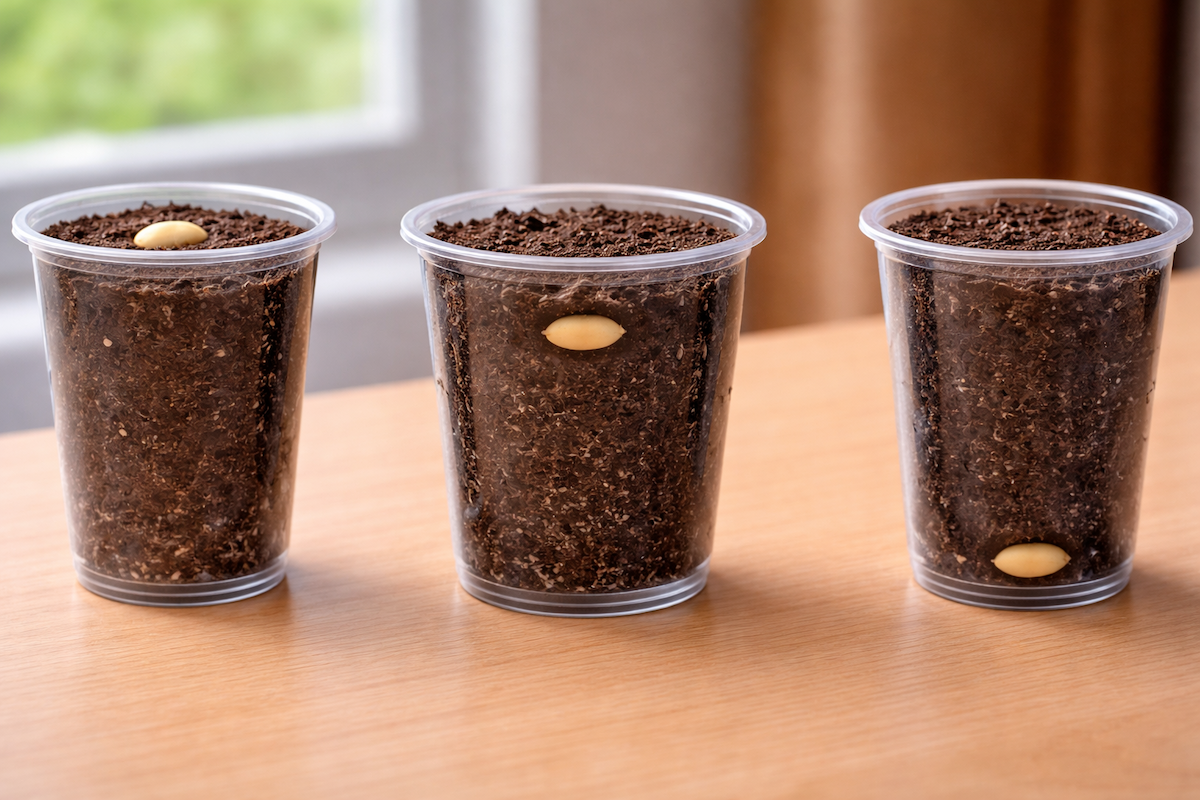
Seed Depth Experiment
Kids Will Learn: Planting depth matters, as seeds need the right balance of soil coverage to access water and air and to push through the soil towards the sun as they grow.
Supplies:
- Bean seeds
- 3 clear plastic cups
- Potting soil
- Ruler
Instructions:
1
Make some predictions: How will the seeds react based on the depths they’re planted at? Which seed will grow the best?
2
Poke a few holes in the bottom of each cup for drainage, and fill each about ⅔ of the way with potting soil.
3
Set the first seed on top of the soil in the first cup, and press it slightly into the soil, but don’t cover.
4
Poke a hole with your finger about an inch or so into the second cup, drop in the seed, and cover it lightly with soil.
5
Poke a deep hole almost to the bottom of the third cup, drop the seed in, and cover with soil.
6
Set each cup in a saucer and sprinkle with water gently until water just starts to flow out the bottom of the cup.
7
Place the cup in a sunny spot. Check the soil each day by poking your finger gently into it. If it feels dry, water as before. Observe the three seeds as they begin to sprout and grow. What do you notice?
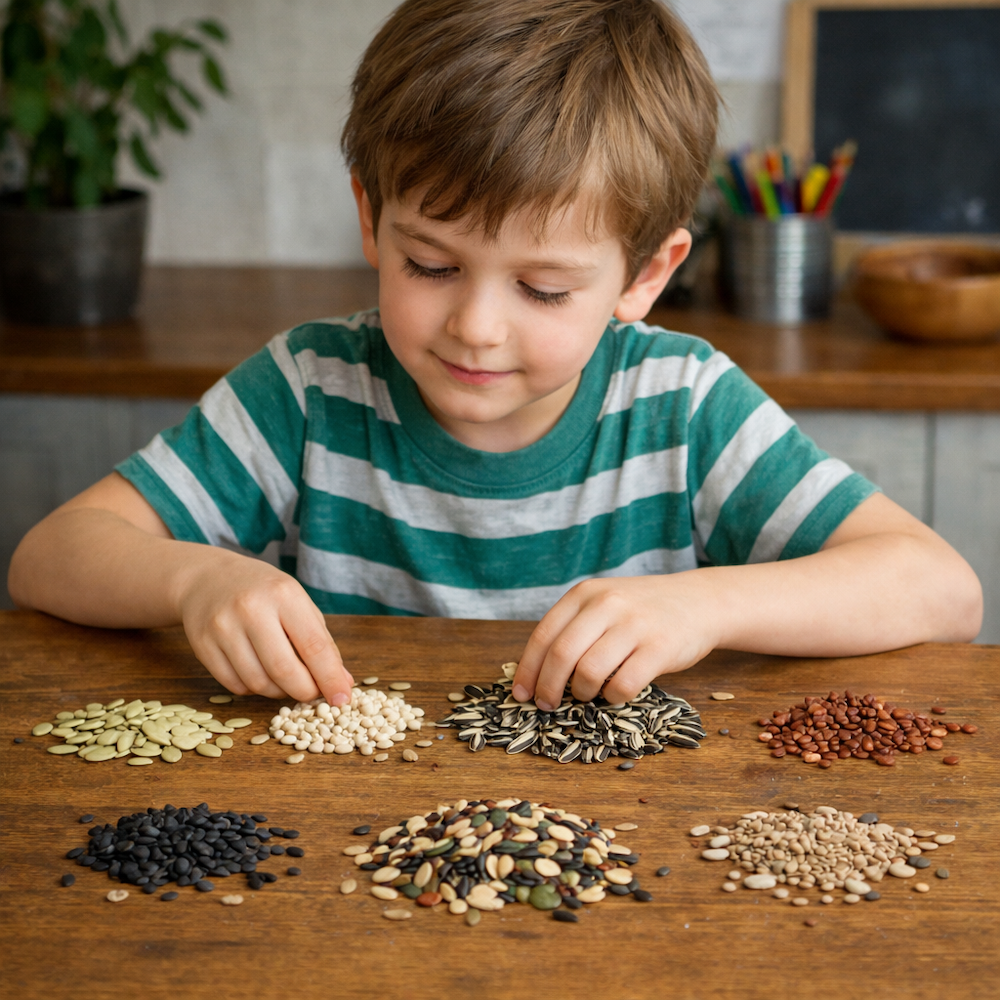
Seed Sorting Activity
Kids Will Learn: Seeds come in many shapes and sizes, each adapted to the type of plant they grow into and how they spread.
Supplies:
- A variety of seeds in different shapes and sizes
Instructions:
1
Pour all the seeds out on the table. Examine them closely, discussing their similarities and differences.
2
Sort the seeds by characteristics like size, color, shape, and more.
3
Why do you think the seeds are so different? What does each one grow into? Does knowing more about the plant explain why the seeds look like they do?
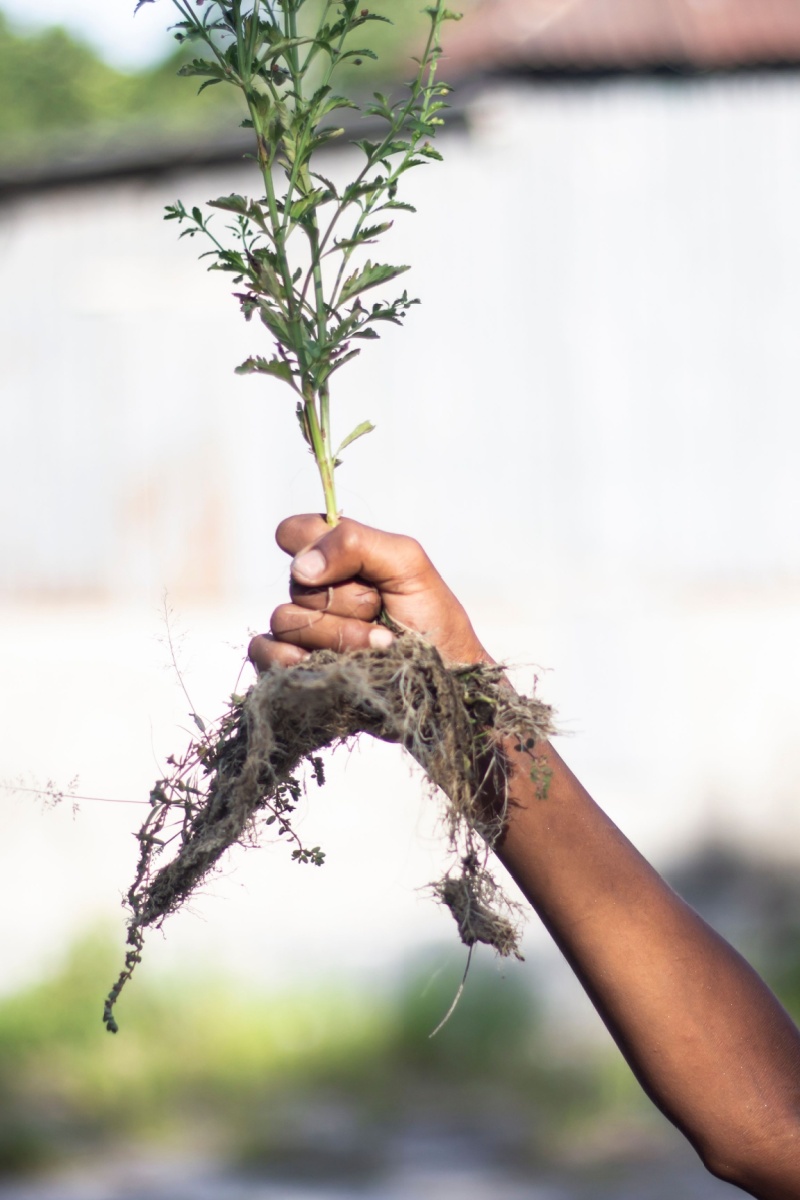
Parts of a Plant Investigation
Kids Will Learn: Plants have different parts (roots, stems, leaves, flowers), each with a specific job that helps the plant survive and grow.
Supplies:
- Shovel
- Two different small plants you can dig out of the ground (ask for permission first)
- Paper and crayons (optional)
Instructions:
1
Pour all the seeds out on the table. Examine them closely, discussing their similarities and differences.
2
Examine the plants closely. On each plant, identify the main root (tap root), smaller roots, stem, leaves, flowers, and other basic plant parts.
3
Examine and discuss the similarities and differences in each plant’s parts. Think about what those differences may mean in terms of where the plant can grow, how much water it may need, and how it spreads.
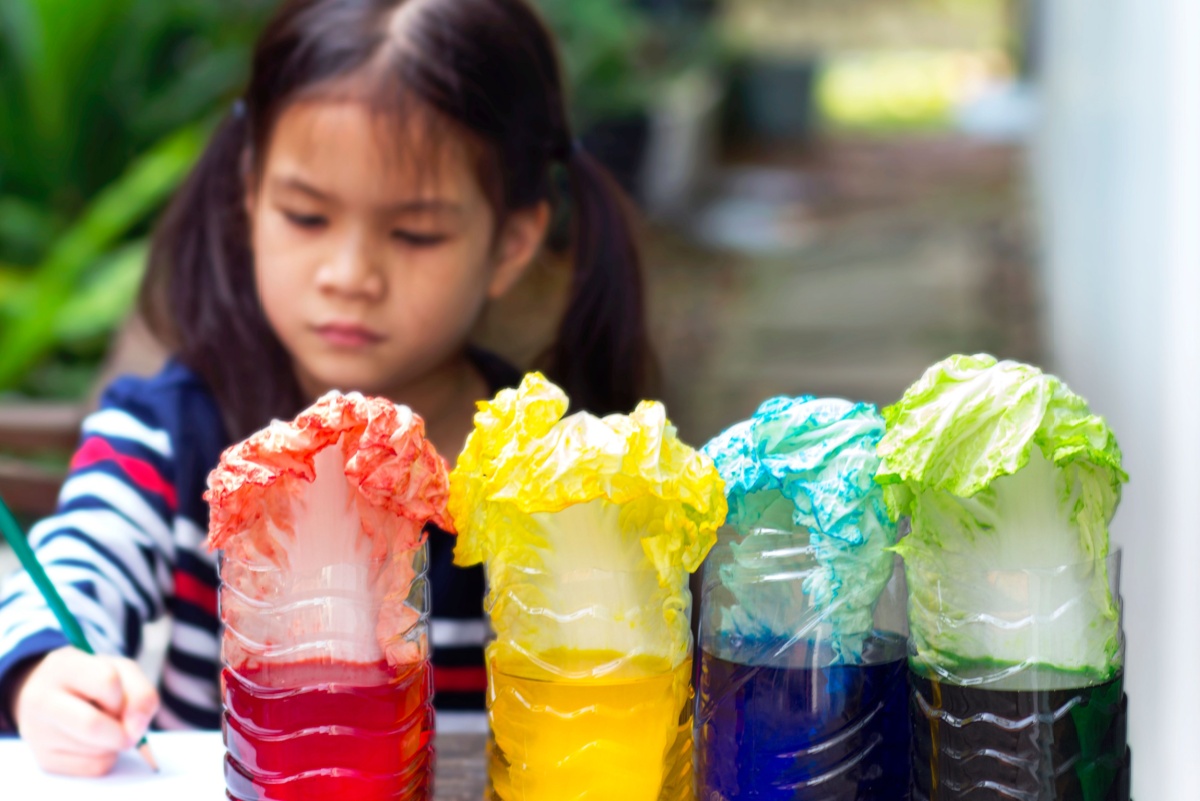
Colorful Celery or Cabbage
Kids Will Learn: Water travels through plants in tiny tubes (xylem) through a process called capillary action.
Supplies:
- Fresh celery stalks with leaves or nappa cabbage leaves
- 5 cups
- Food coloring
- Water
- Spoon
- Knife
Instructions:
1
Fill each cup about halfway with water. Add a few drops of food coloring to each to create any hues you like.
2
Trim the bottom inch or so from the celery stalks or cabbage leaves, and place each in a glass of water with the leaves up.
3
Check the stalks or leaves after about 3 hours. You should start to see some color change. Monitor them over the next 2-3 days as they draw more colored water up the stems into the leaves through the process known as capillary action!
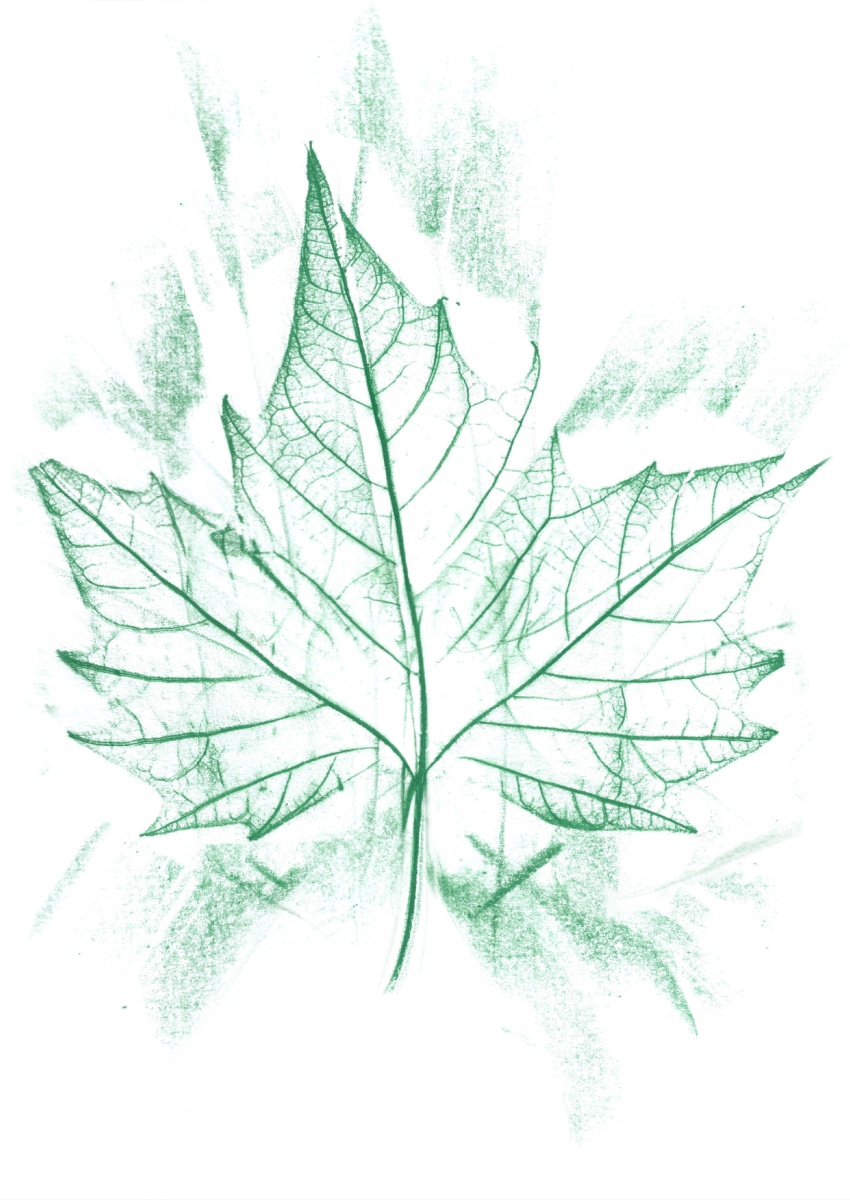
Leaf Vein Exploration
Kids Will Learn: Leaf veins transport water and nutrients throughout the plant, similar to how blood vessels work in the body.
Supplies:
- A variety of large leaves
- Plain white paper
- Unwrapped crayons
Instructions:
1
Start by making predictions about the veins in leaves. Do all leaves have veins? Do they all look the same? Do thick leaves have bigger veins?
2
Head outside and gather an assortment of leaves from plants. Look for leaves on the ground and get permission to remove any leaves from plants.
3
Once you have your leaves, place a sheet of white paper on the table, and arrange the leaves top-side down in a single layer on top. Lay another piece of white paper on top of the leaves. (It may help to tape it in place.)
4
Hold the crayon long side down and rub it firmly over the paper so the textures of the leaves underneath appear.
5
Examine the leaf rubbings to see the vein patterns and see if they prove your predictions correct. These veins carry water and nutrients from the stem up through the leaf!
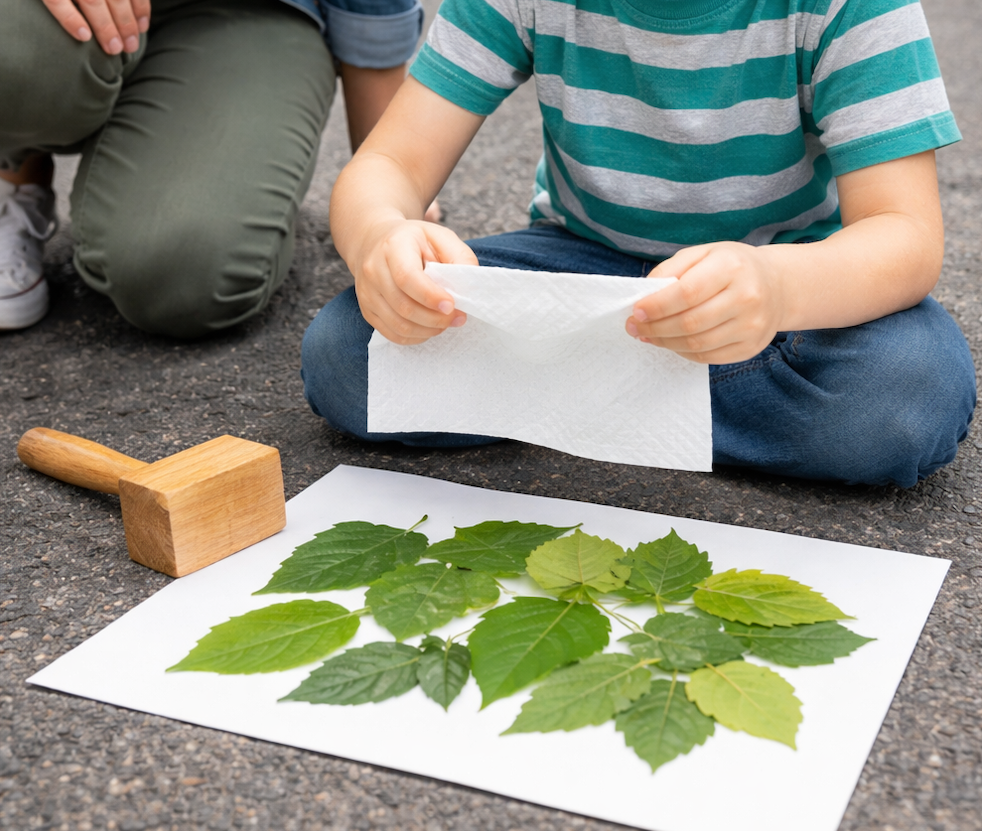
Chlorophyll Print Comparison
Kids Will Learn: Chlorophyll is the green pigment in plants that helps them make food using sunlight (photosynthesis).
Supplies:
- Newspaper
- White paper
- Paper towels
- Fresh soft leaves in various colors (darker and lighter green)
- Rubber mallet
Instructions:
1
Start by making predications. Will lighter or darker green leaves create a darker green print? Do darker green leaves have more chlorophyll?
2
Gather up leaves from different plants, trying to find leaves in varying shades of green.
3
When you’ve returned with your leaves, spread several sheets of newspaper onto a table or on the ground if you’re working outside. Place a sheet of white paper on top. Lay several leaves on the white paper, and cover them with a piece of paper towel.
4
Now the fun part! Whack the covered leaves with the mallet (not too hard!). Adult supervision recommended for this step.
5
Take off the paper towel and remove the leaves. You should see green prints on the white paper. This is the chlorophyll from the leaves! Did the darker leaves create darker prints?

Fun Plant and Garden Science Experiments for First and Second Grade
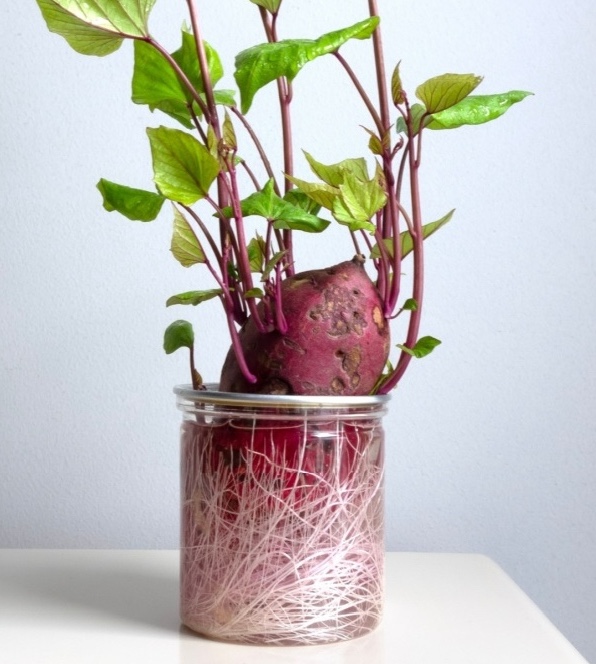
Potato in a Jar
Kids Will Learn: Some plants can grow from parts of other plants (vegetative reproduction), not just seeds.
Supplies:
- Sweet potato
- Knife
- Toothpicks
- Clear glass jar
- Water
Instructions:
1
Make predictions. Will the piece of potato grow in the water or rot? If it does grow, what plant parts might you see and which direction will they grow?
2
Fill the jar with water about ¾ of the way and stick 3 or 4 toothpicks around the middle of the potato.
3
Place the potato in the jar, resting the toothpicks on the rim. Be sure the bottom (the pointed end) of the potato is submerged in the water. (Add more water if needed.)
4
Place the potato in a warm, sunny spot. Change the water every 2 to 3 days to prevent mold.
5
In a week or two, you’ll notice roots growing from the bottom of the potato. Green shoots will soon follow, growing from the top.
6
If you want to, you can plant your sweet potato in the ground for harvest in a few months!
Soil Types Experiment
Kids Will Learn: Different soils affect plant growth by changing how well roots get water, air, and nutrients.
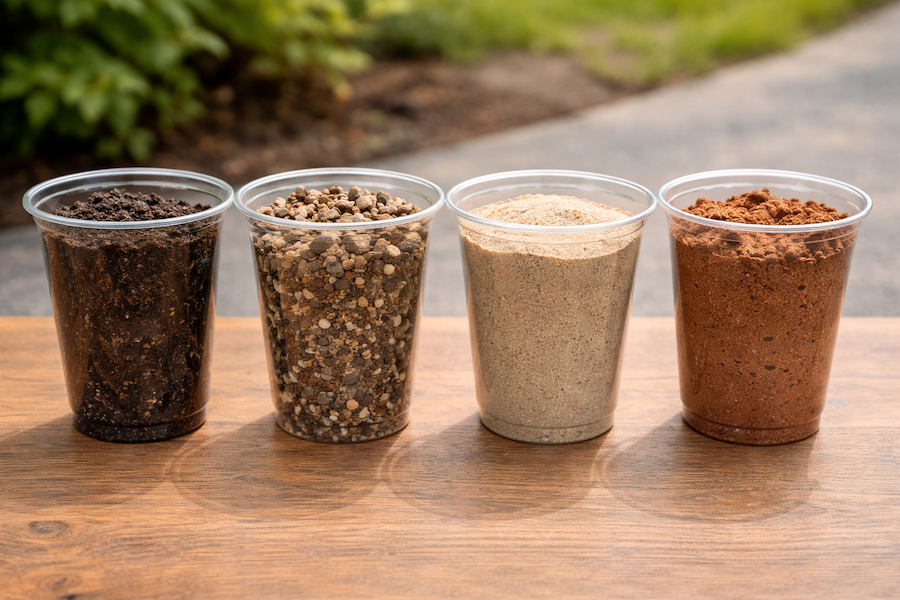
Supplies:
- Clear plastic cups
- Potting soil, sand, pebbles, or another growing medium
- Seeds
Instructions:
1
Make some predictions: Which type of soil will be best for growing the seeds? Why?
2
Place the potato in the jar, resting the toothpicks on the rim. Be sure the bottom (the pointed end) of the potato is submerged in the water. (Add more water if needed.)
3
Place the potato in a warm, sunny spot. Change the water every 2 to 3 days to prevent mold.
4
In a week or two, you’ll notice roots growing from the bottom of the potato. Green shoots will soon follow, growing from the top.
5
If you want to, you can plant your sweet potato in the ground for harvest in a few months!
Capillary Action Flowers
Kids Will Learn: Water moves up through a plant’s stem to its petals and leaves, showing how plants stay hydrated.
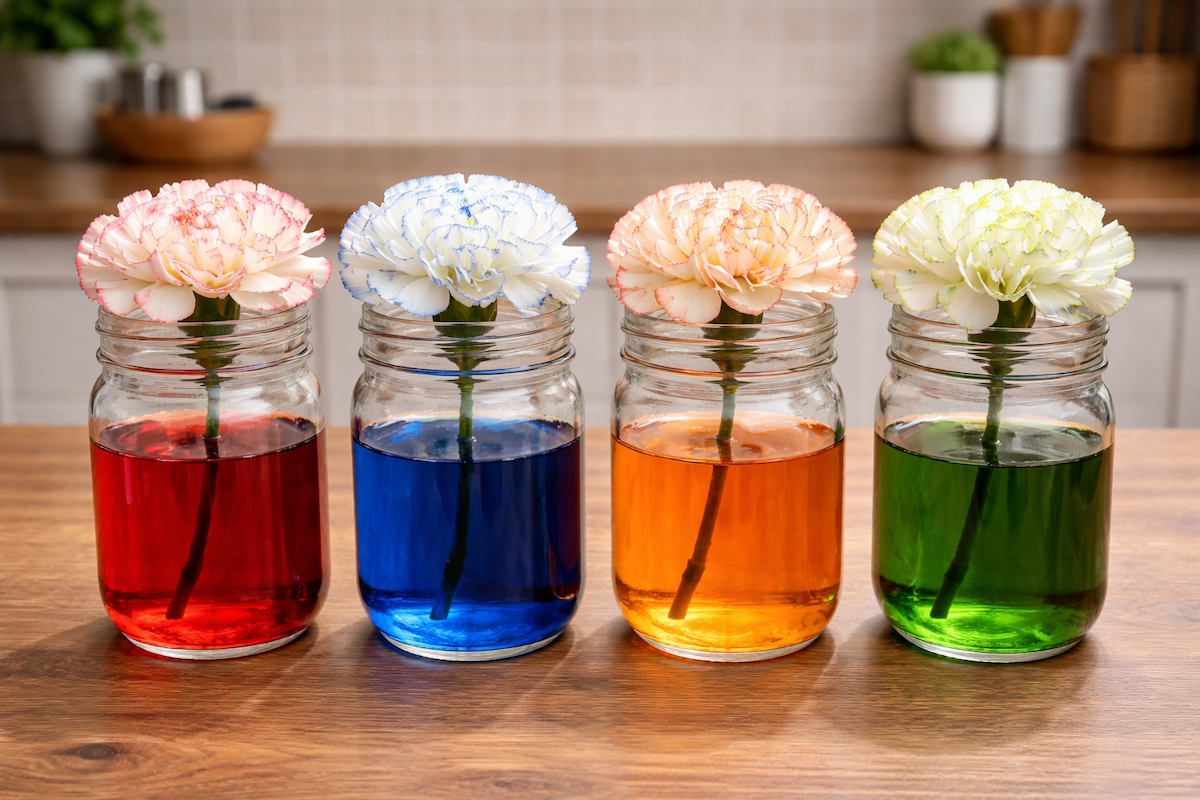
Supplies:
- White flowers (carnations work well)
- Food coloring
- Water
- Cups
- Spoon
- Knife (optional)
Instructions:
1
Fill each cup about halfway with water. Add a few drops of food coloring to each to create any hues you like.
2
Trim the bottom inch or so from the flower stalks. Place each into a cup of water.
3
Monitor your flowers over the next 2-3 days as they begin to draw colored water up the stems into the petals through the process known as capillary action, helped by transpiration.
Tip: Try dyeing flowers multiple colors! Use a knife to split the stem lengthways about halfway up the flower, and place each half in separate side-by-side cups. Or, try moving a flower from one cup to another as the colors start to show. Have fun experimenting with different methods to see what you can create!
Flower Dissection Project
Kids Will Learn: Flowers have specialized parts for reproduction, including structures that produce and receive pollen.
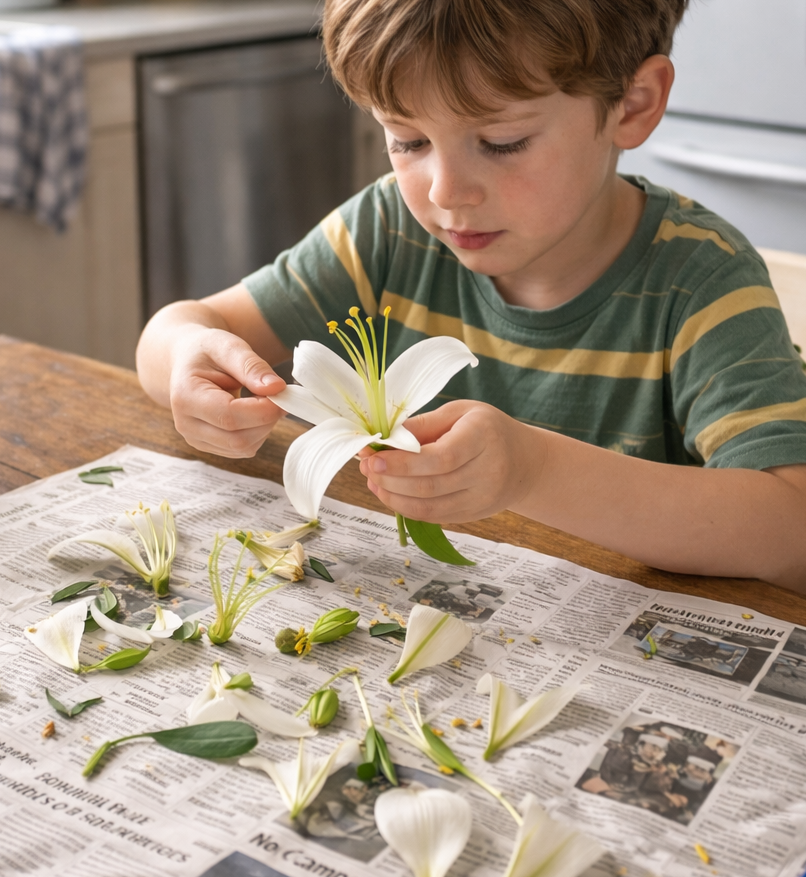
Supplies:
- Large flower like a lily
- Magnifying glass
- Tweezers
- Pencil and paper
Instructions:
1
Use the tweezers and magnifying glass to examine and pull apart the flower.
2
Draw a diagram of the flower and label some or all of these parts: stem, leaf, petal, sepal, pistil, stamen, anther, filament. (See the helpful diagram by our vocabulary words above.)
Pollinator Hunt
Kids Will Learn: Animals like bees and butterflies help plants reproduce by moving pollen between flowers.
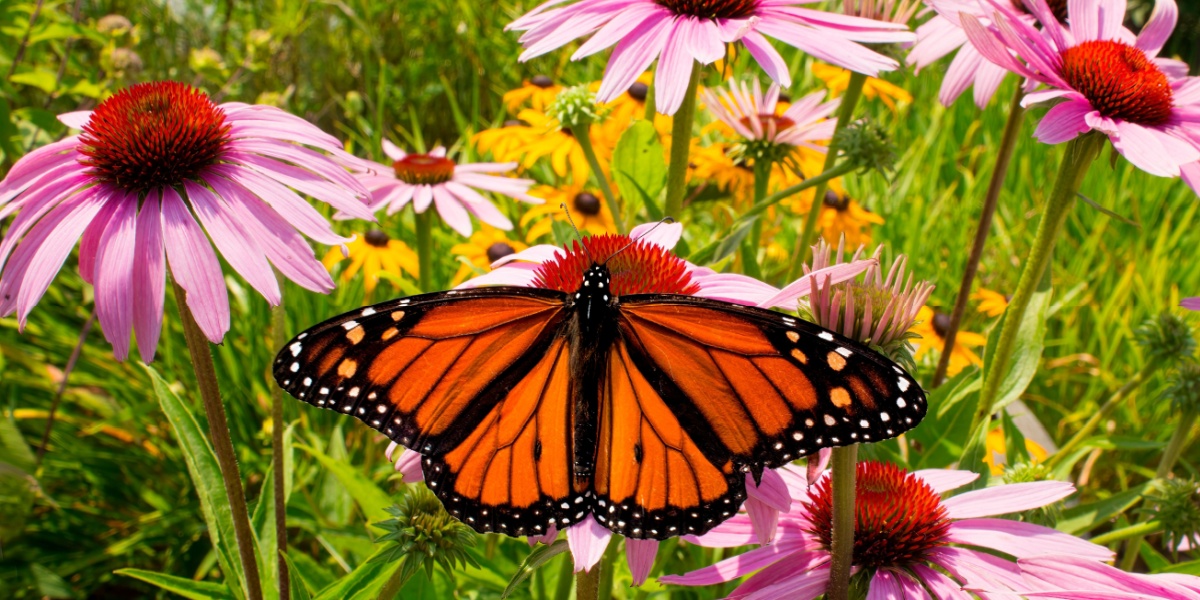
Supplies:
- Notebook and pencil
- Magnifying glass
- Camera (optional)
Instructions:
1
Take your notebook, pencil, and magnifying glass out with you on a nature walk. Look closely at flowering plants and shrubs for pollinators including bees, ants, birds, butterflies, wasps, beetles, and flies.
2
Write notes and draw pictures of the pollinators you see. You can also take pictures to look more closely at them at home.
3
How did each pollinator carry the pollen from one plant to the next? What was it doing as it pollinated?
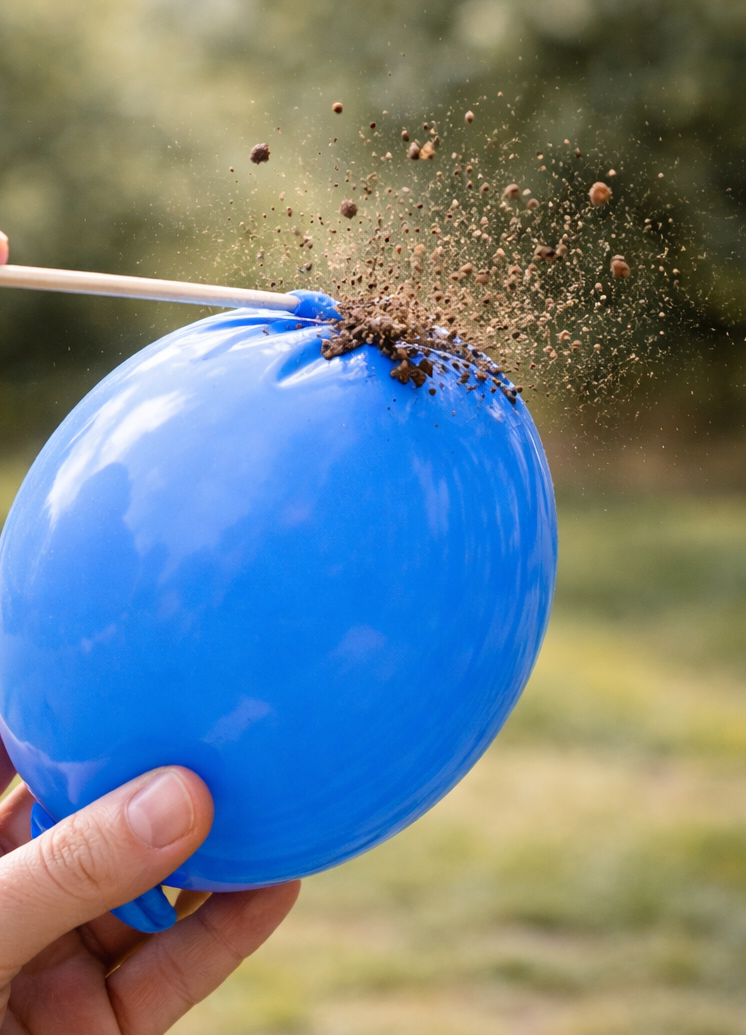
Seed Pod Dispersal
Kids Will Learn: Some plants spread seeds by bursting open, helping seeds travel farther from the parent plant.
Supplies:
- Small seeds
- Balloons
- Funnel
- Sharp pencil or skewer
- Measuring tape
Instructions:
1
Use the funnel to drop about a teaspoon of seeds into the balloon. Inflate the balloon and tie it off.
2
Take the balloon outside. Hold it far away from your body.
3
Now, pop the balloon and watch closely. The seeds will fly in all directions, just like the exploding seed pods of some plants!
4
Track down some of the seeds and use the measuring tape to see how far they traveled.
These plants have exploding seed pods: Jewelweed (Impatiens capensis), Wood Sorrel (Oxalis stricta), Hairy Bittercress (Cardamine hirsuta), and Witch Hazel (Hamamelis virginiana)
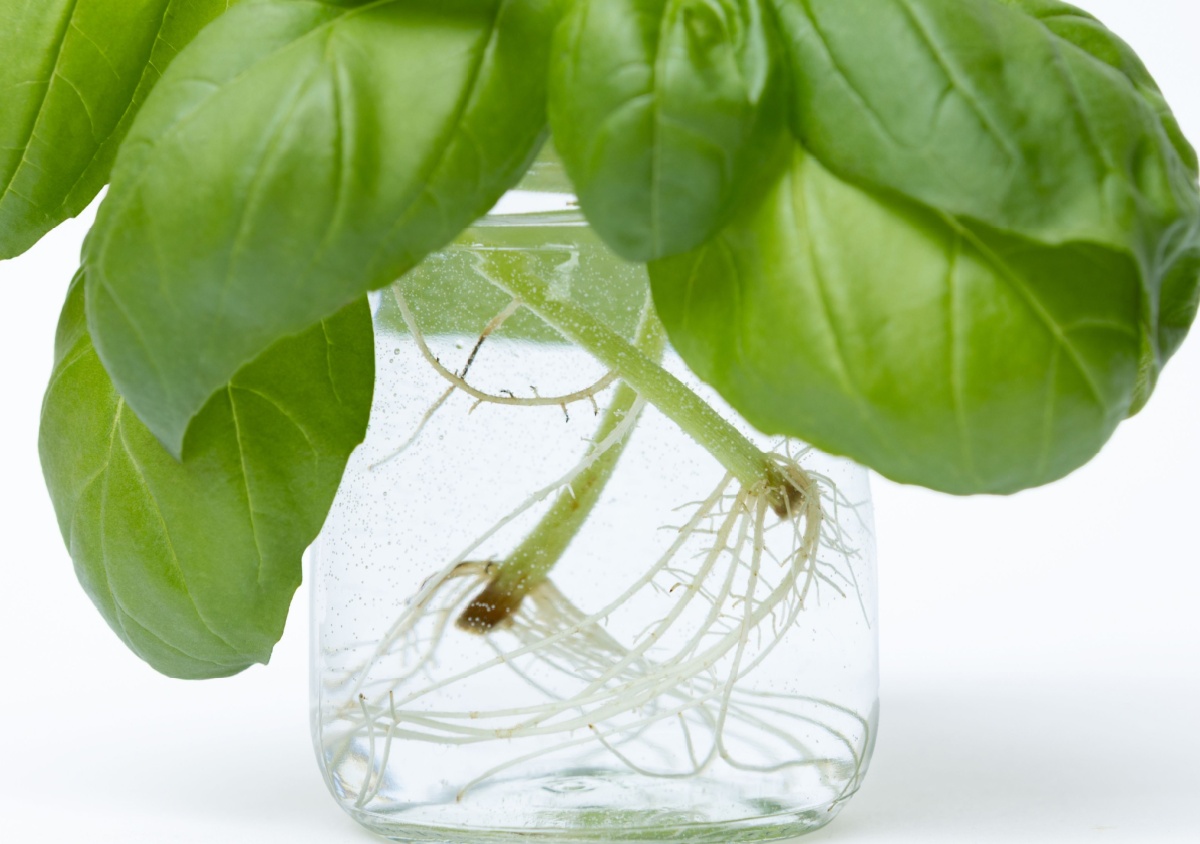
Kitchen Scraps Garden
Kids Will Learn: Some plants can regrow from scraps, showing how plants can reproduce and continue growing in new ways.
Supplies:
- Fresh basil stems with leaves and/or green onion bases
- Cups
- Water
- Small pots and potting soil
Instructions for Basil:
1
Trim the basil stems at a slight angle. Remove any wilted leaves.
2
Place the basil stems in a cup of water, making sure the leaves are left above the surface. Change the water every day or two, and watch for roots to appear.
3
When the roots are about an inch long, gently plant your new little plantlets in a pot with soil and place in a sunny window.
Instructions for Green Onion:
1
You can use any green onion base that still has a bit of root attached at the bottom. Place them in a glass of water. Change the water every day or two.
2
Very soon, you’ll start to see new leaves grow from the tops of the onion bulbs!

Tip: You can plant the onion bulbs directly in potting soil so they’ll keep growing, but they’ll also grow just fine in a glass of water.
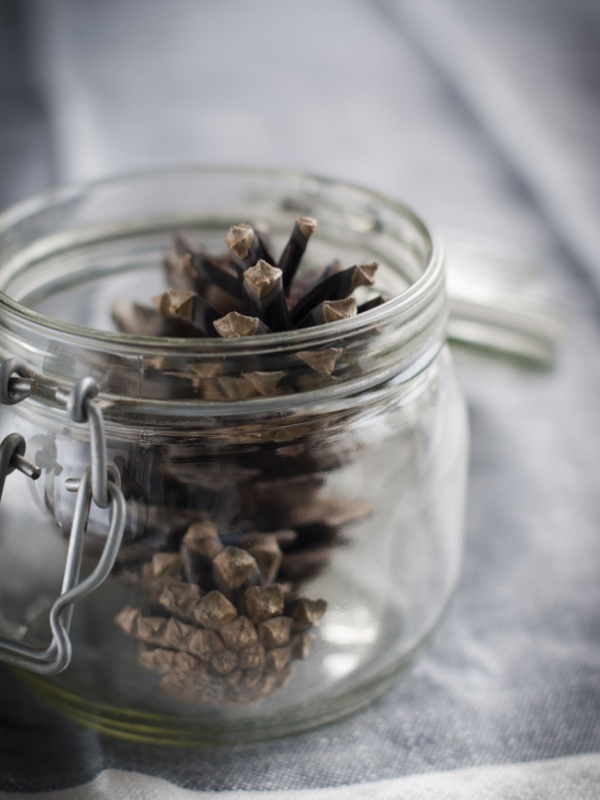
Pine Cone Science
Kids Will Learn: Plants respond to environmental changes—pine cones open and close based on moisture and temperature to protect seeds.
Supplies:
- 5 pine cones
- 5 clear glass jars (large enough to hold a pine cone)
- Water
Instructions:
1
Start by looking at your pine cones. Are they open or closed? Now, make some predictions. What makes pine cones open or close? How will they react to water or different temperatures?
2
Place one pine cone in each jar. Put one jar in a warm, sunny place. Put another in a dark room. Put the third one in the refrigerator.
3
For the remaining jars, fill one with warm water and the other with cold water.
4
Check your pine cones after an hour or so. What changes do you notice? Were your predictions correct?
Did You Know? Pine cones open in warm, dry conditions and close in cold or wet conditions. This helps them disperse seeds when conditions are favorable.
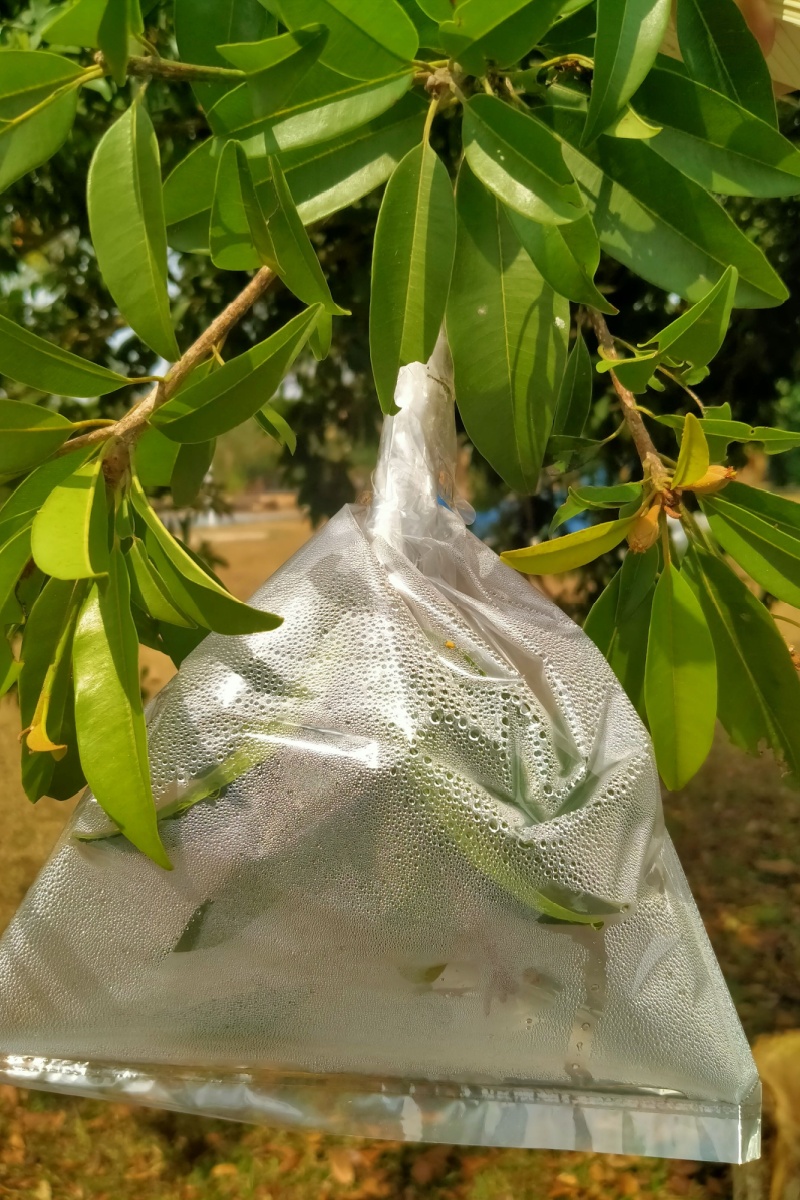
Transpiration in Action
Kids Will Learn: Plants release water vapor through their leaves, which helps move water through the plant and regulate temperature.
Supplies:
- Clear plastic bag
- Pipe cleaner, string, or twist ties
- Tree in a sunny spot with branches low to the ground
Instructions:
1
Take your plastic bag outside to the tree. Place it around the end of a twig with leaves, and use the pipe cleaner, string, or twist tie to seal it tightly in place, leaving some air in the bag.
2
Leave the bag in place for a day or two when it’s warm and sunny.
3
Check back to see the water droplets that have formed inside the bag. This is transpiration: water given off by the leaf through its pores (stomata)!
4
Check your pine cones after an hour or so. What changes do you notice? Were your predictions correct?

Fun Fact: Water droplets form because the leaf releases water vapor through its stomata, which then condenses inside the bag.
Plant Light Maze
Kids Will Learn: Plants grow toward light (phototropism), showing how they respond to their environment to survive.
Supplies:
- Shoebox with lid
- Scrap cardboard
- Masking tape
- Scissors
- Small pot
- Potting soil
- Lima bean seed
- Watering can
Instructions:
1
Fill the pot with potting soil, poke a hole with your finger about 1 inch deep, and drop the bean seed in. Cover it lightly with more soil. Water gently, then set in a sunny windowsill for a few days so your seed can sprout. (This ensures you start the experiment with a viable seed.)
2
Take the lid off the shoebox and set it aside. Set the box on its end, then use scissors to cut a hole in the top side of the box as shown in the picture.
3
Use the scrap cardboard to make a simple zig-zag maze inside the box, as shown.
4
Set your sprouted seed in the bottom of the box, underneath the lowest part of the maze.
5
Put the lid back on the box. Check to make sure that the only light that can get through is from the hole at the top. If you see any light leakage, use masking tape to seal the cracks or holes.
6
Place the box in a sunny spot. Check the pot each day to see if it needs water, then quickly seal the box back up with the pot in the same position.
7
Watch as your plant navigates the light maze! This demonstrates phototropism, the ability of a plant to change its growth toward light!
More Plant Activities & Science Experiments for Kids
200+ Free Flower Coloring Pages
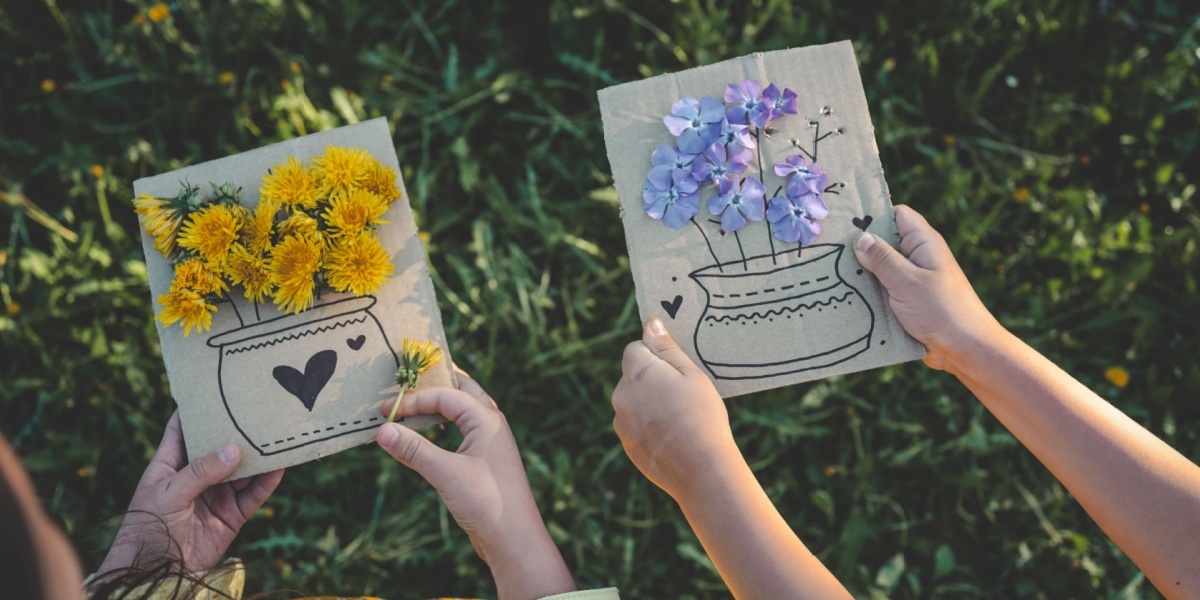
30+ Flower Crafts for Kids
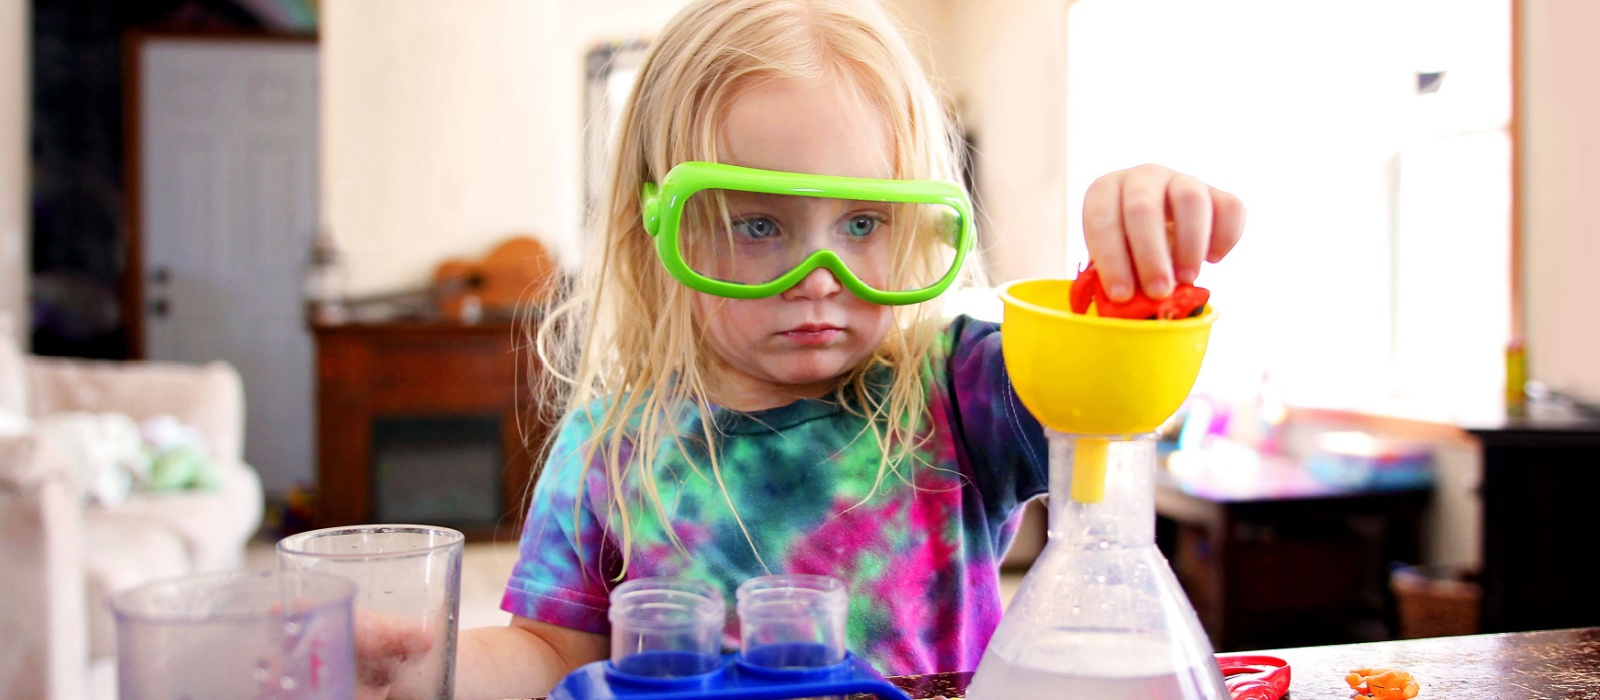
Science Activities & Experiments: Preschool & Kindergarten
90+ STEM Activities for Kids

Everybody’s Garden, Ep 1
Join Ivy and Niko as they try to create a community garden for their apartment complex!
Everybody’s Garden, Ep 2
Watch as Ivy and Niko explore seeds from around the world and learn how different cultures grow unique foods.
Related Activities
-

Father’s Day Craft for Kids: Create a Dad Frame
Create a heartfelt Father’s Day photo frame craft kids can make with simple supplies, family photos, and easy step-by-step instructions.
-

Kids Science Experiment: How to Build a Simple Catapult
Build a craft stick catapult in this fun STEM activity for kids. Launch pom-poms and explore force, motion, and simple engineering concepts.
-

20+ Homemade Mother’s Day Card Ideas
Creative homemade Mother’s Day card ideas for kids, from flower crafts to heart designs and easy printables for meaningful, handmade gifts.
-

20+ Plant Science Experiments & Activities for Kids and Toddlers
Explore 20+ easy plant science experiments for kids, from growing seeds to photosynthesis, with simple supplies and hands-on learning at home or school.
-
30+ Flower Crafts for Kids: Easy Ideas for Preschool and Up
30+ flower crafts for kids—easy ideas for preschool, kindergarten, and beyond. Includes paper flowers, spring projects, and fun Mother’s Day crafts using simple materials.
-
40 Easter Crafts for Kids (Easy DIY Ideas)
40 fun and easy Easter crafts for kids, from bunnies and chicks to egg decorating and DIY baskets—perfect for home or classroom creativity.