33 Fun Fall Crafts and Art Activities for Preschool and Kindergarten
Share
Celebrate the magic of autumn with hands-on art projects kids will love!
With colorful leaves, cozy themes, and plenty of inspiration from nature, fall offers endless opportunities to get creative. Whether you’re a parent or a teacher looking for easy art projects for young kids, these 30+ fall crafts and art activities are just right for preschoolers and early elementary kids. Please note that while these projects are designed for young children, they should be completed with adult supervision.
Get more fall crafts, printables, jokes, and activities our with Halloween and Thanksgiving Crafts and Activities.
Fall Crafts and Art Activities for Preschoolers
These fall crafts are designed with the littlest learners in mind! Each project is easy to make and uses simple materials you likely already have at home or in the classroom. From colorful leaves to friendly pumpkins, these art activities help preschoolers explore the season while building creativity and fine motor skills.
1. Turkey Pudding Cup
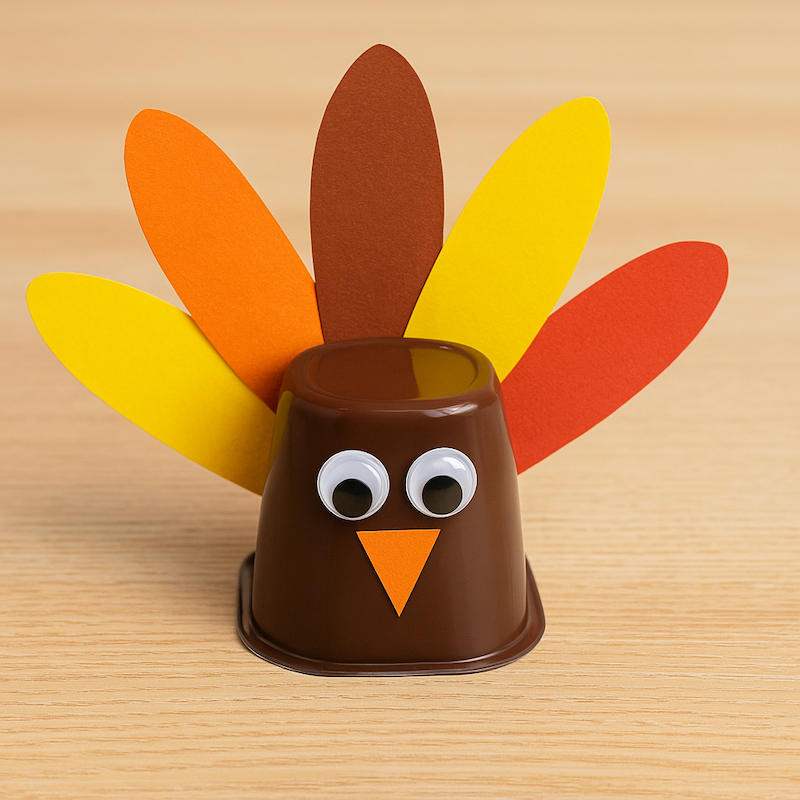
Supplies:
- sealed chocolate pudding cup
- orange, red, yellow, and brown construction paper
- googly eyes
- liquid school glue
- scissors
Instructions:
1. Cut out 4 feathers from the construction paper.
2. Cut out a small triangle from the orange construction paper for the turkey’s beak.
3. Turn the pudding cup upside down, so the lid is on the table.
4. Use liquid school glue to adhere the feathers onto the back of the pudding cup, creating the turkey’s tail feathers.
5. Glue the googly eyes onto the front of the pudding cup.
6. Glue the orange triangle onto the pudding cup to create the turkey’s beak. Then admire your cute feathered friend for as long as you can resist eating the pudding!


2. Paper Plate Apple Lacing

Supplies:
- red paper or plastic disposable plate
- hole punch
- brown and green construction paper
- yarn
Instructions:
1. Use the hole punch to make evenly-spaced holes around the edges of the plate.
2. Cut a stem from the brown paper and a leaf from the green paper, and glue them to the top of the plate.
3. Tie one end of the yarn to one of the holes, then show your toddler how to lace the yarn in and out of the holes.
Tip: If you don’t have a red plate on hand, just use paint to turn a regular white plate into a red one!
3. Fall Handprint Tree
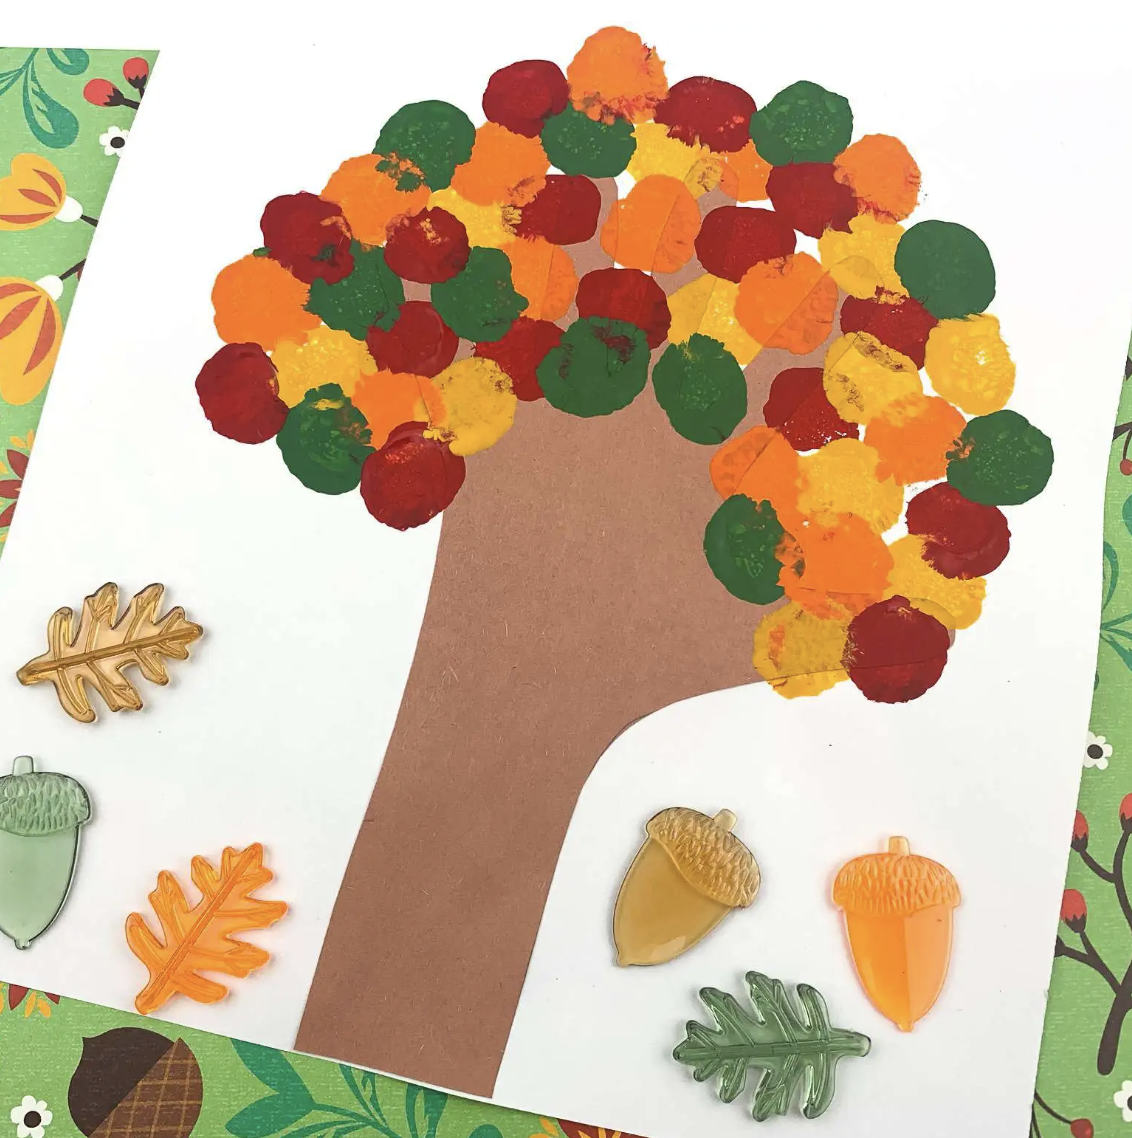
Supplies:
- brown construction paper
- white construction paper
- pencil
- glue
- paper plate
- craft paint
- clothespins
- pom poms
Instructions:
1. Trace your child’s hand and their wrist onto the sheet of brown construction paper.
2. Have your child cut out their hand print from the paper. This will act as their tree’s trunk and branches.
3. Glue their hand cutout onto a piece of white paper.
4. Squeeze some yellow, red, orange, and green paint onto a paper plate.
5. Get one clothespin and pom pom for each paint color. Pinch one pom pom into the end of each clothespin, forming a painting tool.
6. Have your child gently dip the pom pom into the paint and dab it onto their “tree,” placing the paint around the branches.
7. Once your child is done filling the tree’s branches with colorful leaves, let their creation dry.
Tip: You can skip the pom poms and just use finger paint instead, creating the leaves on the tree with your child’s thumb and finger prints.
4. Paper Bag Squirrel
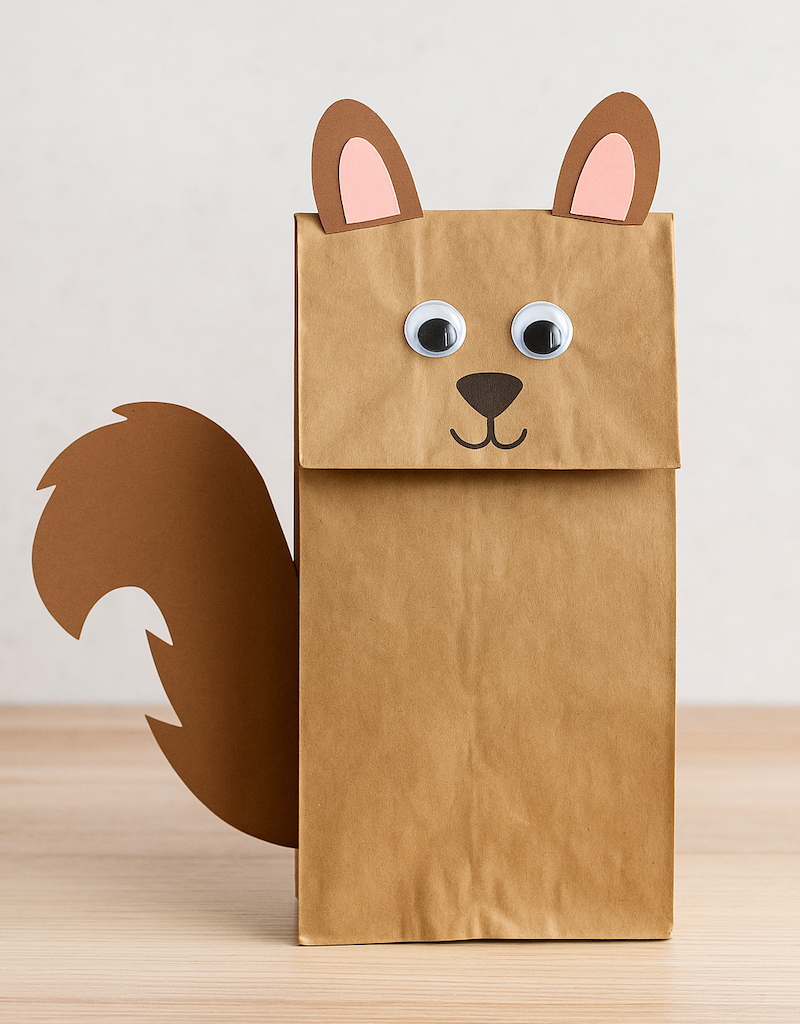
Supplies:
- brown lunch bag
- googly eyes
- black marker
- brown and pink construction paper
- glue
- scissors
Instructions:
1. Cut out a longer bushy tail from the brown construction paper for the squirrel’s tail.
2. Cut out two curved ears from the brown construction paper.
3. Cut out two pink pieces similar in shape to the brown ear pieces, but slightly smaller. Glue the pink inner ear pieces on to the brown ear pieces.
4. With the flap of the paper bag facing you, glue the ears to the back, top part of the bag. Glue the tail to the back, lower portion of the bag.
5. Glue on the googly eyes to the square flap of the lunch bag.
6. Draw on a nose and mouth with marker or crayon. Now put on a show with your DIY squirrel puppet!
5. Pom Pom Acorns
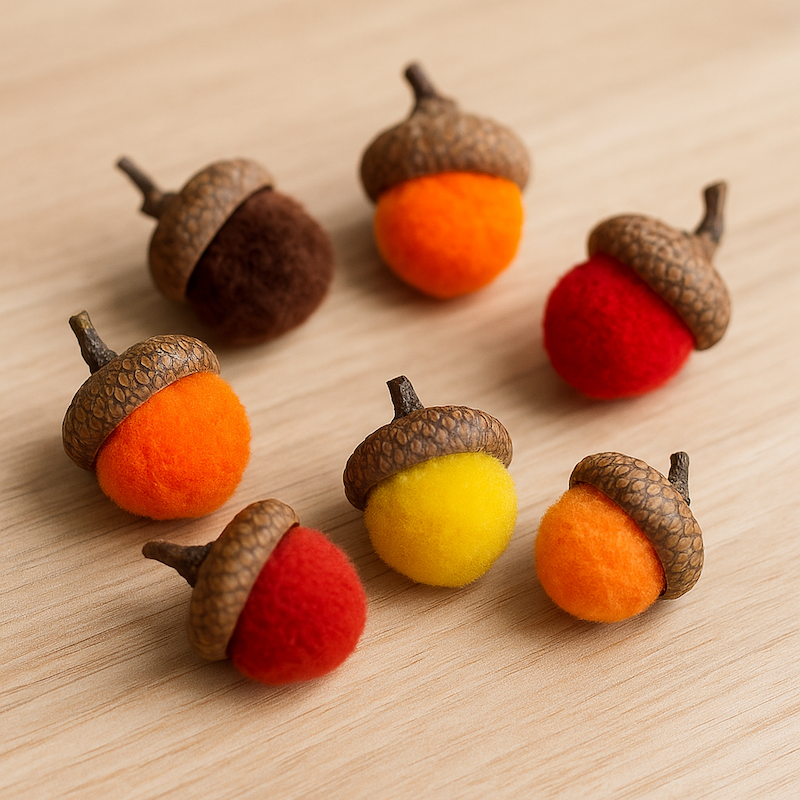
Supplies:
- small craft pom poms
- real acorn caps collected and cleaned
- hot glue gun or strong craft glue
- optional: string or twine (for hanging)
Instructions:
1. Collect and clean acorn caps, then let them dry completely.
2. Choose small pom poms in fall colors that fit snugly inside the caps.
3. Add a drop of glue inside each acorn cap. If using glue guns, an adult should complete this step.
4. Press a pom pom into the glue and hold for a few seconds.
5. Let the glue dry completely, then display or use in decorations!
Tip: Glue in a string loop before adding the pom pom if you want to hang the acorns.
6. Fall Handprint
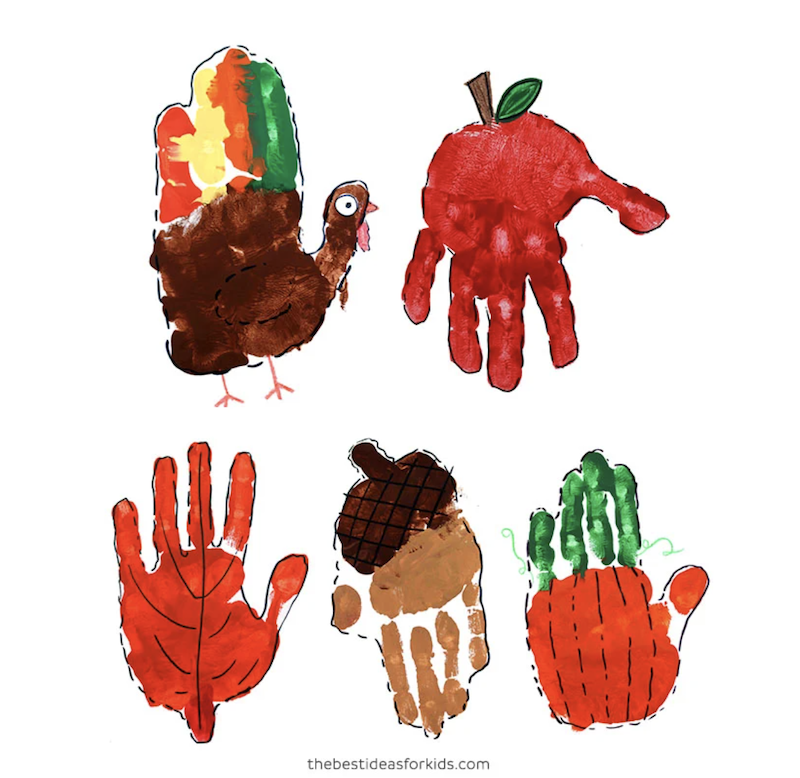
Supplies:
- white card stock or construction paper
- washable paint in fall colors (red, orange, yellow, brown)
- small paintbrush
- black marker or pen
- paper plate or paint tray
- googly eyes (for turkey)
- wet wipes or access to a sink (for cleanup)
Instructions:
1. Choose your fall design, such as a handprint leaf, handprint turkey, or handprint apple–or make all 5 designs!
2. Pour paint into a tray or paper plate, using a few different fall colors.
3. Use a brush to apply paint to your child’s hand (or let them dip into the colors).
4. Press their painted hand onto the paper to create a handprint. Repeat if making multiple prints for leaves or feathers.
5. Let the handprint dry completely before adding details.
6. Use a black marker to draw a turkey face, leaf veins, etc. depending on your design.
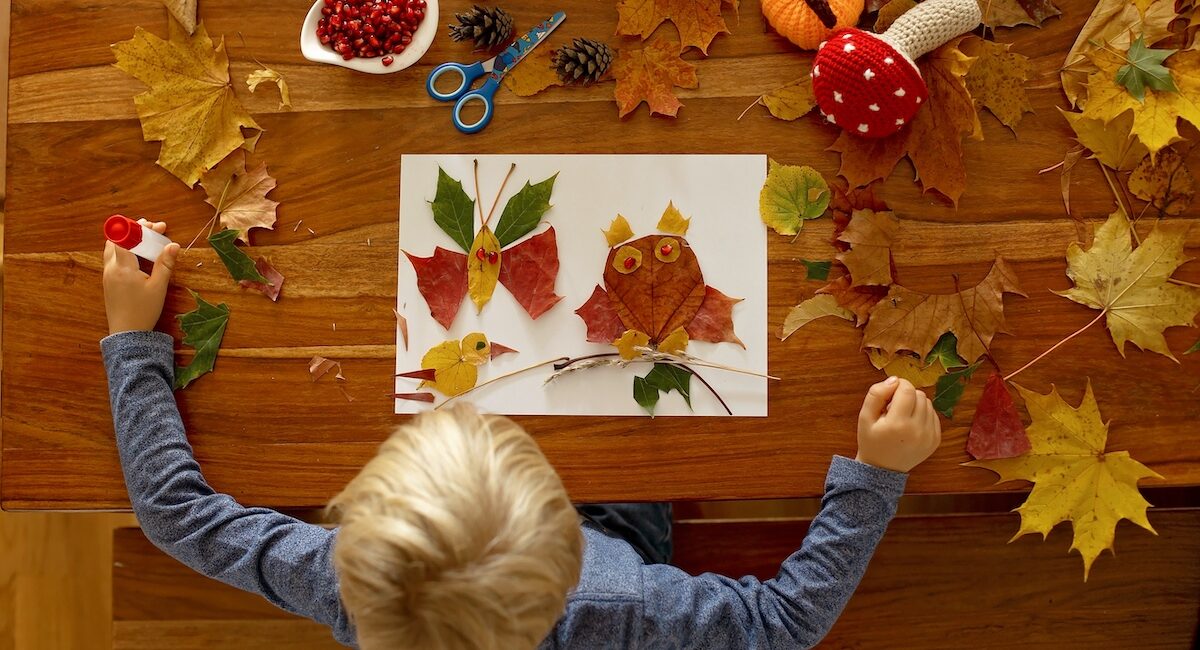
7. Leaf People
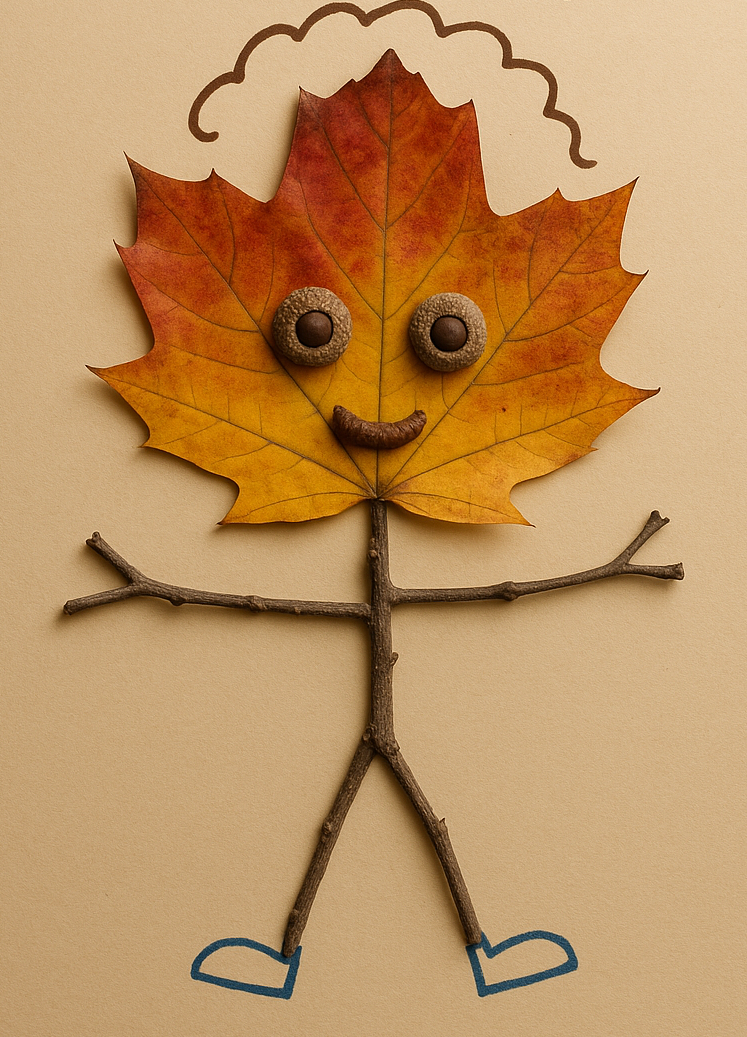
Supplies:
- variety of real or artificial leaves
- small twigs
- acorn tops and bottoms (or googly eyes or buttons)
- liquid school glue
- markers or crayons
- construction paper or cardstock
Instructions:
1. Collect leaves, acorns, and small twigs in various shapes and colors. Let them dry if they’re fresh.
2. Choose a large leaf to use as the head of your leaf person.
3. Glue the leaf to a piece of construction paper or card stock, leaving room below it to create the twig body.
4. Add a body, arms, and legs by gluing on small twigs.
5. Use the acorns to create eyes and a mouth, gluing them down one by one. If you don’t have acorns, use googly eyes and buttons or whatever household supplies you have on hand.
6. If you’d like, use markers or crayons to draw in hair or accessories like hats or shoes.
8. Button Apple
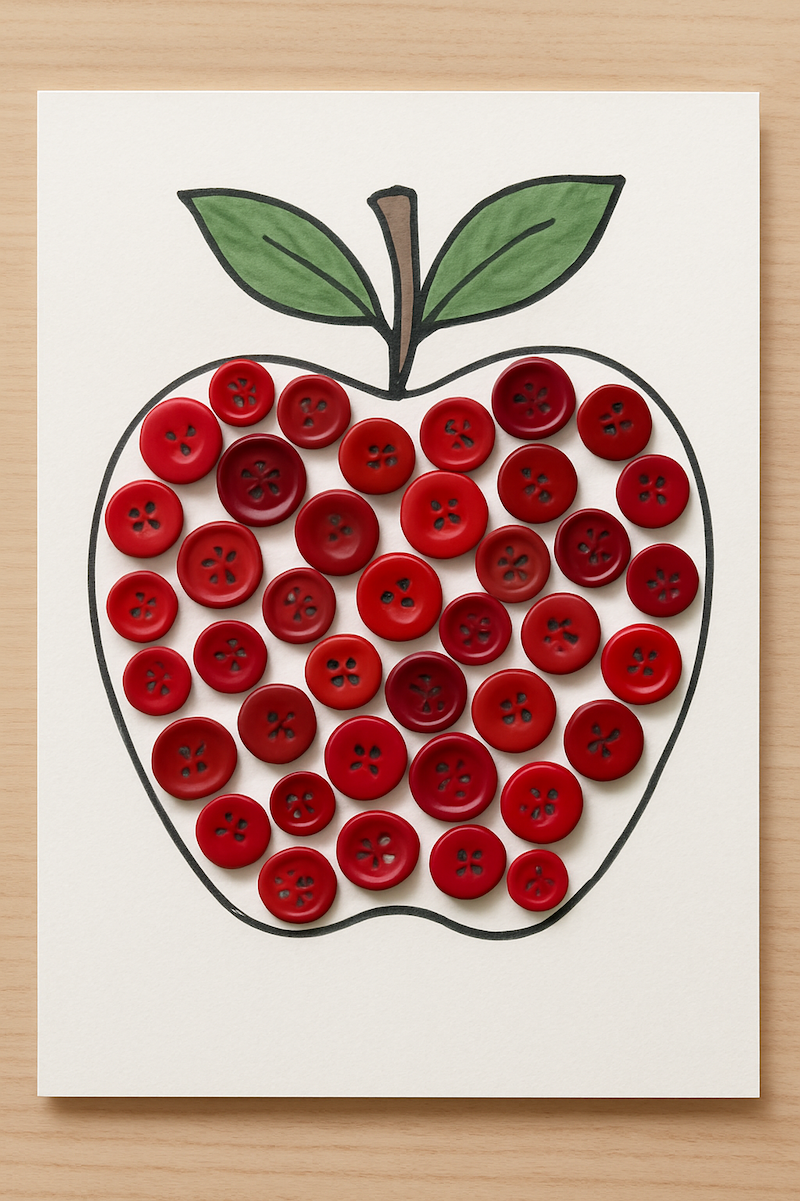
Supplies:
- red or green buttons of various sizes
- glue
- card stock
- markers
Instructions:
1. Trace the outline of a large apple onto a piece of card stock, and add a stem and leaves.
2. Help your child fill the outline with buttons, covering as much space as possible. (Supervise small children for safety.)
3. Carefully glue each button in place, then display your art!
9. Paper Plate Pumpkin
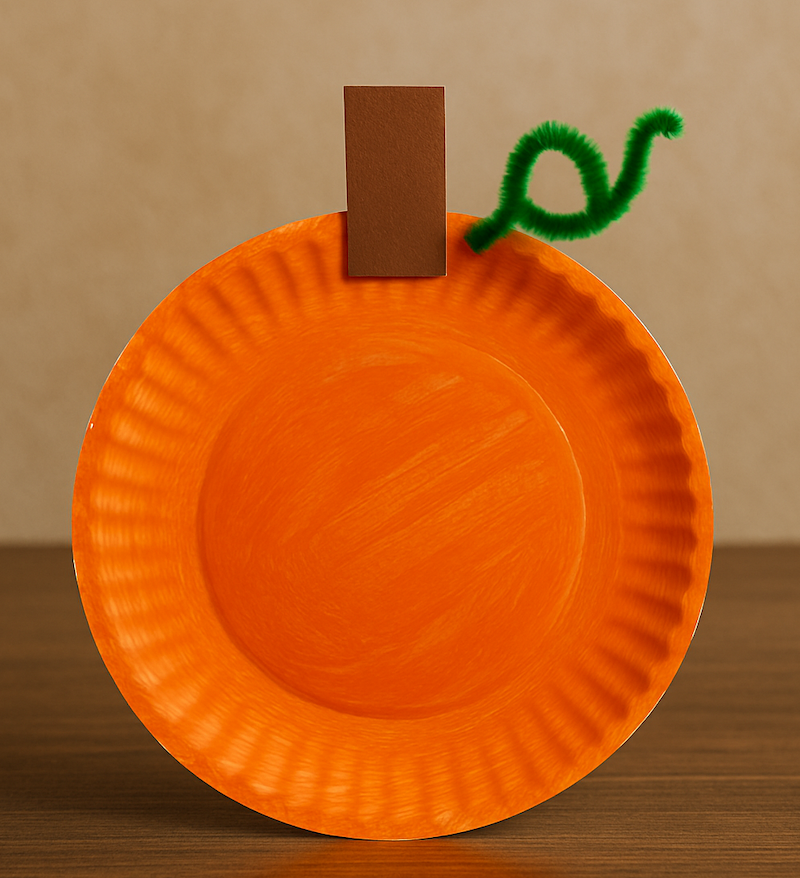
Supplies:
- paper plate
- orange paint
- paintbrush
- brown construction paper
- green pipe cleaners
- school glue
- scissors
Instructions:
1. Set up a space for painting, providing orange paint, a paint brush, and the white paper plate.
2. Have your child paint the entire paper plate orange. Let the paint dry completely.
3. Cut out a small rectangle from the brown paper to form the stem of the pumpkin and glue to the top of your orange plate.
4. Carefully bend the tips of the pipe cleaners you trimmed upward to mimic the shape of pumpkin vine tendrils. Careful–pipe cleaners can sometimes have sharp points at the end.
Tip: Keep this craft more mess-free by buying orange paper plates.
10. Butterfly Leaf

Supplies:
- variety of real leaves
- googly eyes
- glue
- scissors
- construction paper or card stock
- markers or crayons
- optional: pipe cleaners or small twigs (for antennae)
Instructions:
1. Gather a selection of leaves in different shapes and colors—choose two similar-sized leaves for each butterfly’s wings.
2. Lay out a piece of construction paper or card stock as the background.
3. Add a butterfly body by drawing it in with marker or cutting it from construction paper.
4. Arrange leaves on either side of the butterfly to form butterfly wings and glue into place.
5. Draw on the butterfly’s antennae or glue down a small pipe cleaner or twig to create them.
5. Attach googly eyes at the top of the body using glue. If you’d like, draw in more details, like flowers or grass.
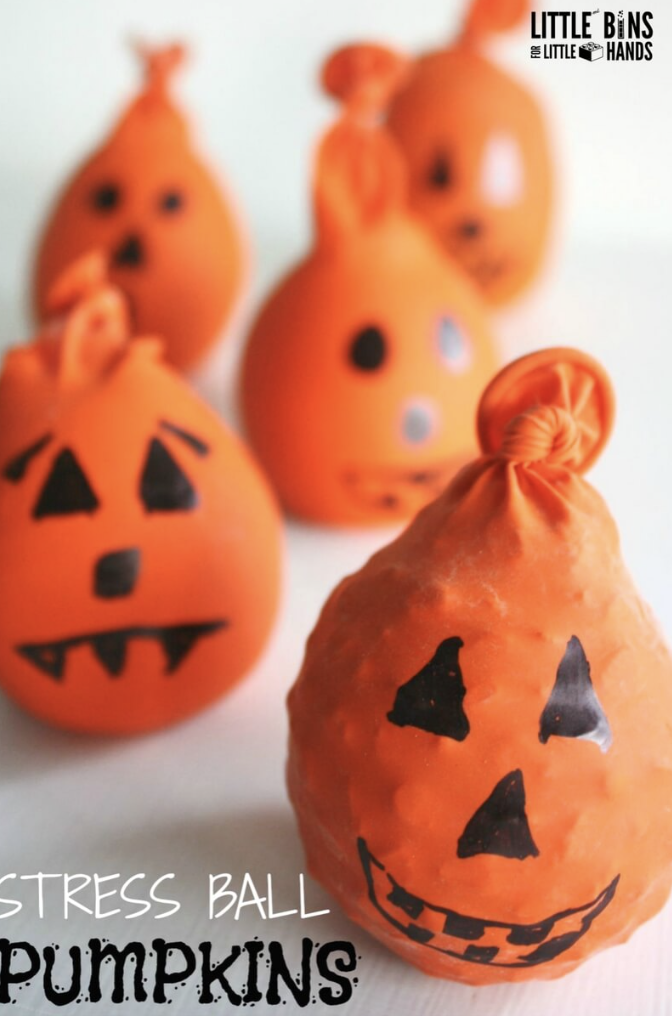
11. Pumpkin Squish Ball
Supplies:
- orange balloons
- black permanent marker
- funnel
- filling (flour, corn starch, dried lentils, playdough, popcorn kernels)
Instructions:
1. Start by stretching the balloon to help it expand to fit the fillings. Do this by blowing up the balloon and holding it full of air for about 20-30 seconds.
2. Let the air out of the balloon and place a funnel into the skinny tube section of the balloon.
3. Slowly pour your chosen filling into the funnel in small batches, letting the contents of the funnel empty into the balloon before adding more.
4. Tie a knot into the tube of the balloon, sealing the contents in.
5. Use a permanent marker to draw on the lines of a pumpkin or a jack-o’-lantern face. Enjoy squeezing and squishy your balloon pumpkin or even playing a gentle game of catch with it!
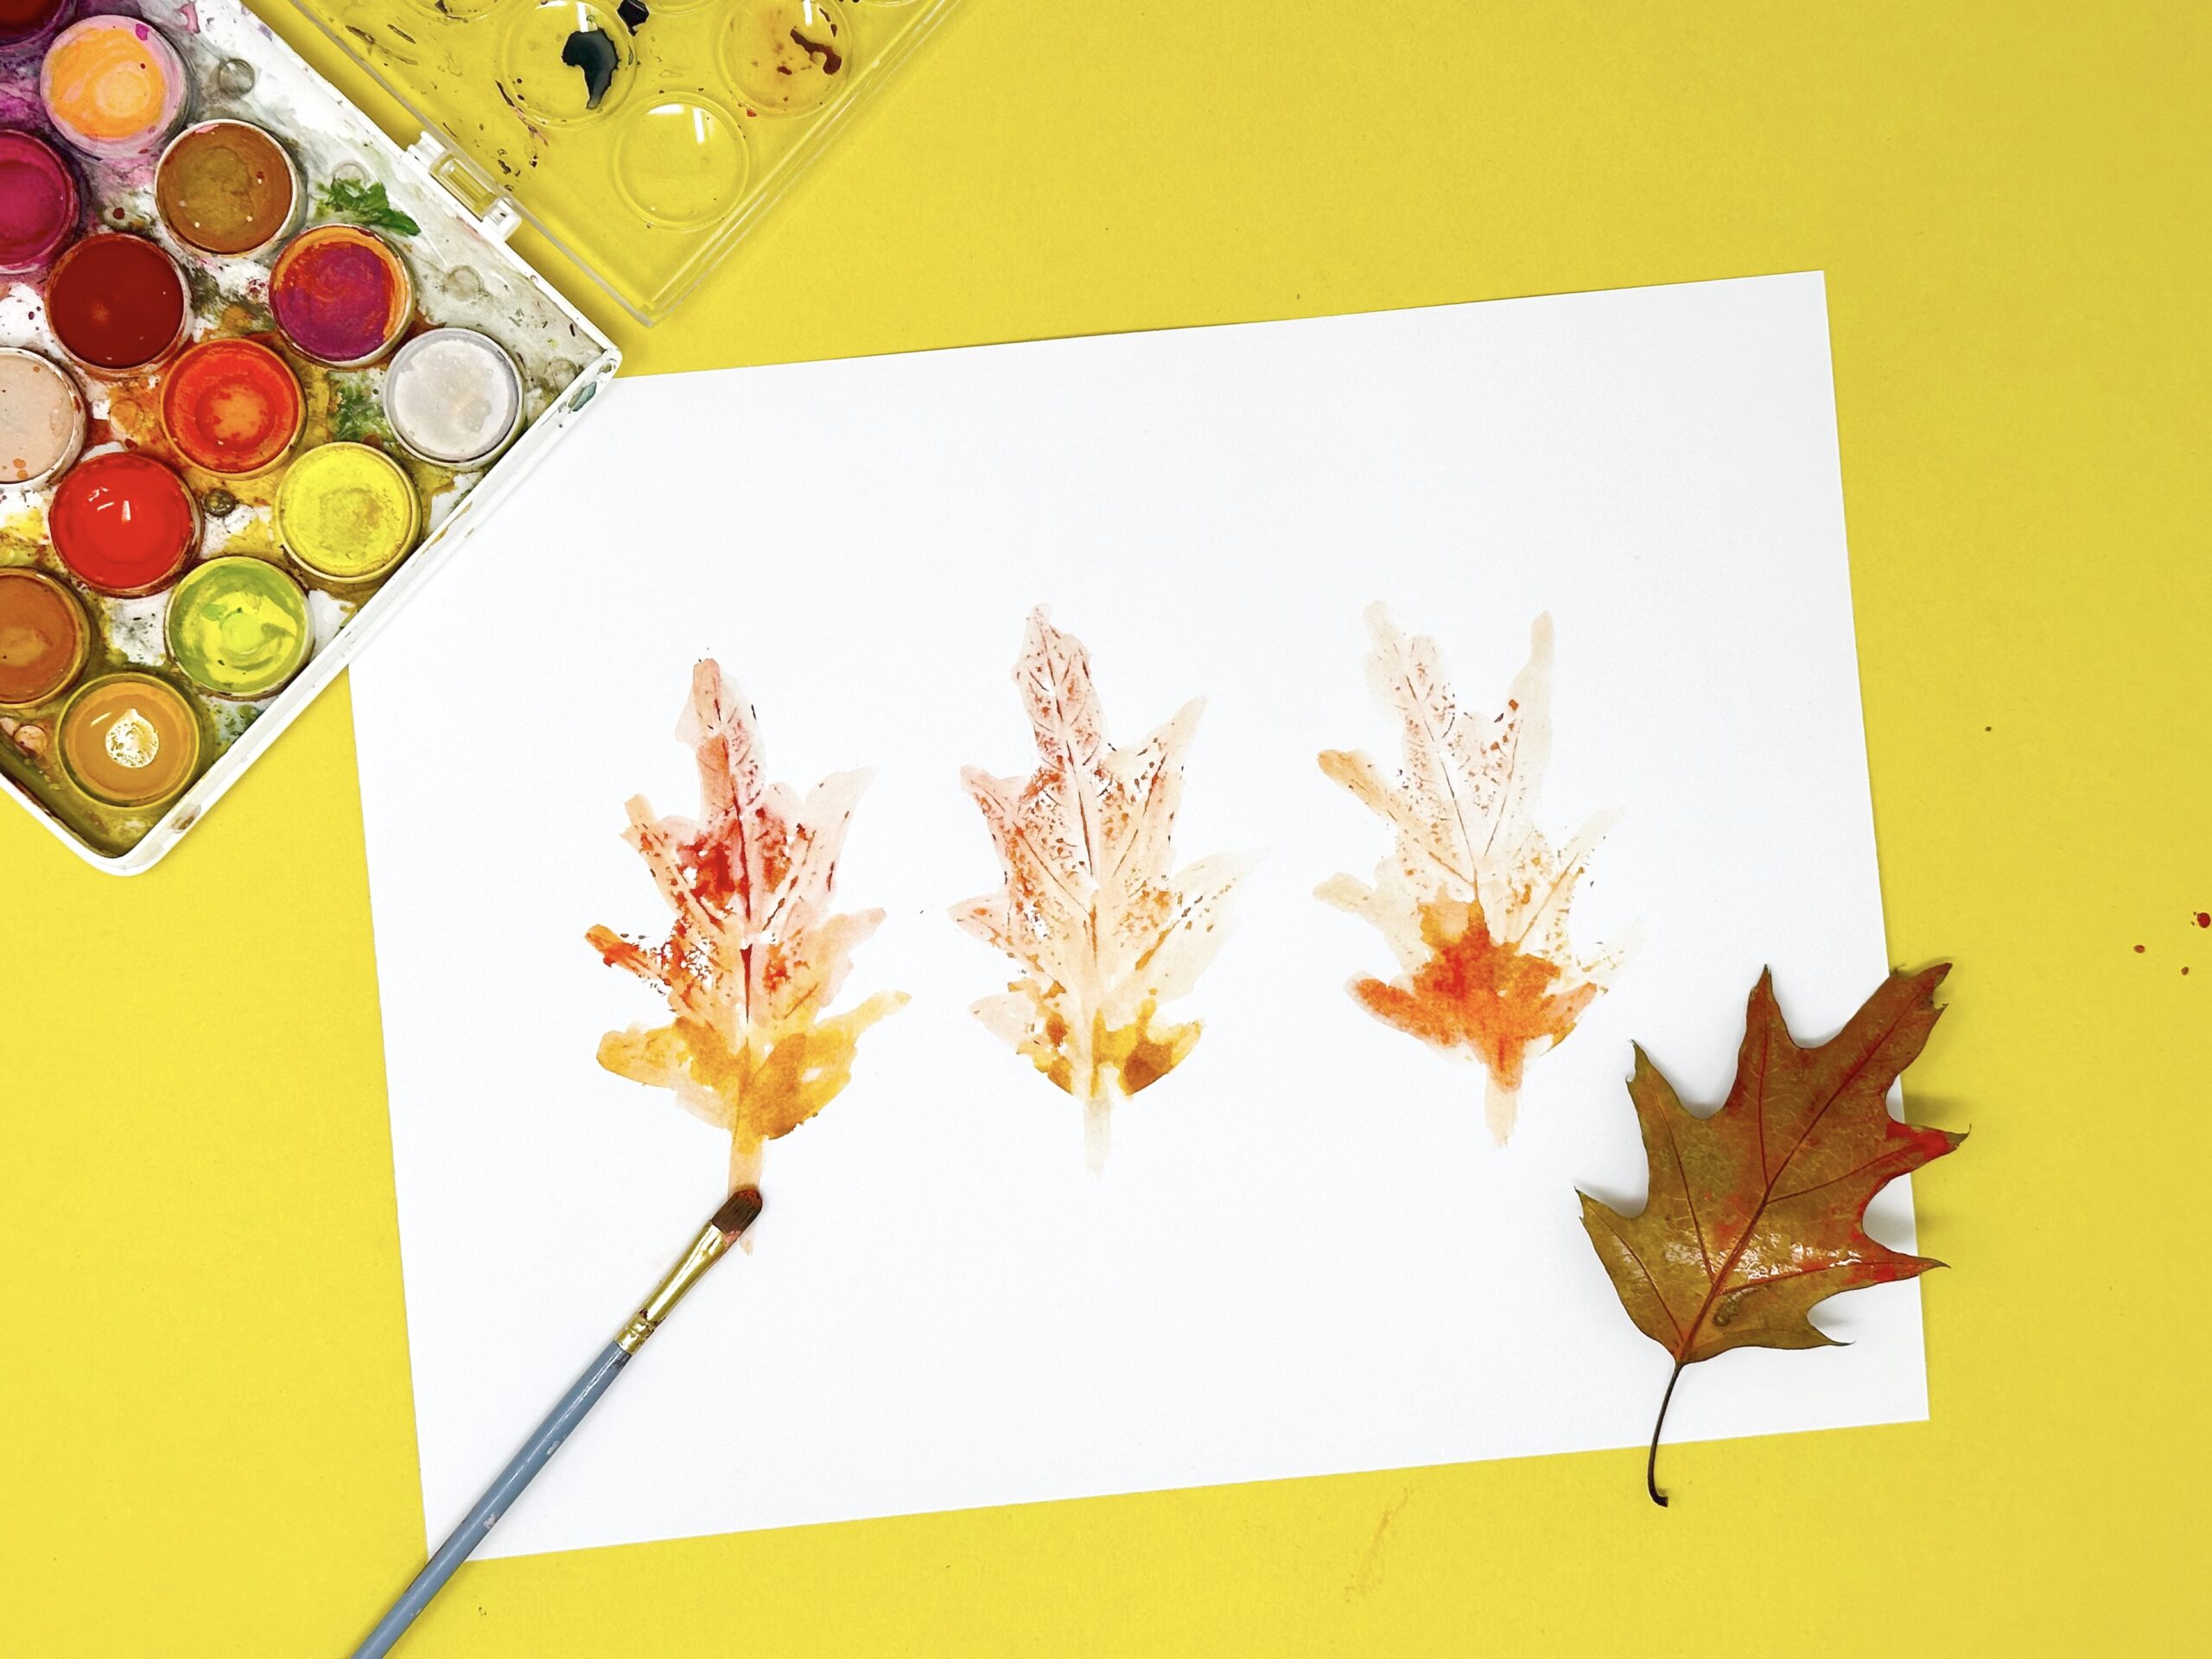
12. Leaf Prints
Supplies:
- leaves from outside
- paper
- paint
- paint brush
Instructions:
1. Gather up one or several sturdy leaves from outside.
2. Have your child paint the under side of the leaves (the side with more prominent veins).
3. Then, ask your child to press the paint-coated side of the leaves onto a sheet of paper, leaving behind unique and colorful leaf prints.
Tip: If using watercolor paint, be careful not to use too much water as it will make it harder for the paint to stick to the leaves. See additional leaf print techniques here!
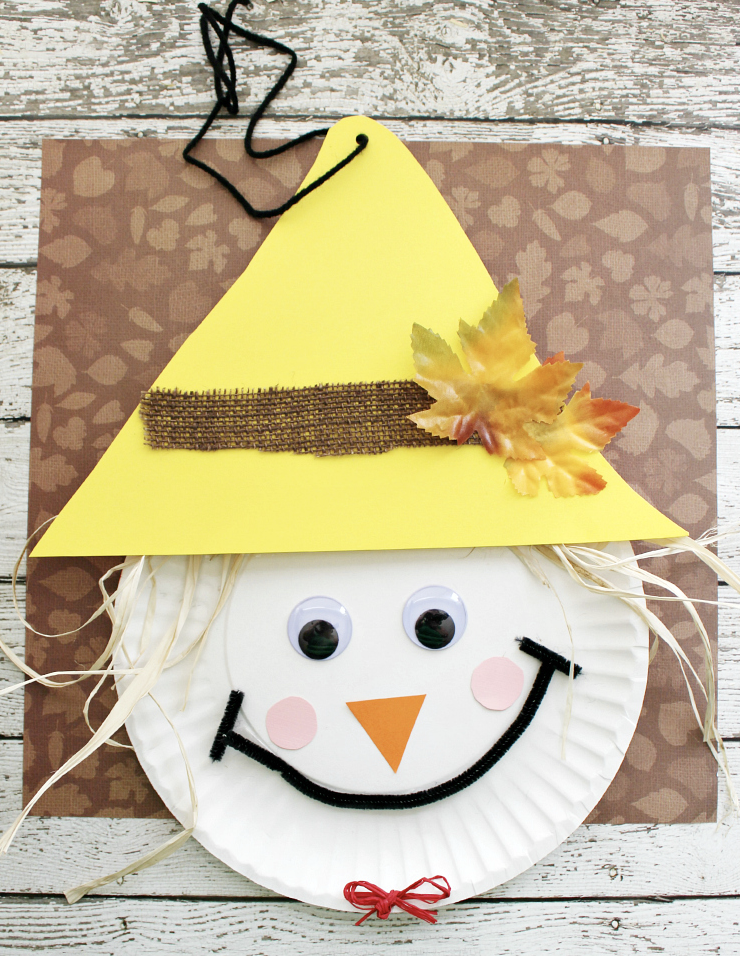
13. Paper Plate Scarecrow
Supplies:
- paper plate
- dried straw or hay
- yellow, orange, and pink construction paper
- googly eyes
- scissors
- glue stick
- black marker or pipe cleaner
- optional: pink crayon or paper for cheeks
Instructions:
1. Cut yellow paper into a triangle large enough to fit the paper plate. This will be the scarecrow’s hat.
2. Use the dried straw to glue the hair strips around the top edge of the paper plate.
3. Glue the yellow hat down over the hair, across the top of the plate.
4. Glue down googly eyes, an orange paper triangle nose, and pink paper circles for the cheeks.
5. Curve the pipe cleaner into a smile and glue it down onto the plate (watch out for potentially sharp ends!). You could also use a black marker to draw it in.
6. Let dry and hang your scarecrow for a festive fall decoration!
14. Pumpkin Apple Stamping

Supplies:
- paper
- orange and green paint
- apples sliced in half
- paper plate
- apple stem
Instructions:
1. Pour out a bit of the paint onto a paper plate.
2. Dip the apple half into one of the paint colors and gently press it onto the paper, creating a pumpkin-shaped print.
3. Take your apple stem and press it into the green paint (you can also try painting it on with a paint brush). Then press the stem down onto the paper above the pumpkin.
4. Let dry completely, then show everyone how you turned apples into pumpkins!
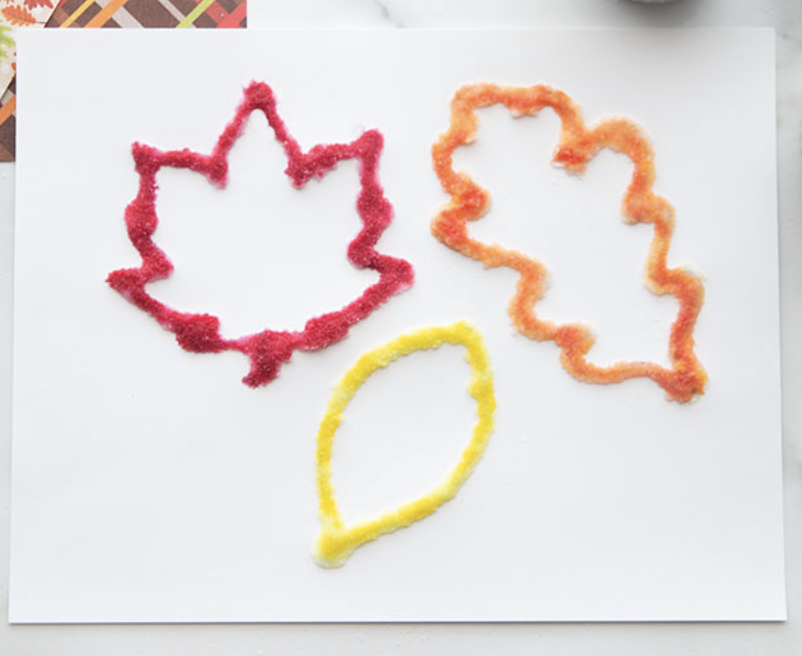
15. Leaf Salt Painting
Supplies:
- white card stock
- liquid school glue
- table salt
- watercolor paints or food coloring diluted with water
- paintbrush or dropper
- pencil (optional, for drawing leaf shapes)
- tray or shallow box (to catch excess salt)
Instructions:
1. Draw a leaf shape on your paper with a pencil—or use one of our free printable leaf templates as a guide.
2. Set your paper in a baking sheet to help contain the salt.
3. Trace the leaf shape with white glue, following the pencil lines carefully.
4. Place the paper on a tray and generously sprinkle salt over all the glue lines.
5. Gently tap off the extra salt and let the glue and salt dry slightly (about 10–15 minutes).
6. Dip your paintbrush into watercolor paint, and gently touch it to the salted glue lines.
7. Watch the color spread! Continue adding different colors until your leaf is complete.
8. Let dry completely, then display your sparkling salt leaf art!
16. Sunflower Paper Plate

Supplies:
- paper plate
- black marker
- yellow and brown paint
- craft glue
- sunflower seeds
Instructions:
1. Use a marker, pen, or pencil to draw a circle in the middle of the paper plate, as well as a series of petals around the edge. You can make the petals as big or small as you’d like.
2. Fill in the petals with yellow paint.
3. Mix some craft glue into your brown paint. Then use the mixture to paint the brown circle in the center of the flower.
4. While the glue/paint mixture is still wet, sprinkle sunflower seeds onto the middle of the plate and let them dry.
Tip: After completing this craft, keep little ones enjoying this flower with our free printable sunflower coloring pages.
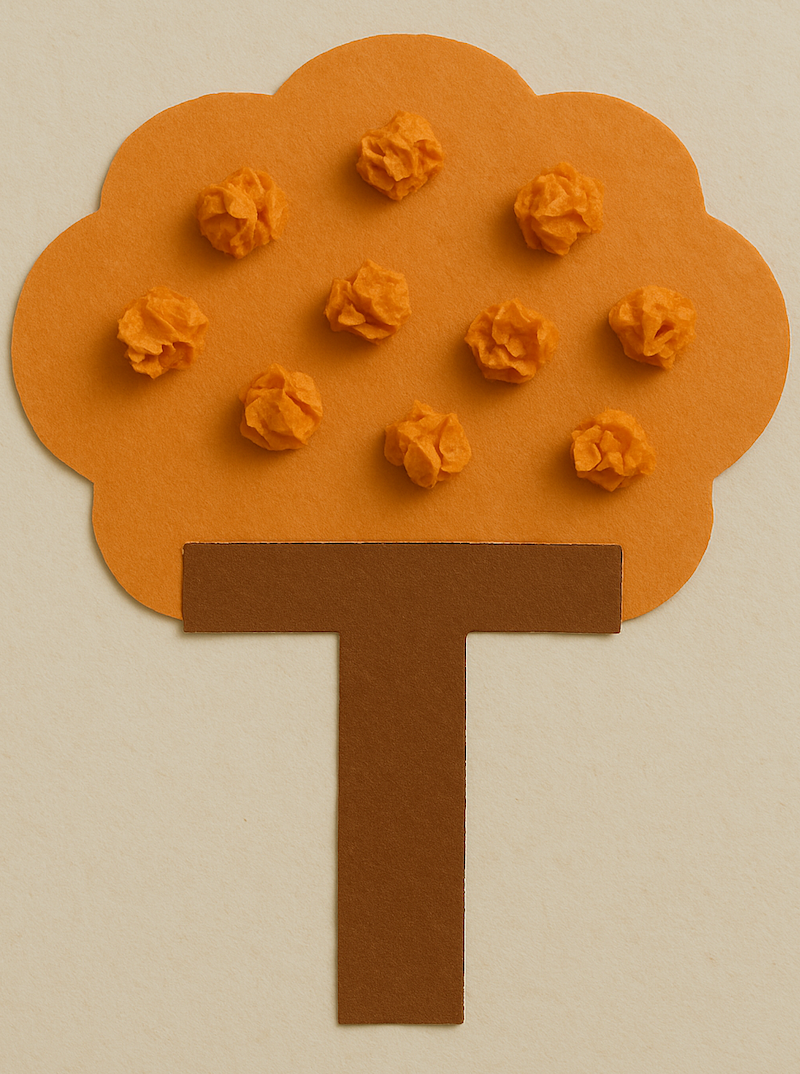
17. T is for Tree Fall Letter Craft
Supplies:
- brown and orange construction paper
- sheet of white paper
- scissors
- glue
Instructions:
1. Print out or draw an uppercase letter T onto a sheet of brown construction paper, then cut it out. Use our letter T outlines from this set of worksheets if needed.
2. Cut out a cloud shape from orange construction paper and glue it to the top portion of the letter T, forming the canopy of the tree.
3. Add texture (or leaves) by crumpling up small bits of orange paper and gluing them to the top of the tree.
Fall Crafts and Art Activities for Kindergarteners
Kindergarten is a great time for kids to try more hands-on projects, and fall is full of inspiration! These seasonal crafts give children a chance to cut, glue, paint, and create while exploring autumn themes like trees and pumpkins and even work in some letter recognition practice too.
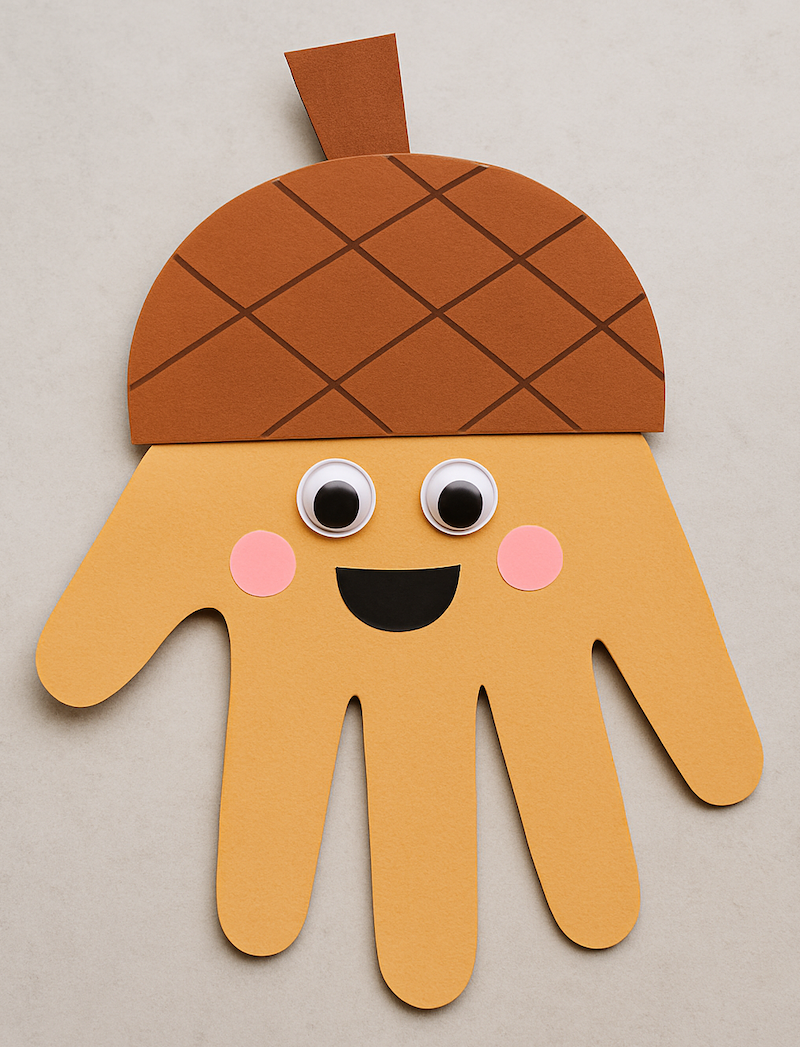
18. Hand Print Acorn
Supplies:
- tan, pink, and brown paper
- googly eyes
- glue
- black and brown markers
Instructions:
1. Trace your child’s hand onto the tan paper and cut it out.
2. Trace and cut out a semi-circle from the brown paper. The semi circle should be wide enough to fit the end of your child’s handprint.
3. Cut out a small tapered rectangle from the brown paper to be the acorn’s stem.
4. Cut out two small circles from the pink construction paper. You can also use pink marker to create the acorn’s rosy cheeks.
5. Assemble and glue down all the pieces, gluing on the googly eyes at the end.
6. Use a brown marker to draw the grid lines onto the acorn’s cap and a black marker to draw on a smile.
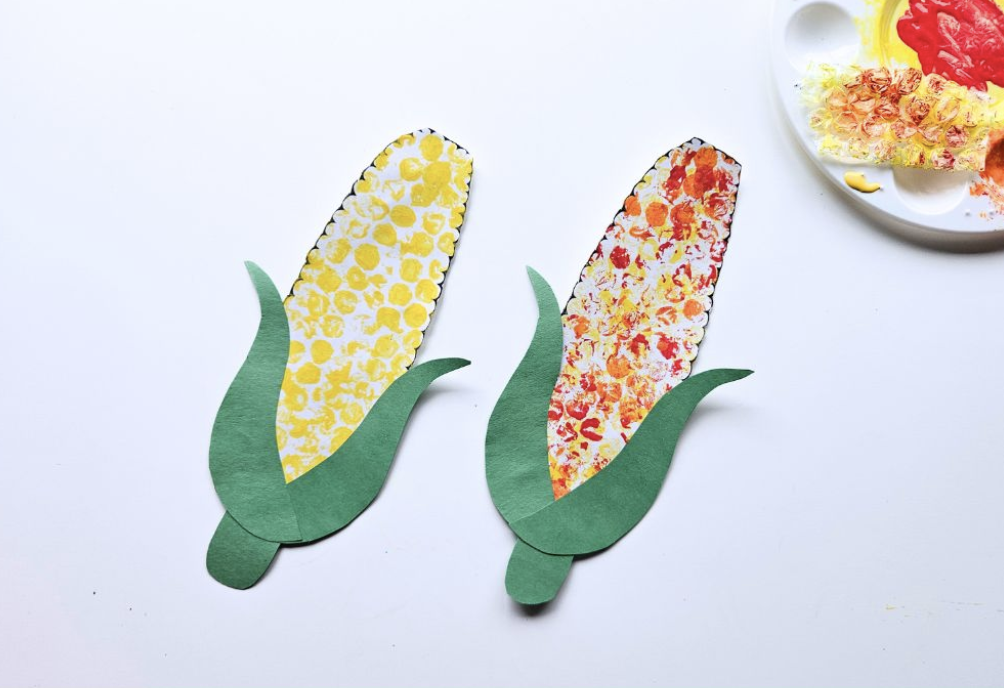
19. Bubble Wrap Corn
Supplies:
- white and green paper
- yellow, red, and orange paint
- bubble wrap (cut into small squares)
- paper plate
Instructions:
1. Draw and cut out the shape of a corn cob from the white paper.
2. Draw and cut out two corn husks and a stem from the green paper.
3. Squeeze the paint onto a paper plate.
4. Have your child gently dip a square of bubble wrap into the paint and press it onto their corn cob. Repeat this process until their satisfied with how their corn looks. Let it dry.
5. Glue the green paper husks and stem to the painted corn cobs and enjoy your corn masterpiece!
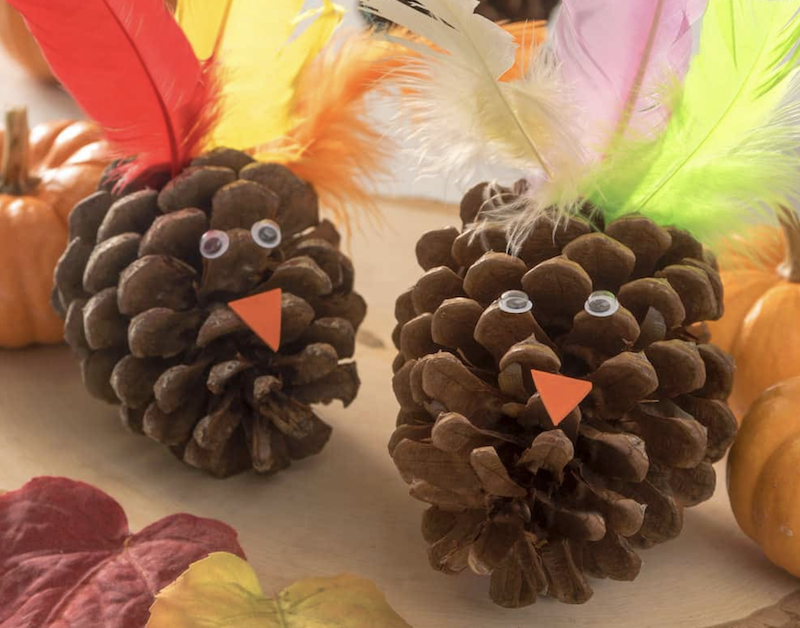
20. Pinecone Turkey
Supplies:
- pine cone
- feathers
- liquid glue
- paint brush
- colored paper
- scissors
- googly eyes
Instructions:
1. Turn your pine cone on its side so the bottom of it is facing you.
2. Have your child pick out the feathers they’d like to use on their pine cone turkey and cut out a small orange triangle to form the turkey’s beak.
3. Use the paint brush to brush the liquid glue onto the upper back of the pinecone. Place the feathers in the glue. Hold them in place briefly to dry a bit.
4. Glue the googly eyes to the front of the turkey and then add it’s beak.
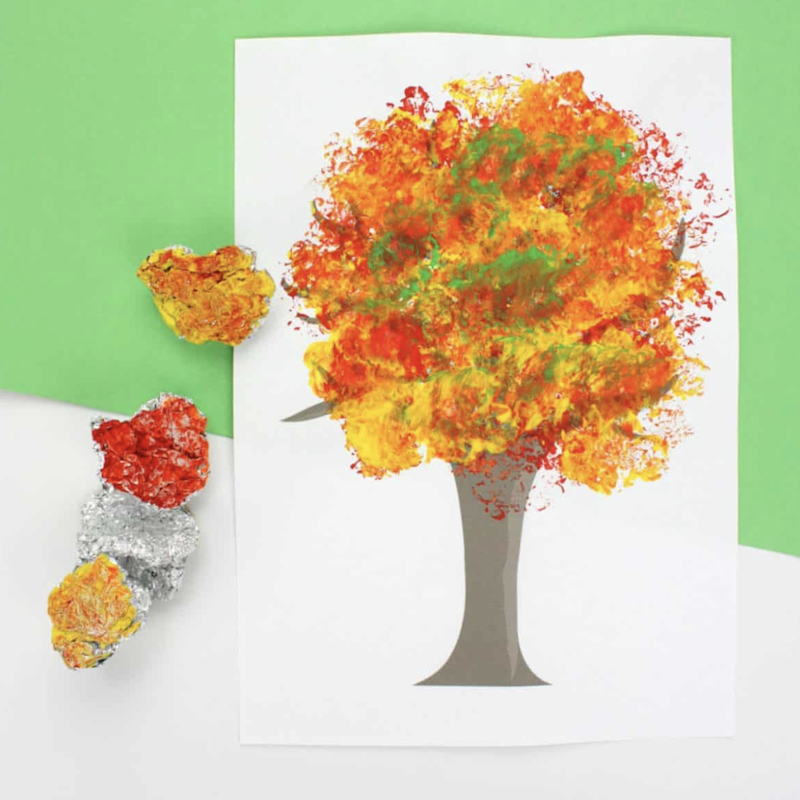
21. Foil Painted Tree
Supplies:
- white paper
- brown paper
- red, orange, and yellow paint
- paper plate
- tin foil
Instructions:
1. Cut out the shape of a tree trunk and glue onto the white sheet of paper.
2. Squeeze some of the paint onto a paper plate.
3. Rip off several small squares of tin foil and crumple them up slightly.
4. Have your child dip the foil into the paint and then onto the paper, creating fall colored leaves for their tree.
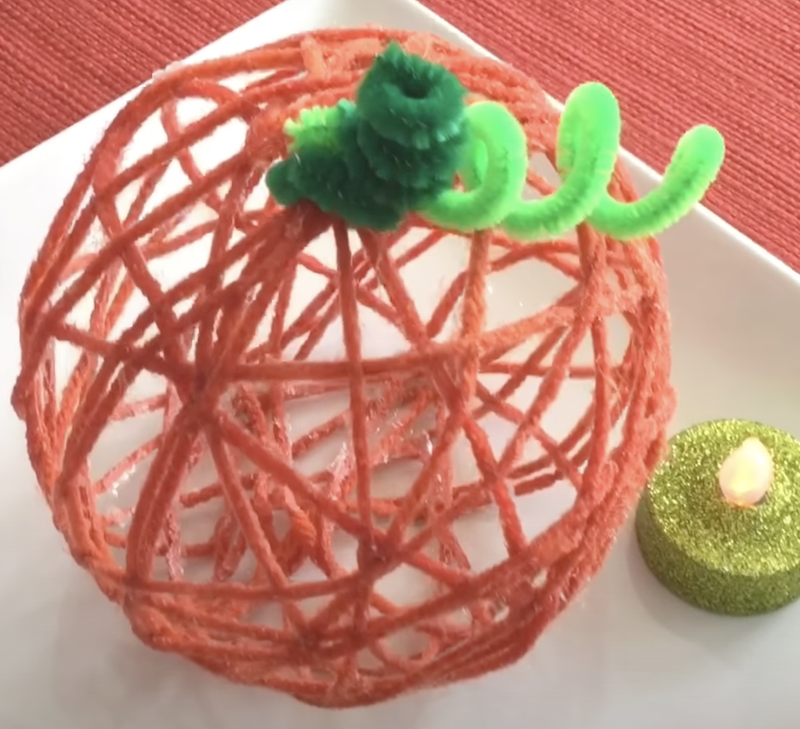
22. Yarn Pumpkin
Supplies:
- orange yarn
- balloon
- glue
- green pipe cleaners
- pencil
- disposable gloves
Instructions:
1. Blow up a small balloon to a round pumpkin-like shape and tie it.
2. Mix white glue with water (about 2 parts glue to 1 part water) in a bowl.
3. Dip orange yarn into the glue mixture and coat it fully.
4. Put on your disposable gloves. Wrap the gluey yarn around the balloon in different directions until mostly covered.
5. Let it dry overnight until the yarn hardens completely.
6. Pop and remove the balloon carefully from inside the hardened yarn shape.
7. Twist green pipe cleaners into a stem and curly vines, then insert them into the top of the pumpkin.
Tip: Watch a full video tutorial on creating the pumpkin yarn craft here.
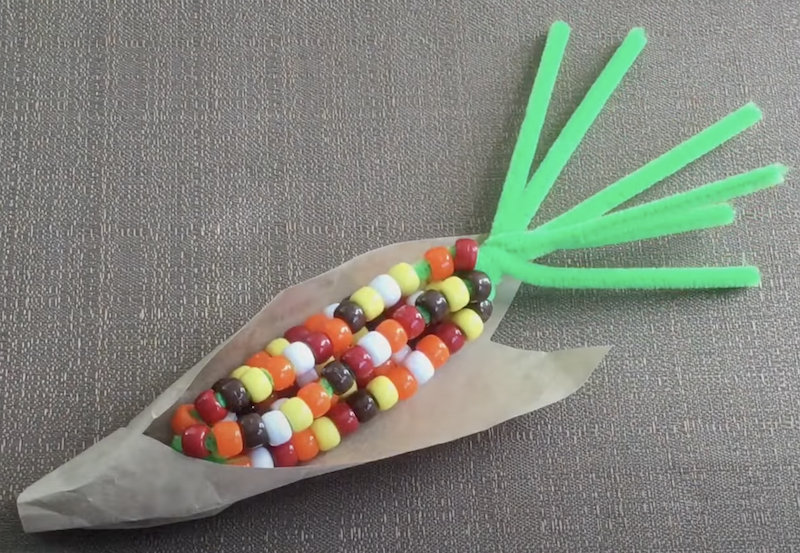
23. Bead Corn
Supplies:
- 6 green pipe cleaners
- assorted pony beads (about 100)
- scissors
- brown paper (optional)
Instructions:
1. String the beads onto the pipe cleaner. Repeat six times so you have six beaded pipe cleaners.
2. Group your six beaded pipe cleaners together and twist them together at the top and bottom to prevent the beads from falling off.
3. Trim the bottom ends of the pipe cleaners (leave the top ends long). Careful–the tips of the pipe cleaners will be sharp after they are cut!
4. Carefully bend the tips of the pipe cleaners you trimmed upward and towards the middle so that the sharp points will not stick out.
5. For an additional fun look, you can cut a piece of brown paper to wrap your corn cob in. A brown lunch bag or grocery bag can also work great for this.
Tip: We used 16 beads on each pipe cleaner in our example.
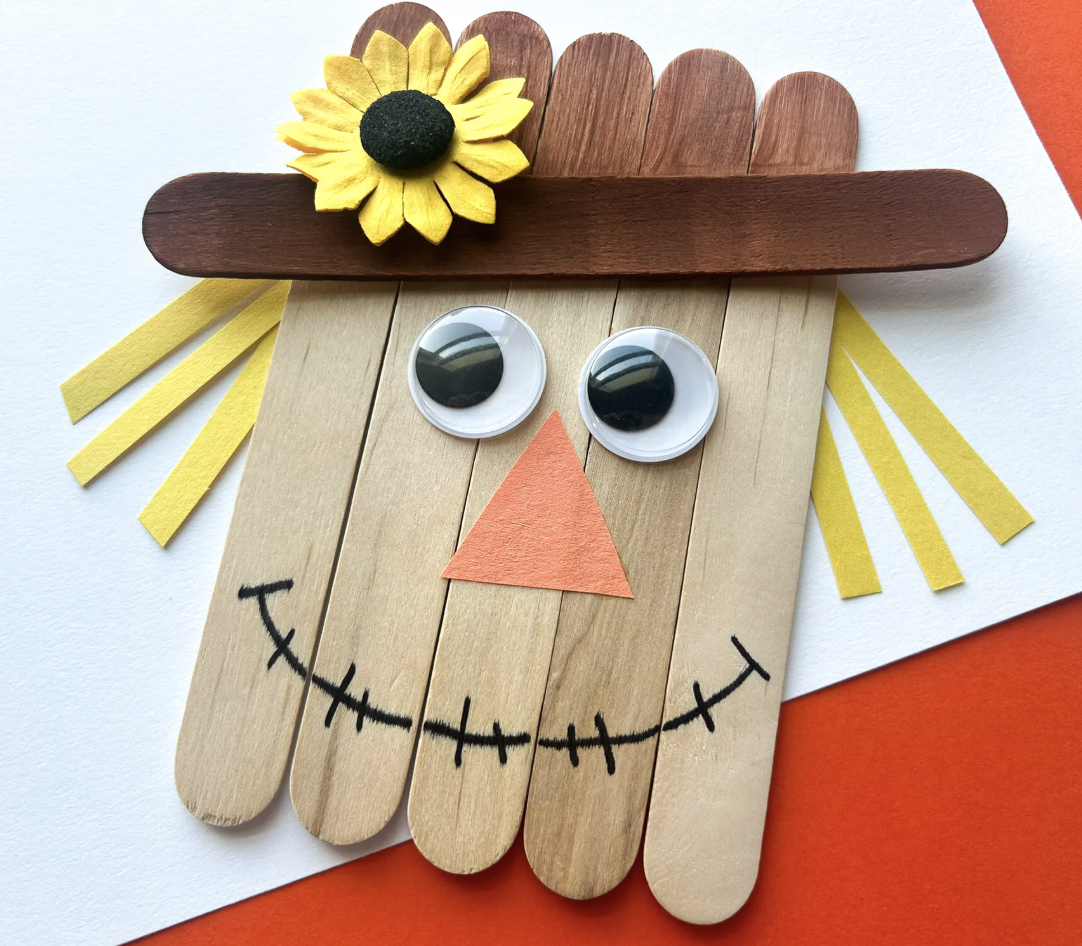
24. Scarecrow Popsicle Craft
Supplies:
- 6 craft sticks
- liquid glue
- card stock
- orange and yellow paper
- brown paint
- googly eyes
- black and orange marker
- dried or artificial flower (optional)
Instructions:
1. Line 5 craft sticks up on a piece of card stock and glue them down.
2. Place the last craft stick on a diagonal towards the top of the other craft sticks, forming the brim of the scarecrow’s hat.
3. Paint the “hat” portion of the craft sticks brown, leaving the rest unpainted.
4. Glue down googly eyes and any dried flowers or straw you may want to add to the scarecrow’s hat.
5. Cut a triangle from the orange paper to form the scarecrow’s nose and several thin strips of yellow paper for the scarecrow’s hair. Glue it all into place.
6. Use the black marker to draw a smile onto the scarecrow.
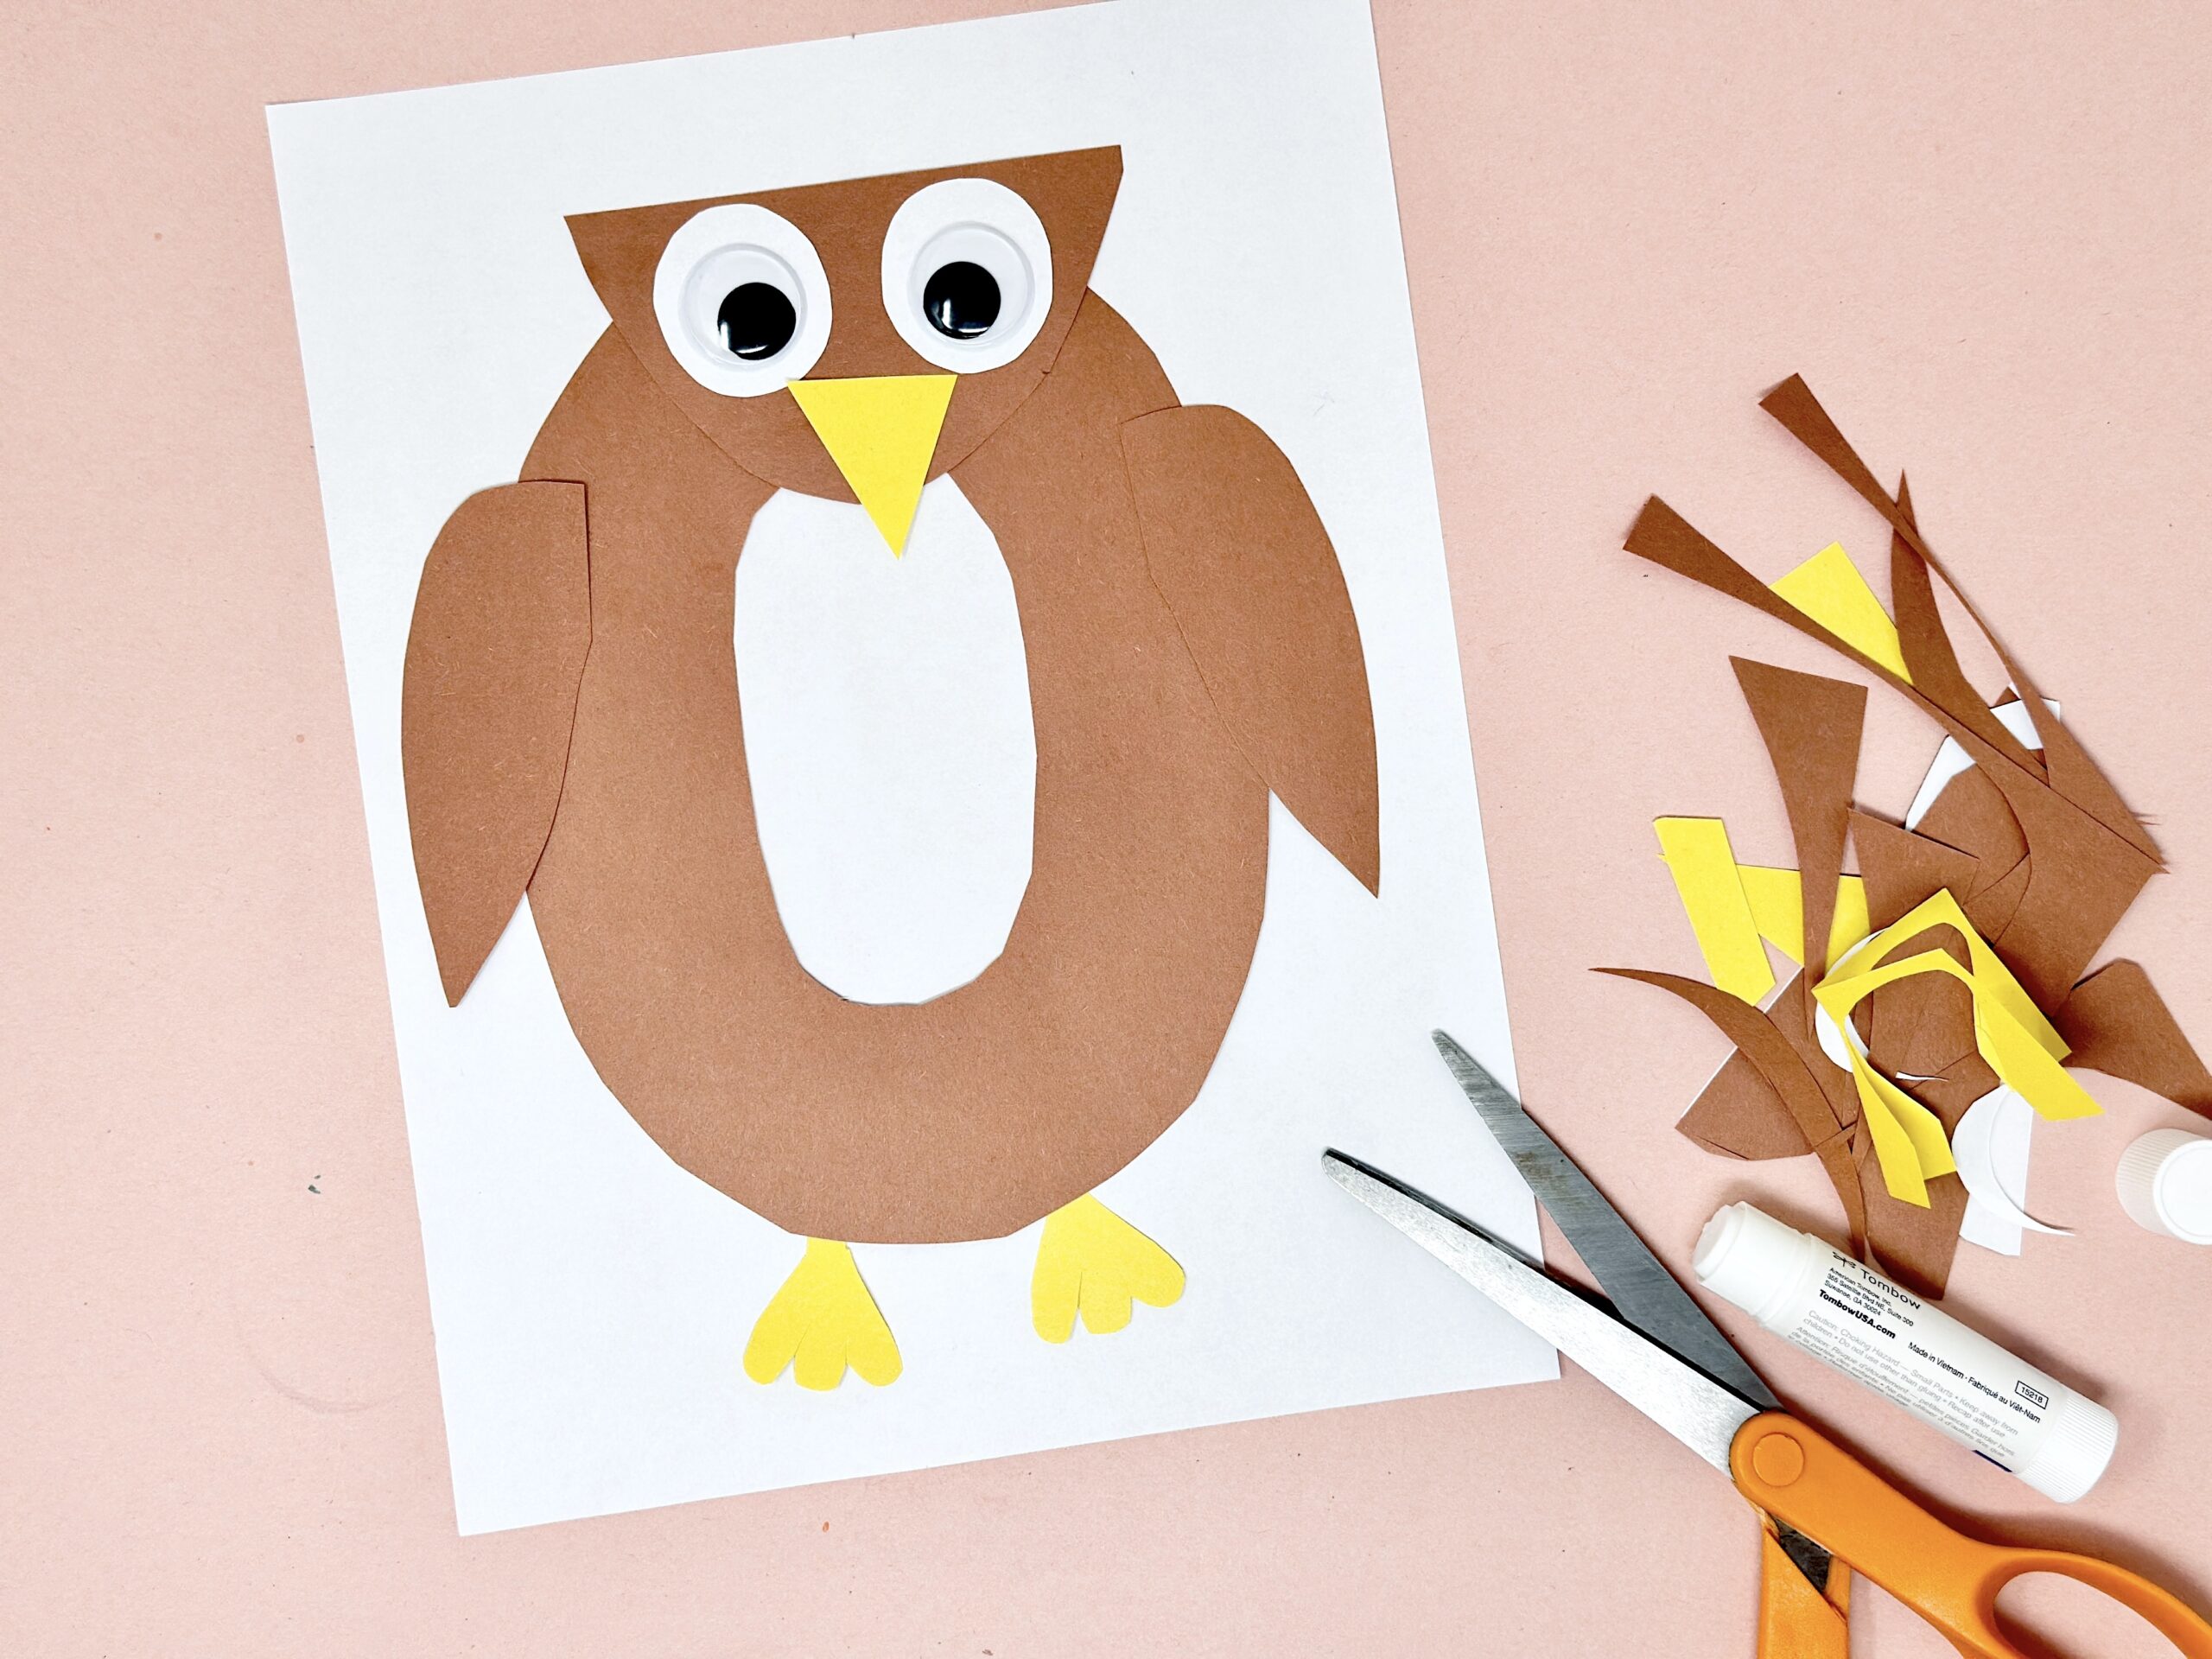
25. O is for Owl Letter Craft
Supplies:
- brown, white, and yellow construction paper
- scissors
- glue
- googly eyes
Instructions:
1. Trace the letter O onto a piece of brown construction paper and cut it out. Use a template from our free letter O worksheets if you’d like.
2. Cut out a semi-circle for the owl’s head and two long pointy ovals for its wings.
3. Cut out a yellow triangle for the owl’s beak and two triangles with a wavy edge for the owl’s feet
4. Cut out two white circles for the owl’s eyes.
5. Work with your child to assemble and glue down all the pieces of the owl, saving the googly eyes for the end.
Tip: Pair this craft with out free printable owl coloring pages for even more creative fun!
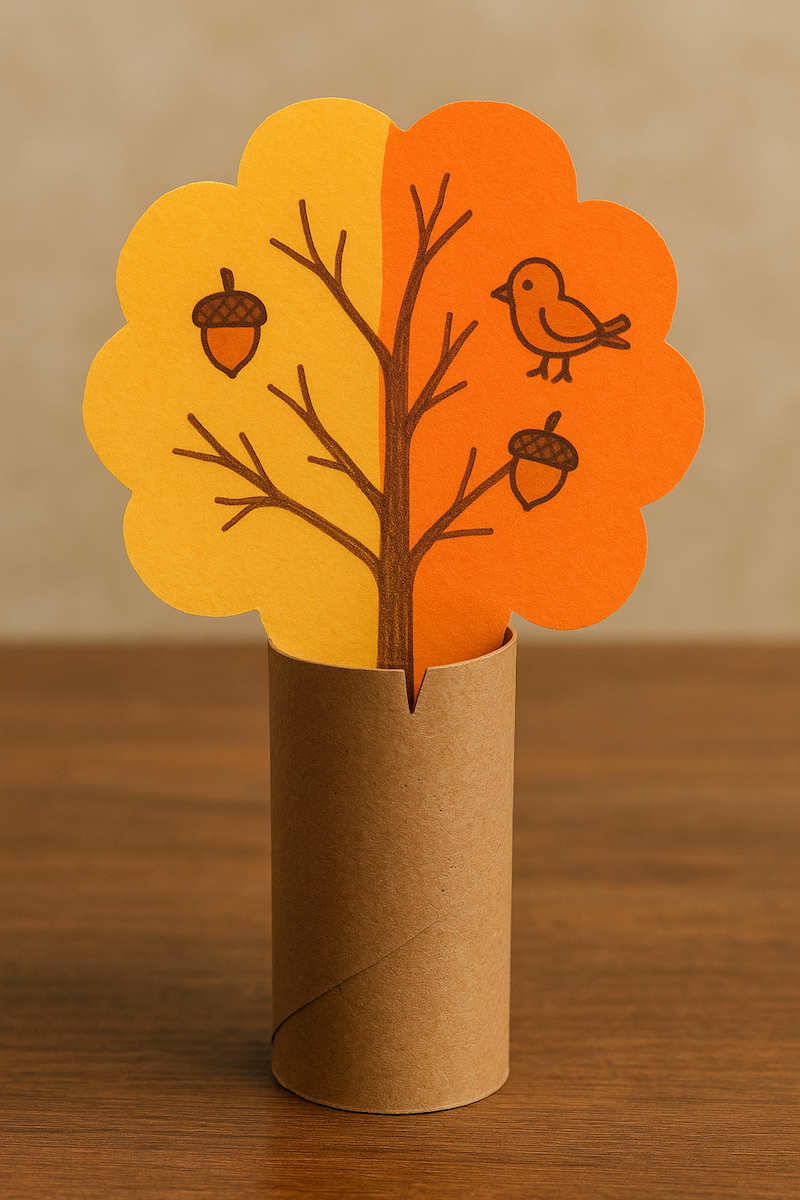
26. Toilet Paper Tube Tree
Supplies:
- brown toilet paper tube
- orange and yellow construction paper or white card stock
- liquid school glue
- scissors
- fall stickers
- markers or crayons
Instructions:
1. Use the orange and/or yellow construction paper to cut out a cloud shaped tree top. You can also trim and color a white piece of card stock, as we did here.
2. Use stickers of markers to decorate your tree top with branches, animals, acorns, and whatever else you’d like.
3. There are two different ways to attach the tree top to the toilet paper tube: 1) You can trim the bottom of your tree top to slide into the toilet paper tube. 2) You can cut slits into opposite sides of the toilet paper tube and slide the paper into them.
4. Create more trees each day until you have a forest!
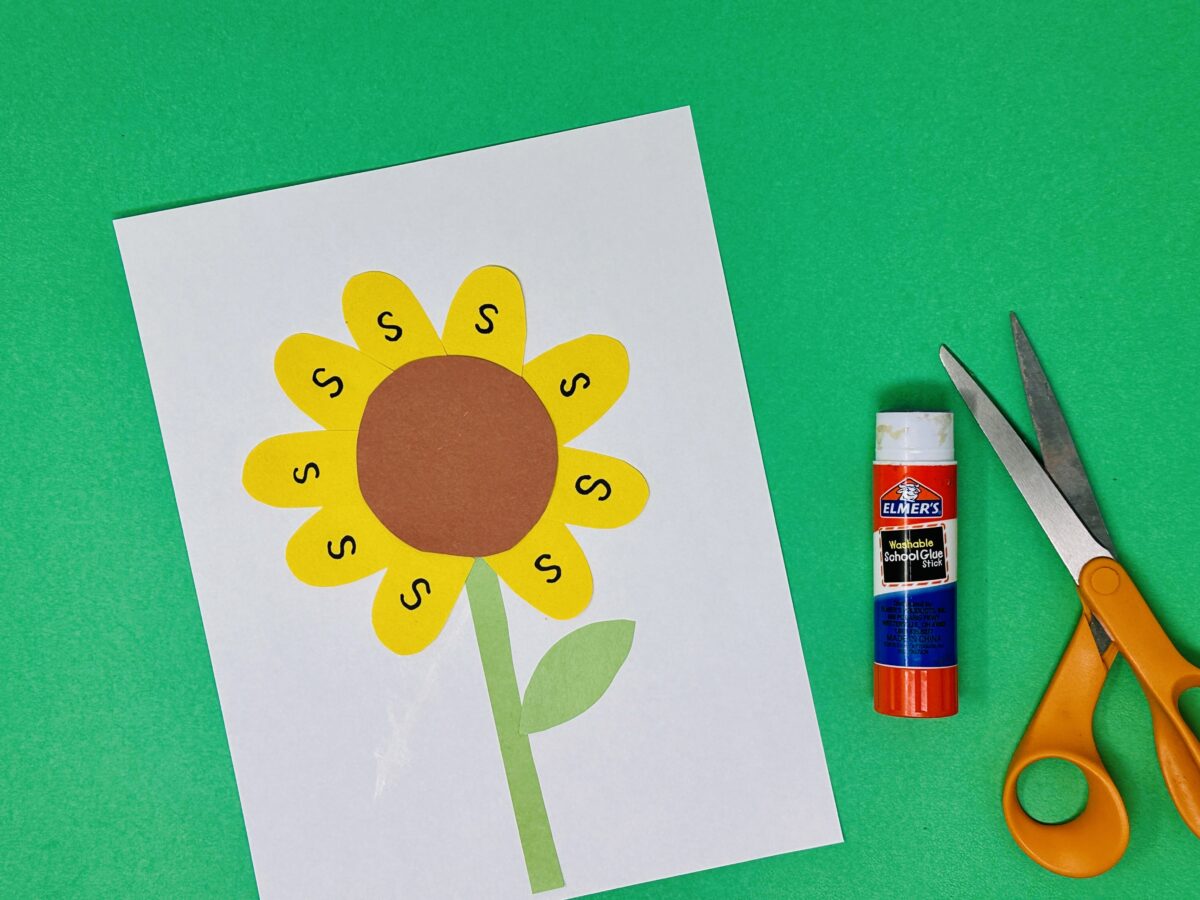
27. Sunflower Letter Craft
Supplies:
- yellow, brown, white, and green paper
- marker
- scissors
- glue
Instructions:
1. Cut out a circle from a brown piece of paper.
2. Cut out oval-shaped semi-circles from the yellow paper to create the sunflowers petals.
3. Cut out a long stem and leaf from the green paper.
4. Have your child assemble and glue down the sunflower parts.
5. Have your child assemble and glue down the sunflower parts.
6. Next, have them practice making the letter S shape in each sunflower petal, using a pencil, marker, or crayon.
Tip: Keep practicing with the letter S with out Letter S Worksheets.
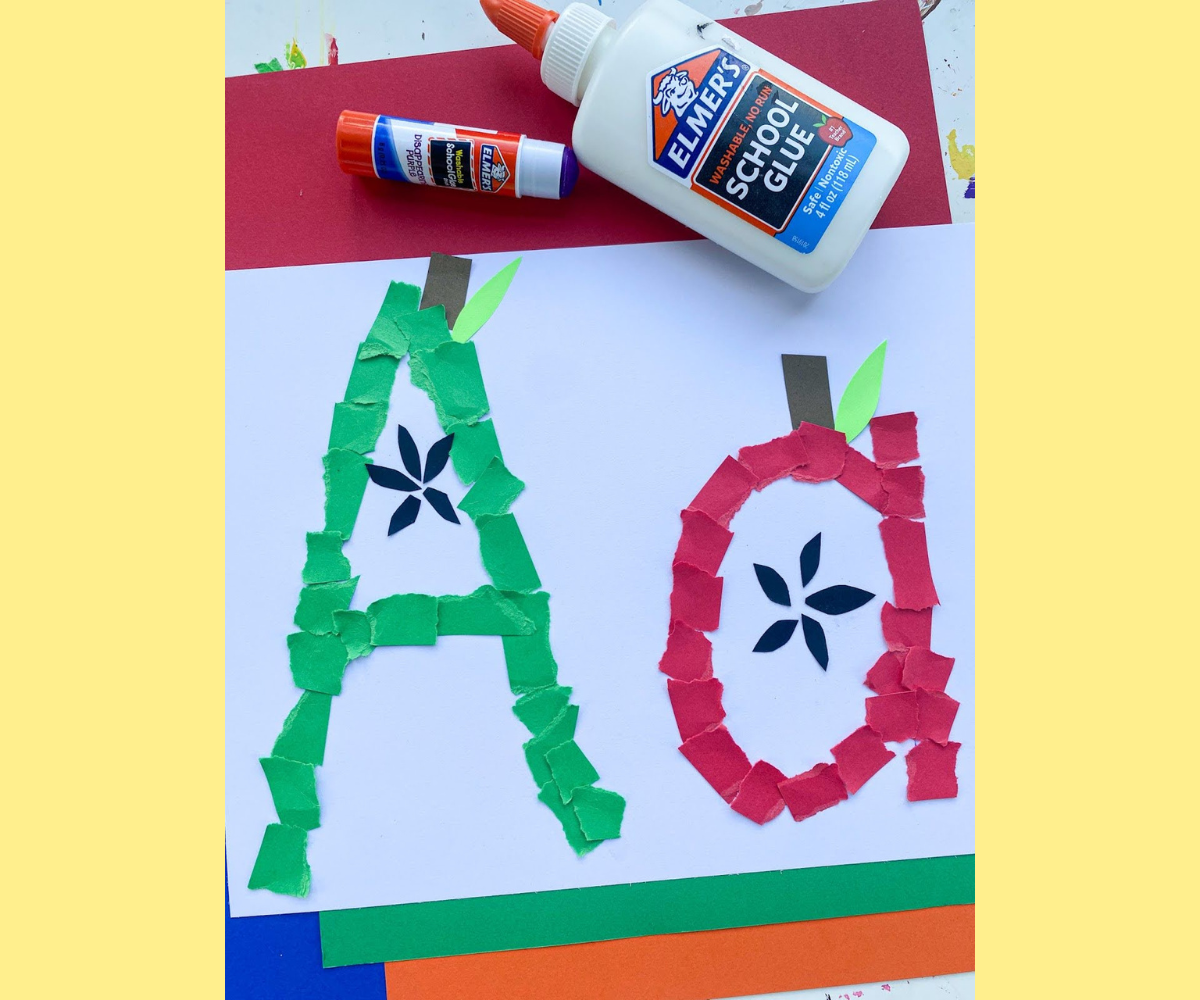
28. A is for Apple
Supplies:
- white card stock paper
- red, green, and brown construction paper
- marker
- glue stick
- scissors (optional)
Instructions:
1. Trace an uppercase and lowercase A onto the card stock.
2. Have your child cut or tear the construction paper into small pieces, then glue them over the letter shapes you traced. Use red for one letter and green for the other.
3. When they’re done, add brown stems and use a marker to draw little seeds inside as shown.
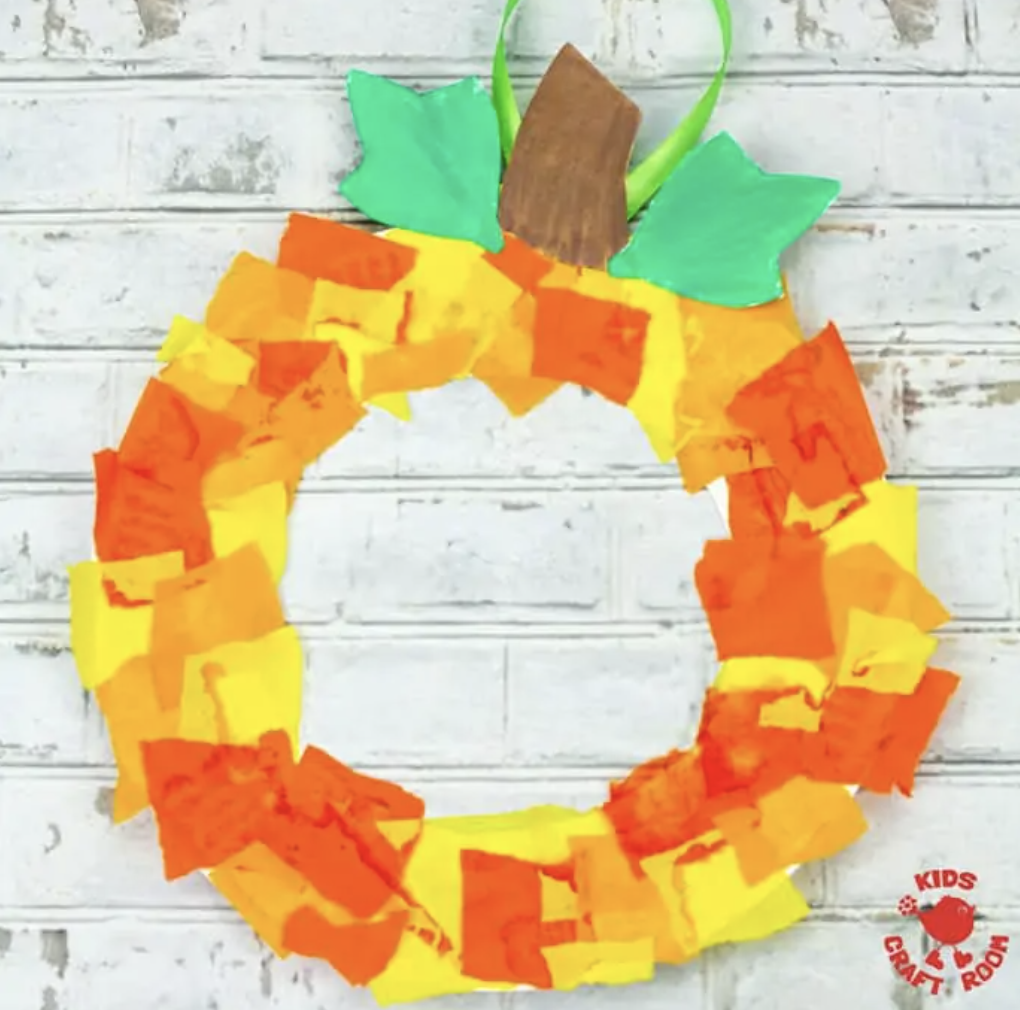
29. Paper Pumpkin Wreath
Supplies:
- 1 paper plate
- orange , green, and brown construction paper
- scissors
- glue stick or white glue
- pencil (optional)
Instructions:
1. Cut the center out of a paper plate to create a wreath ring.
2. Tear orange and yellow construction paper into small pieces.
3. Glue the orange and yellow pieces all around the paper plate ring to cover it completely.
4. Cut green leaves and brown stems from construction paper and glue them to the top of the wreath.
5. Add a string at the top for hanging.
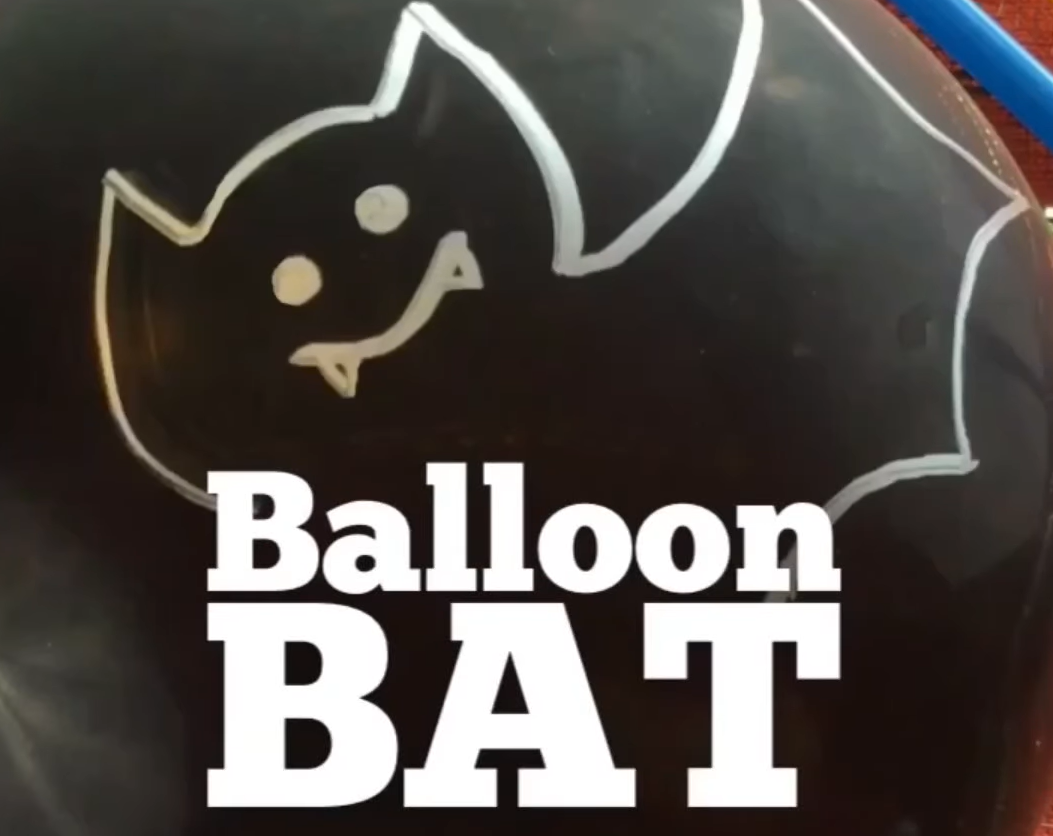
30. Balloon Bat
Supplies:
- dark-colored balloons
- binder clip
- tape
- silver marker
- string
- drinking straws
Instructions:
1. Wrap a piece of tape around the balloon’s neck (the opening) to make it sturdier for clipping.
2. Blow up the balloon to your desired size, but don’t tie it. Pinch the opening, fold it over a few times, and secure it with a binder clip.
3. On the opposite side of the balloon opening, use a marker to draw a bat—outline the wings, body, and head, then add eyes, ears, and a mouth.
4. Thread a long piece of string through a drinking straw. This will guide the balloon as it flies.
5. Tape the straw securely to the top center of the balloon (above your drawing) to ensure a straight flight.
6. Tie each end of the string to sturdy objects (like chairs or doorknobs) so it’s stretched tight and level.
7. Unclip the binder clip. The escaping air will propel your balloon bat along the string for a fun flying effect!
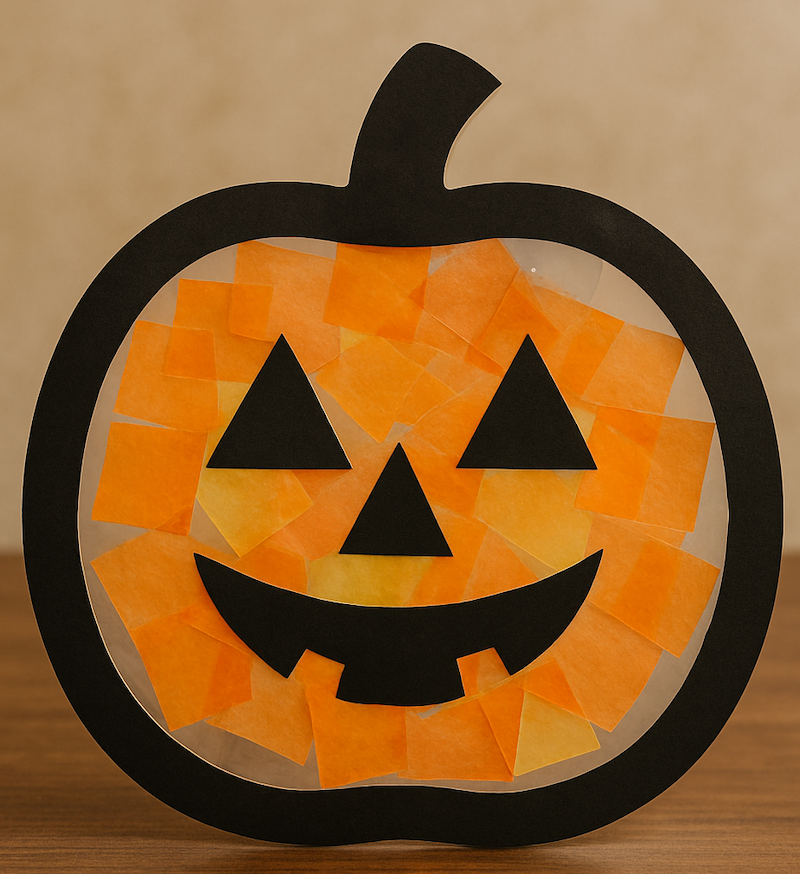
31. Pumpkin Suncatcher
Supplies:
- tissue paper
- black construction paper
- clear contact paper
- paper trimmer
- scissors
- masking tape
- sharpie
- pumpkin outline
- card stock (optional)
Instructions:
1. Cut a large pumpkin shape out of black construction paper, then cut out the inside to make a hollow frame.
2. Cut a piece of clear contact paper and stick it—sticky side up—behind the pumpkin frame. Trim the edges of the contact paper to fit the shape of your pumpkin outline.
3. Tear or cut orange tissue paper into small squares or strips.
4. Stick tissue paper pieces onto the sticky contact paper inside the pumpkin frame to fill it in completely.
5. Cut and add black face pieces (triangle eyes, nose, and smile) or make it plain.
6. Seal the back by placing another sheet of contact paper over the tissue-paper-filled side (sticky sides together).
7. Punch a hole or tape a string at the top to hang your pumpkin in the window.
Tip: Try using our pumpkin coloring pages to create a template – simply cut one out around the edges of the pumpkin and trace it.
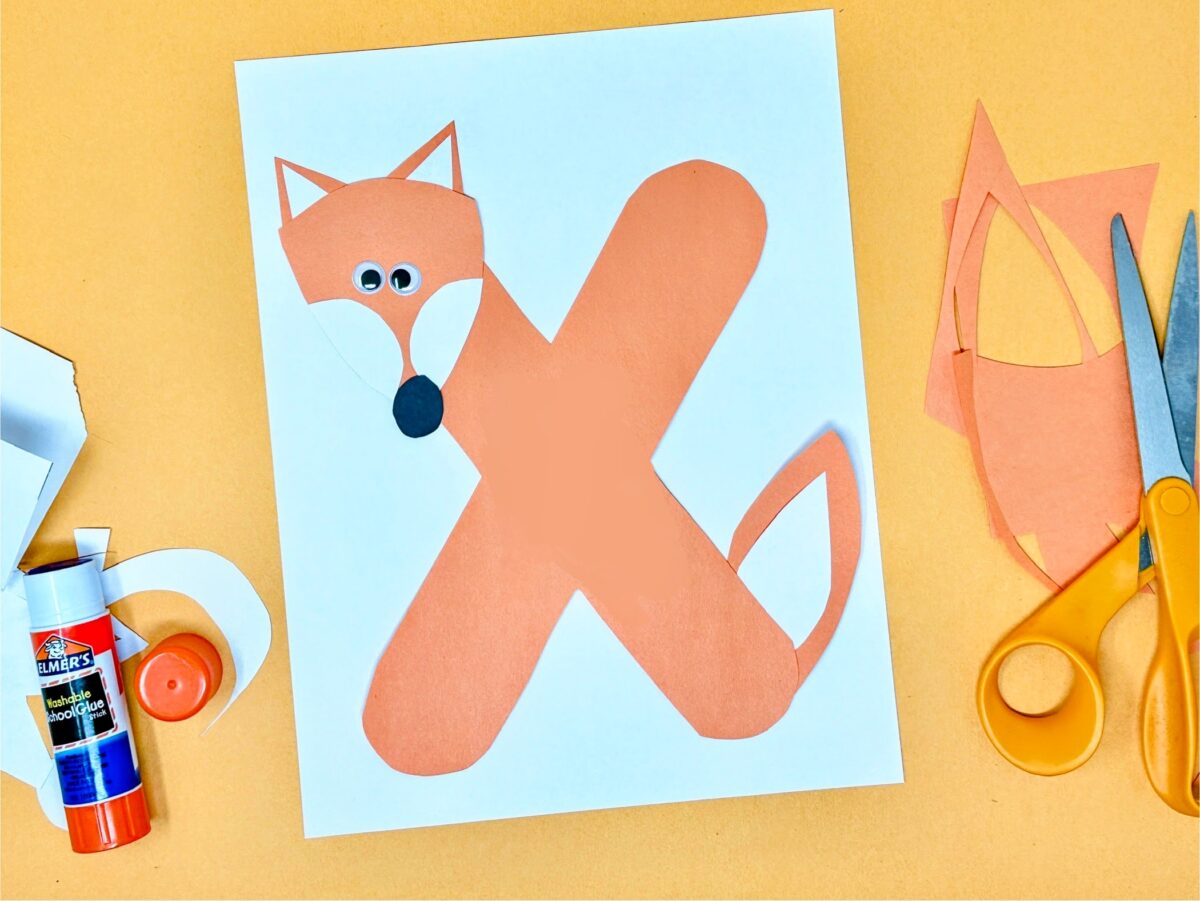
32. X is for Fox Fall Letter Craft
Supplies:
- orange, white, and black construction paper
- scissors
- glue
- googly eyes
Instructions:
1. Draw the shape of a letter X onto a piece of orange paper and cut it out (use our letter X template from above if you need something to trace).
2. Trace the shape of the fox’s head, tail, and ears onto the orange paper and cut them out (all of these shapes are slight variations on a triangle).
3. Cut out smaller white triangles to form the inner part of the fox’s ears and tail.
4. Cut out two oval semi-circles to form the fox’s cheeks.
5. Have your child assemble the pieces to create their fox, gluing them down when they’re ready.
6. Use a black marker or a black circular piece of paper to create the fox’s nose. Glue down googly eyes to complete the fox’s cute face!
Tip: Explore more foxes with our free printable fox coloring pages for kids!
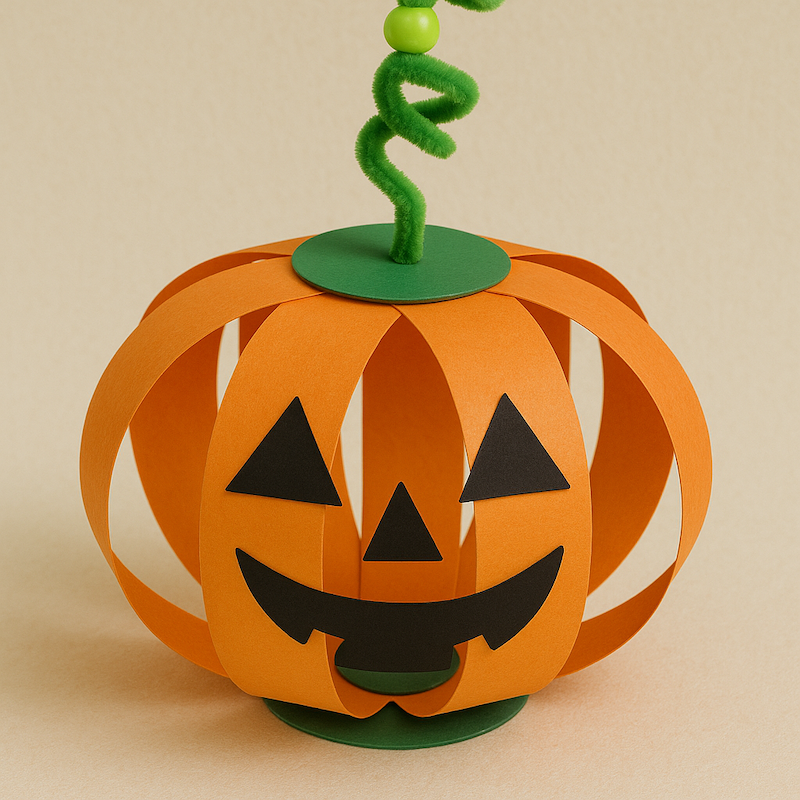
33. Paper Pumpkin
Supplies:
- green, orange, and black construction paper
- scissors
- green pipe cleaners
- pencil or pen
- hole punch
- beads
- glue stick
Instructions:
1. Start by taking two sheets of orange construction paper and layering them on top of each other. Cut four equal strips lengthwise from the paper.
2. Using the green construction paper, cut out two circles, each about 2.5 inches in diameter.
3. Take each of the orange strips and use a hole punch to punch holes at both ends of the strips. The holes should be about 3/4 of an inch from the ends. Then punch a hole in the center of each green circle—this is where you will thread the pipe cleaners through.
4. Take one of the green circles and thread a pipe cleaner through the center hole. Bend the pipe cleaner into a U shape underneath the circle to secure it in place. This will be the base of your pumpkin.
5. Take the other end of the pipe cleaner and thread it through one end of all the orange strips. Once all the strips are threaded onto the pipe cleaner, thread the pipe cleaner through the holes on the other end of the strips. Finally, thread it through the hole in the second green circle, which will be the top of your pumpkin.
6. Once the pipe cleaner is threaded through the top green circle with about 4-5 inches to spare, you can add some beads onto the end of the pipe cleaner.
7. Now take a pencil or pen and wrap the remaining pipe cleaner around it to create a curly stem. Once it’s twisted, slide the pencil out, and your stem will have a fun, curly shape, adding character to your pumpkin.
8. Gently spread out the orange paper strips in all directions to form a round pumpkin shape. The strips should fan out evenly from the top to the bottom, creating the body of your pumpkin.
9. Using black construction paper, cut out shapes to create a spooky or silly face for your pumpkin. You can also use markers if you prefer. Glue or tape the face onto one of the orange strips of your pumpkin.
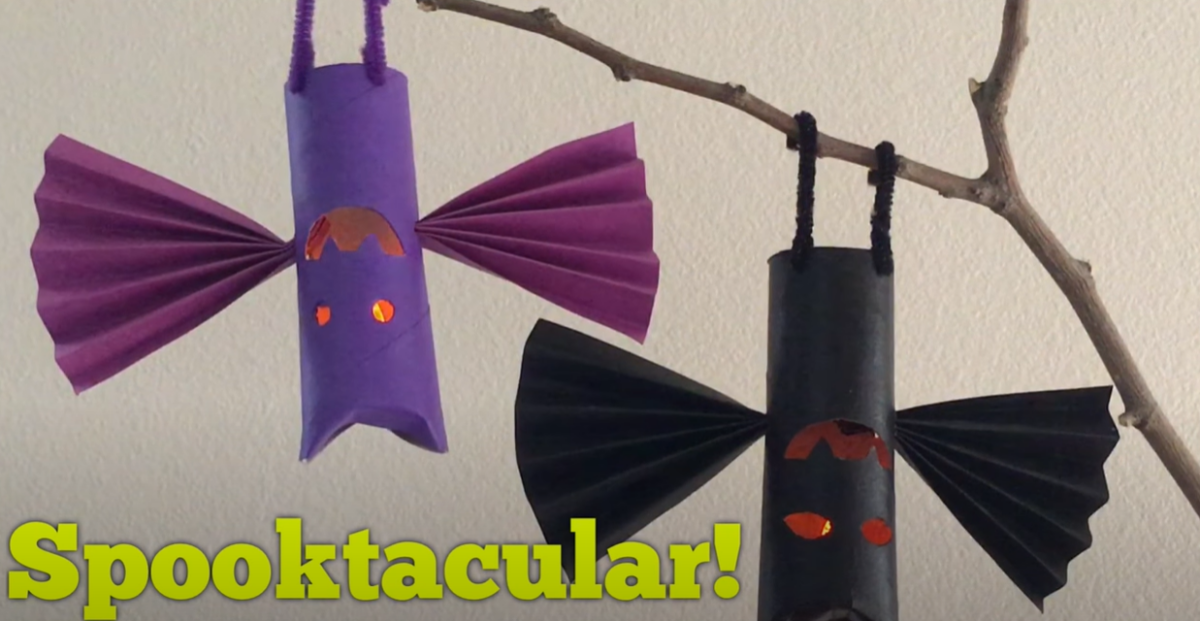
34. Hanging Bat Craft
Supplies:
- Paper towel tube (or toilet paper roll)
- Black or purple acrylic paint
- Construction paper (black or purple)
- Pipe cleaners
- LED tea lights
- Scissors
- Pencil
- Glue
- Water and paper towels (for cleanup)
Instructions:
1. Begin by gathering your materials and preparing your workspace. Lay down newspaper or a plastic tablecloth to protect your surface from paint.
2. Cut the paper towel tube in half. You can make two bats or save one half for later.
3. Paint the outside of the cardboard tube with black or purple acrylic paint. Let it dry completely. Apply a second coat if needed.
4. Once the paint is dry, draw simple facial features—eyes, nose, and mouth—on the front of the tube using a pencil. Then, with adult help, cut out the shapes to create the bat’s face.
5. Fold the top and bottom edges of the tube inward slightly to give your bat a more finished shape.
6. Cut two squares from your construction paper and fold each one accordion-style to make the wings.
7. Make a small slit on each side of the painted tube. Insert the folded wings into the slits and secure them with glue if needed.
8. Cut two pieces of pipe cleaner for legs. Attach them to the bottom of the tube by poking small holes or gluing them in place. Bend the ends so the bat can hang from a branch or shelf.
9. Turn on your LED tea light and insert it into the bottom of the tube. The light will glow through the face cutouts.
10. Hang your bat from a branch or hook and enjoy your glowing Halloween decoration!


Legal Disclaimer: Any links to third-party resources are provided for informational purposes only. We are not affiliated with and do not sponsor/endorse these third parties and bear no responsibility for the accuracy of content on any external site.
-

Father’s Day Craft for Kids: Create a Dad Frame
Create a heartfelt Father’s Day photo frame craft kids can make with simple supplies, family photos, and easy step-by-step instructions.
-

Kids Science Experiment: How to Build a Simple Catapult
Build a craft stick catapult in this fun STEM activity for kids. Launch pom-poms and explore force, motion, and simple engineering concepts.
-

20+ Homemade Mother’s Day Card Ideas
Creative homemade Mother’s Day card ideas for kids, from flower crafts to heart designs and easy printables for meaningful, handmade gifts.
-

20+ Plant Science Experiments & Activities for Kids and Toddlers
Explore 20+ easy plant science experiments for kids, from growing seeds to photosynthesis, with simple supplies and hands-on learning at home or school.
-
30+ Flower Crafts for Kids: Easy Ideas for Preschool and Up
30+ flower crafts for kids—easy ideas for preschool, kindergarten, and beyond. Includes paper flowers, spring projects, and fun Mother’s Day crafts using simple materials.
-
40 Easter Crafts for Kids (Easy DIY Ideas)
40 fun and easy Easter crafts for kids, from bunnies and chicks to egg decorating and DIY baskets—perfect for home or classroom creativity.