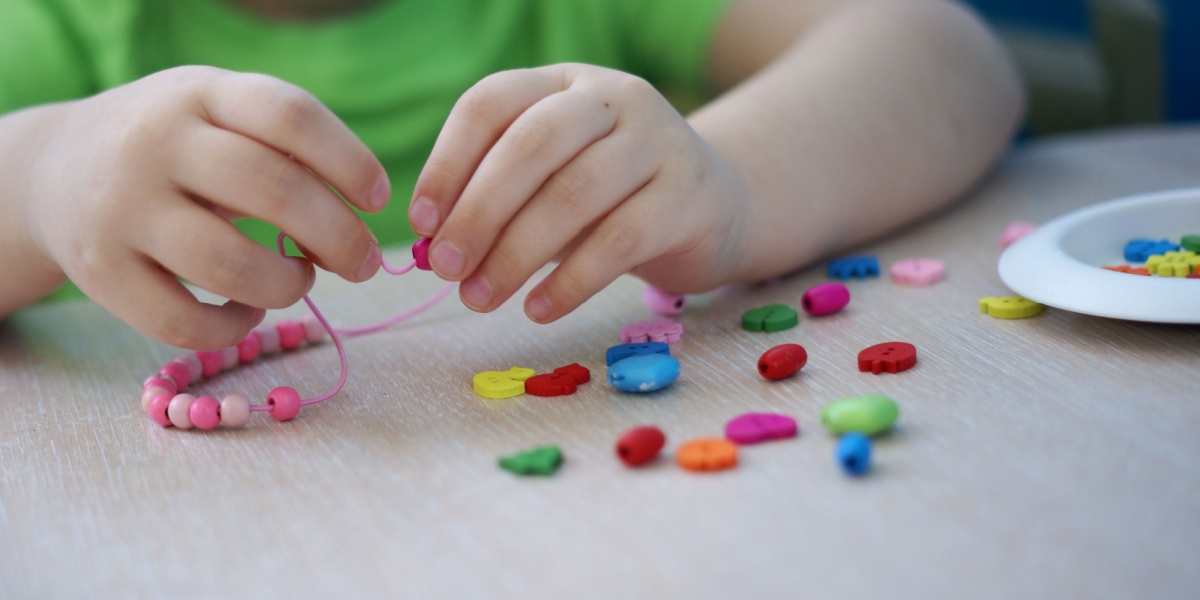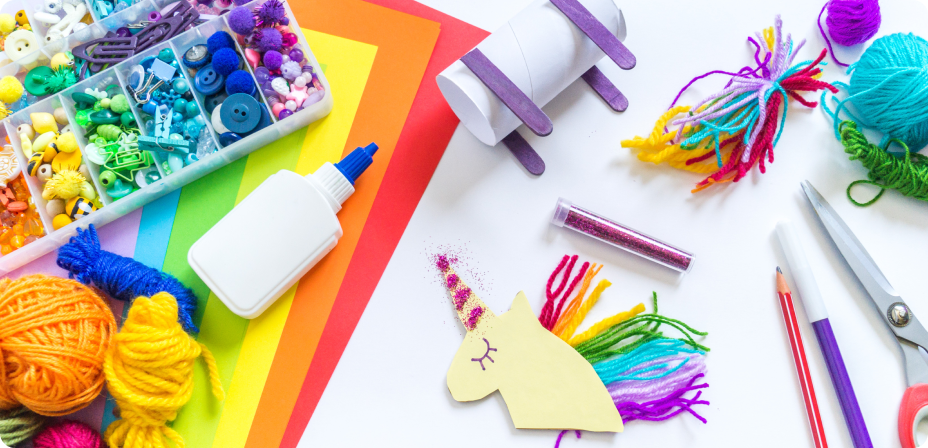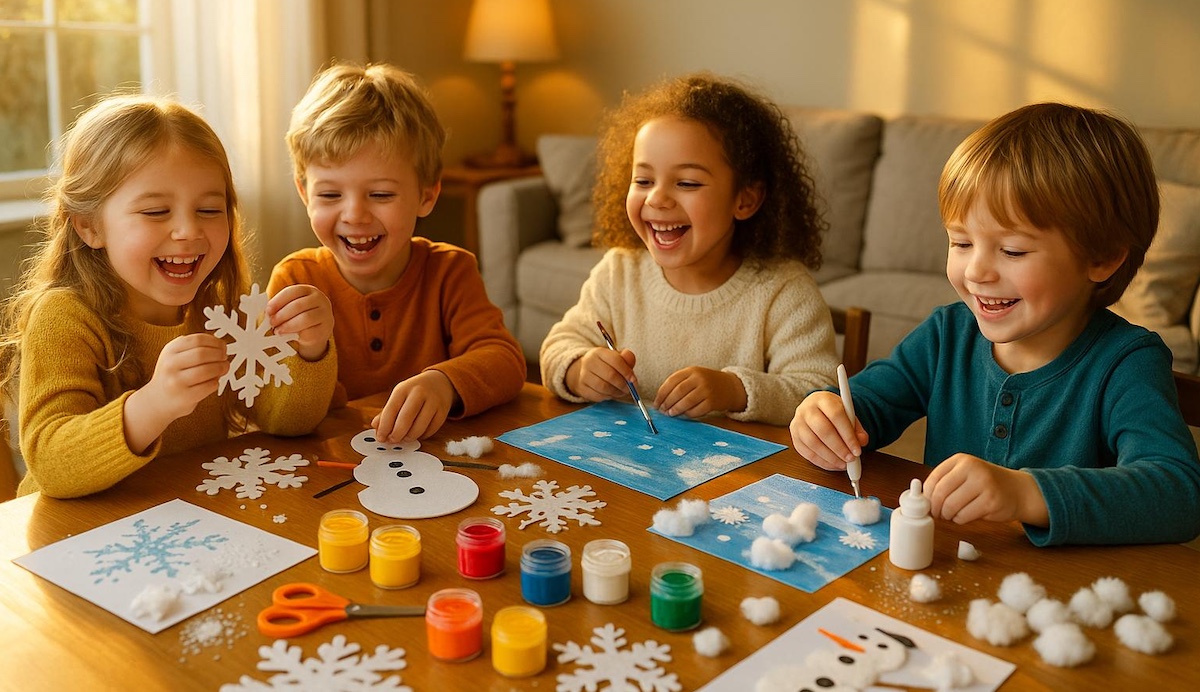
30+ Winter Crafts and Activities for Kids and Families
Share
Use these crafts and activities to beat the winter blues and keep kids and adults alike entertained. Pick from creative and educational hands-on activities, printable coloring pages, puzzles, and more, and tasty treats you can DIY at home together. Try them all for some family fun all winter long!
Hands-on Winter Crafts for Kids and Families
Paper Plate Penguin
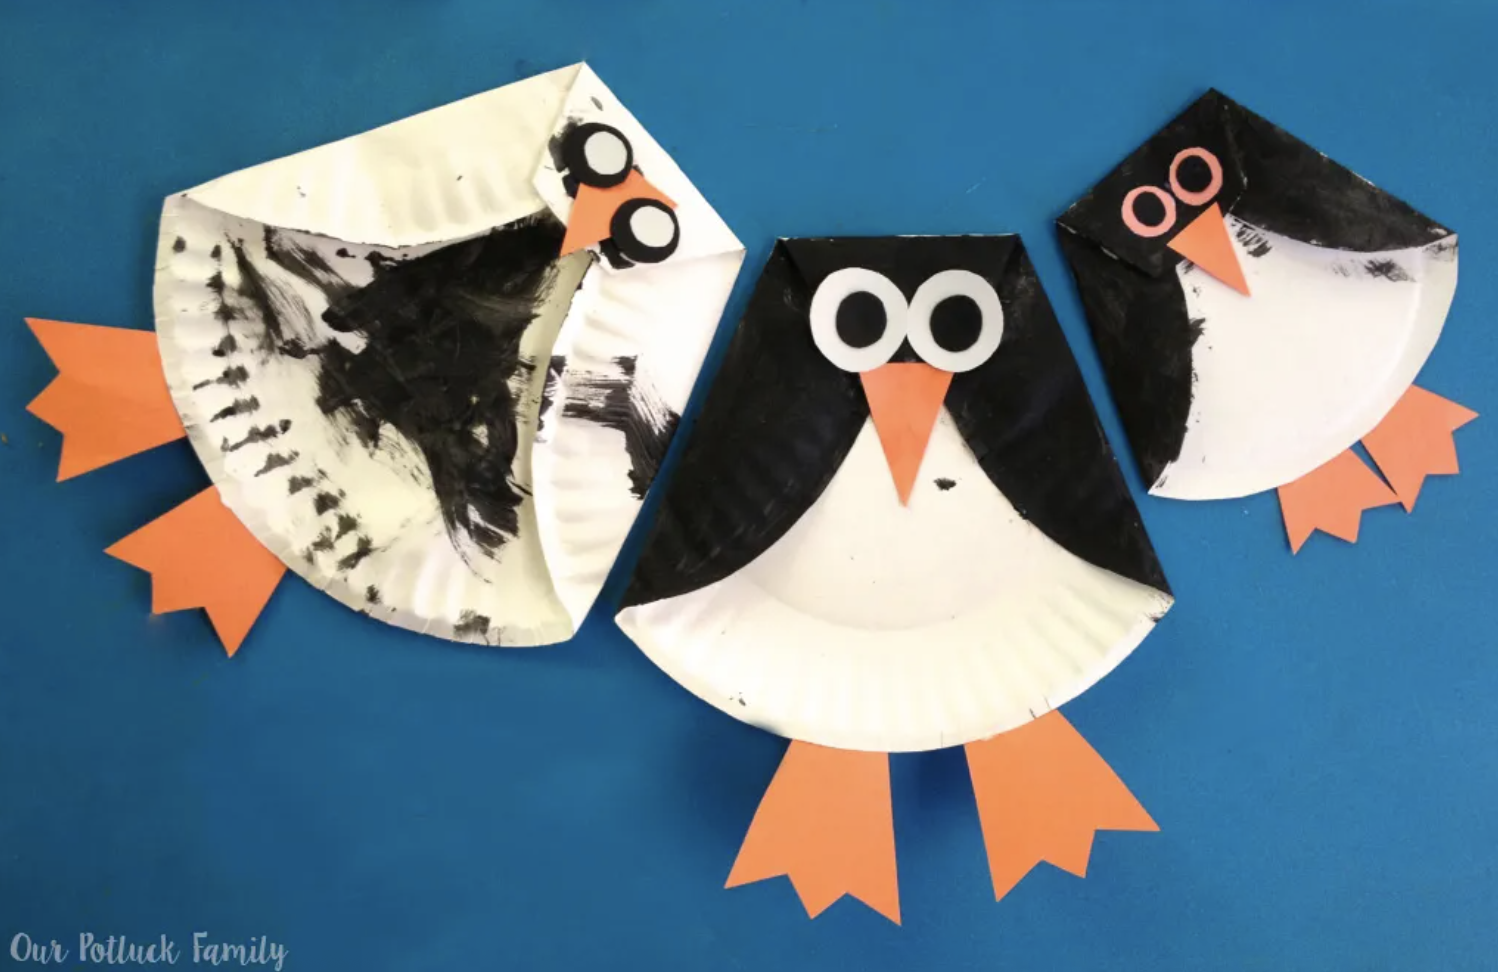
Supplies:
- Black craft paint and brush
- White paper plate
- Orange construction paper
- Large googly eyes, or white and black construction paper
- Scissors
- Glue stick
Instructions:
1
Fold the sides of the paper plate in as shown, then fold down the top and glue it all in place.
2
Use black craft paint to paint the folded portions of the plate, and let dry. Cut out a beak and two feet from orange construction paper. Glue in place.
3
Glue googly eyes to the face, or cut eyes from circles of white and black construction paper and attach them.
Yarn-Wrapped Snowman

Supplies:
- White yarn
- Cardboard (from an empty cereal box or similar)
- Construction paper (orange, black, brown, and red)
- Scotch tape
- Glue
- Scissors
- Pencil
- Plate to use as template
Instructions:
1
Use the plate and pencil to trace a circle onto the cardboard. Cut out the circle.
2
Tape one end of the white yarn to the back of the cardboard circle. Begin wrapping the yarn around the circle, turning as you go, until the whole circle is covered. Cut the yarn and tuck the end in on the back of the plate.
3
Cut a nose, eyes, mouth, and hat (optional) from construction paper. Glue them in place on your snowman head.
Button Snowflakes
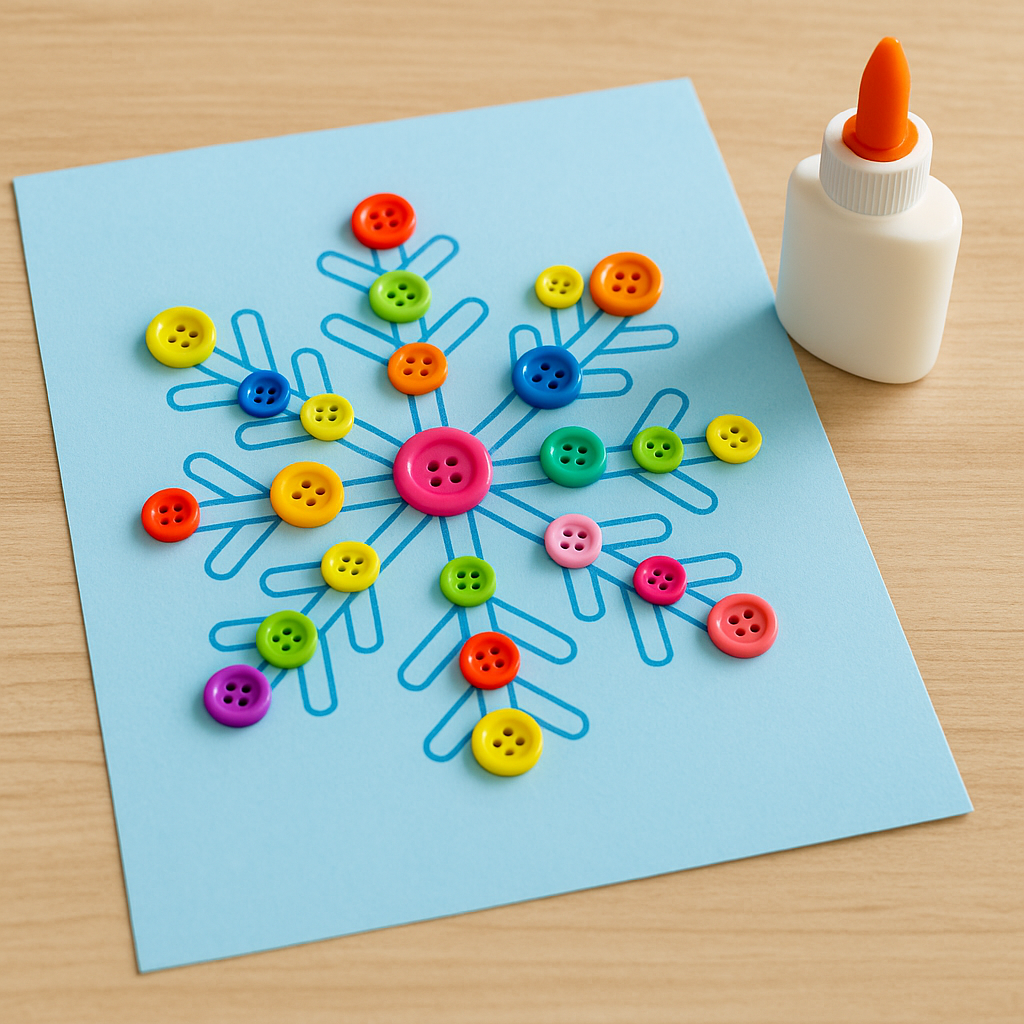
Supplies:
- ABCmouse Snowflake Coloring Page
- White buttons in a variety of sizes
- Glue
Instructions:
1
Print the snowflake page (on cardstock if possible) on white or blue paper. If you’d like, outline the snowflake with blue marker or glitter glue.
2
Lay buttons over the page, using the snowflake as a template.
3
When you’re happy with the design, glue the buttons in place and let the glue dry completely.
Hanging Ice Decorations
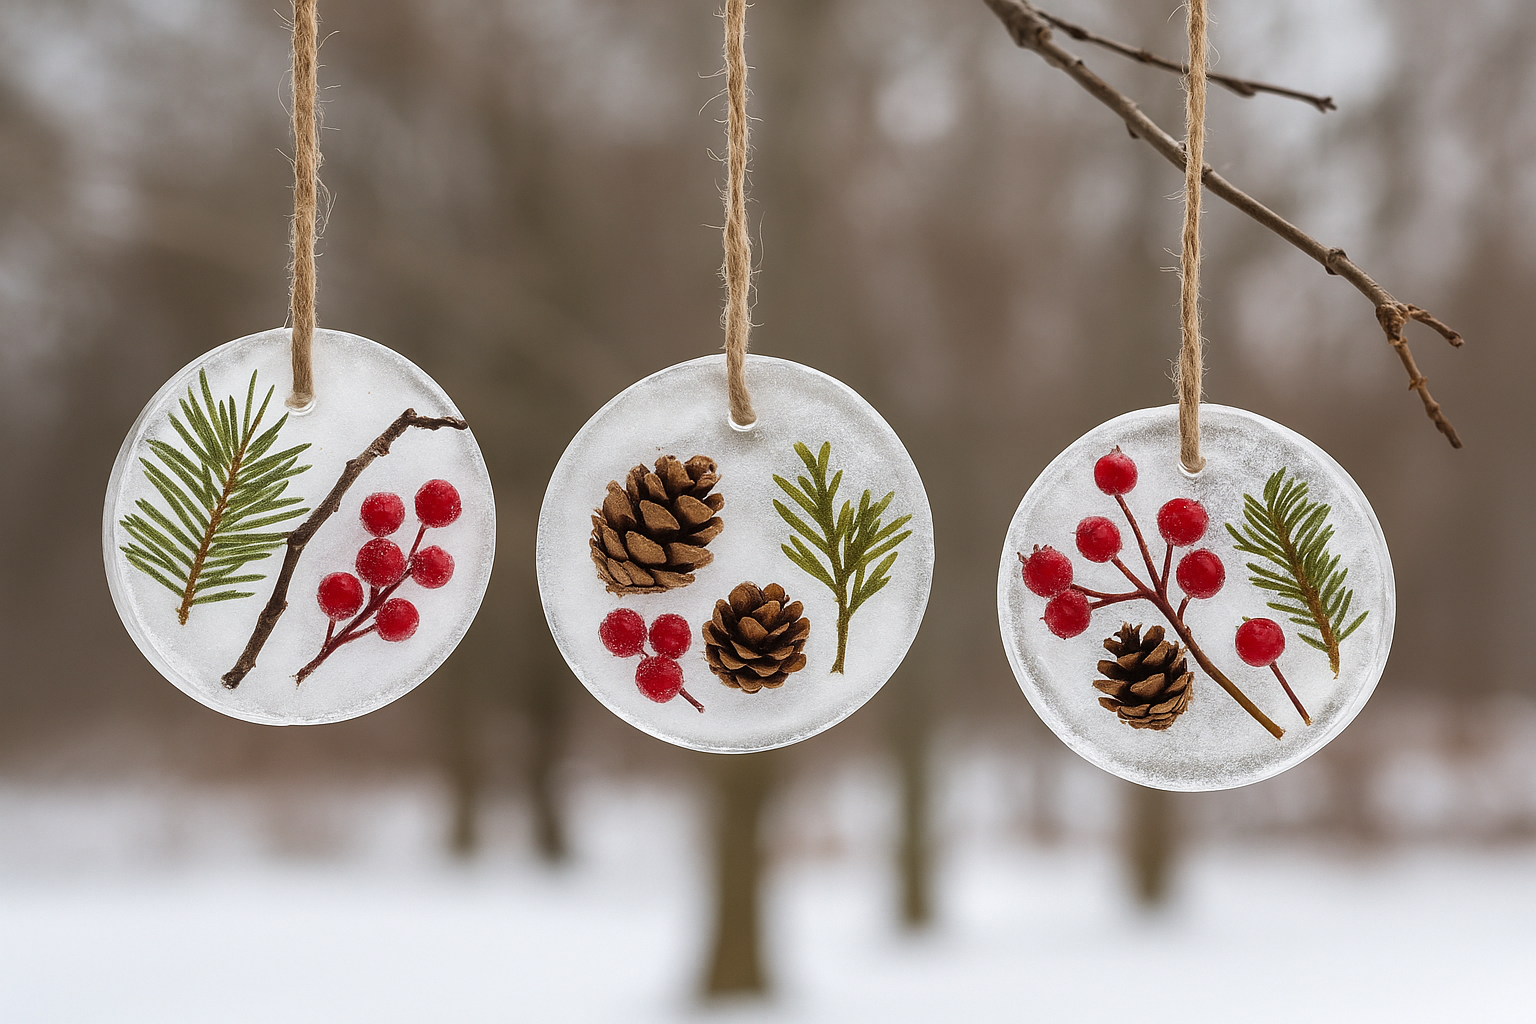
Supplies:
- Winter nature items like twigs, berries, pine bark and needles, pinecones, etc.
- Plastic plates or shallow bowls
- String or twine and scissors
- Water
Instructions:
1
Arrange your nature items in the plate or bowl. Slowly add water until the items are covered.
2
Cut a piece of string or twine and tie it into a loop. Lay the loop in the plate or bowl so part of it is in the water and part of it is out of the water. (This will be your hanging loop.)
3
Freeze the dishes until frozen solid. Release your ornaments from the plates, and hang outside your windows for some winter decorations!
Glass Jar Snowglobe
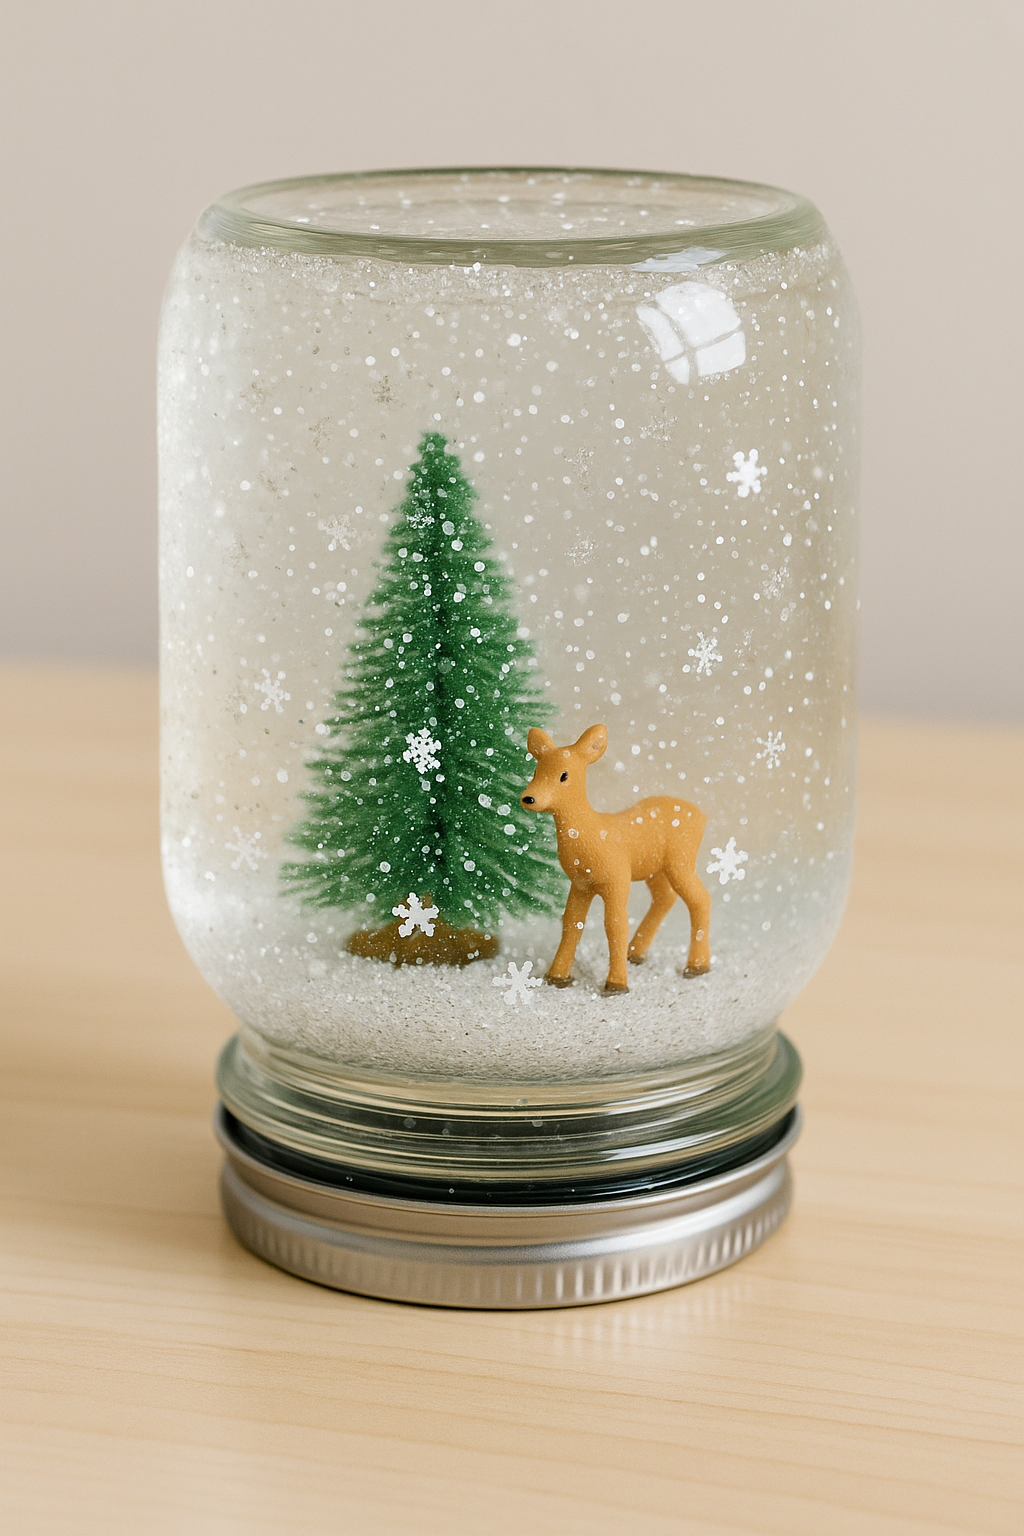
Supplies:
- Clear glass jar with tight-fitting lid
- Small winter scene items, such as pine trees, animals, etc.
- White glitter
- Snowflake sequins (optional)
- Purified drinking water
- Glycerin (optional)
- Waterproof glue
- Measuring cup
Instructions:
1
Remove the lid from the jar and turn it upside down. Arrange your winter scene on the lid and glue it into place. Let it dry completely.
2
In a measuring cup, add enough water to fill your jar most of the way. Mix in three tablespoons of glycerin per cup. (This is optional, but will slow the glitter’s fall and make your snowglobe more like one from the store.) Add glitter and snowflake sequins (if using). Stir thoroughly.
3
Fill your jar about ¾ full. Turn over the lid with the winter scene, and lower it slowly into the water. If the water begins to spill out, empty out a bit. Tighten the lid firmly.
4
Turn the jar over and give it a good shake. The “snow” will fall gently onto your winter scene!
Cotton Ball Snowman with Template
Supplies:
- Printable snowman template from ABCmouse
- Printer and cardstock paper
- Cotton balls
- Glue
- Crayons or markers
- Scissors
Instructions:
1
Print the snowman template. Use white cardstock if you have it. If not, regular printer paper will work, though your snowman might be a bit flimsy.
2
Cut out the pieces, and color the hat, scarf, arm, mittens, buttons, and nose any colors you like.
3
Spread a thin layer of glue over the snowman’s body. Press cotton balls onto the glue until the body is covered, and let dry.
4
Glue the hat, scarf, arms, eyes, and nose in place. Your snowman craft is finished!
Paper Plate Snow Globe
Supplies:
- White and clear plastic plates (same size)
- White and black construction paper
- Markers, crayons, or colored pencils
- White glitter
- Glue
- Scissors
Instructions:
1
Cut a circle of white paper to fit the inner part of the white plate, inside the rim.
2
Draw and decorate a winter scene on the white paper. (You can also choose a scene from ABCmouse’s winter coloring pages and cut it to fit.) Glue your design to the front of the white plate. Let the glue dry completely.
3
Add about a tablespoon of glitter to the plate. Place a line of glue around the rim, and press the clear plate on top, face down. Let the glue dry.
4
Cut a piece of black construction paper to represent the base of the snowglobe. Glue it in place on the bottom edge of the white plate. Shake your “snowglobe” to make the glitter fly!
Listen to our fun Winter Songs While Crafting!
Paper Chain Snowman
Supplies:
- White construction paper
- Scissors
- Ruler
- Markers
- Glue or small stapler
Instructions:
1
Use the ruler to mark and cut 5 strips of white construction paper about 2 inches by 8 inches. Bend the first strip into a loop and glue or staple the ends together.
2
Pass a second strip through the first, then fold it into a loop and attach the ends. Repeat with the remaining strips.
3
Turn the chain so the wide edge of the top loop faces you. Use the markers to draw eyes, mouth, and carrot nose. On the other two loops facing you, use the markers to add buttons.
Optional: Use other colors of construction paper to add a hat, scarf, and other fun snowman details!
Glitter Glue Snowflakes
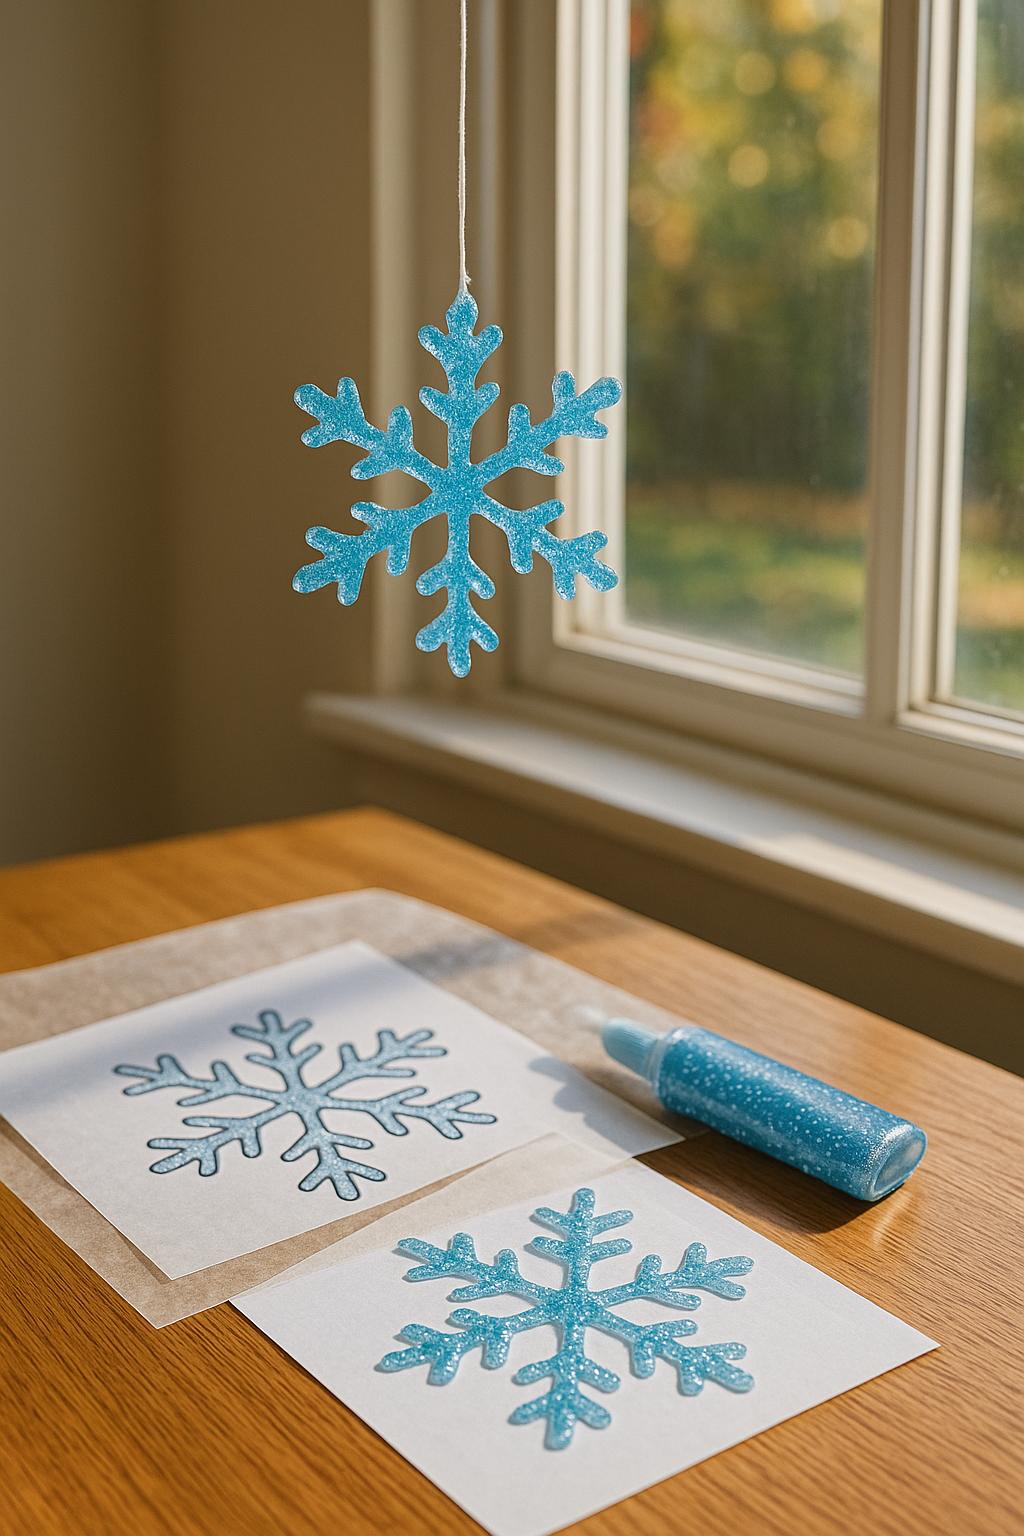
Supplies:
- ABCmouse Snowflake Coloring Page
- Clear or light blue glitter glue
- Wax paper
- String
Instructions:
1
Print the coloring page to use as a template. Lay a sheet of wax paper overtop of the coloring page. Tape in place if needed.
2
Use the glue to trace and fill in the snowflake shape on the wax paper. Let the glue dry completely (may take several hours or overnight).
3
Carefully peel the snowflake off the wax paper. Tie a piece of string to one branch of the snowflake, and hang in a sunny window.
Simple Shapes Paper Plate Snowman
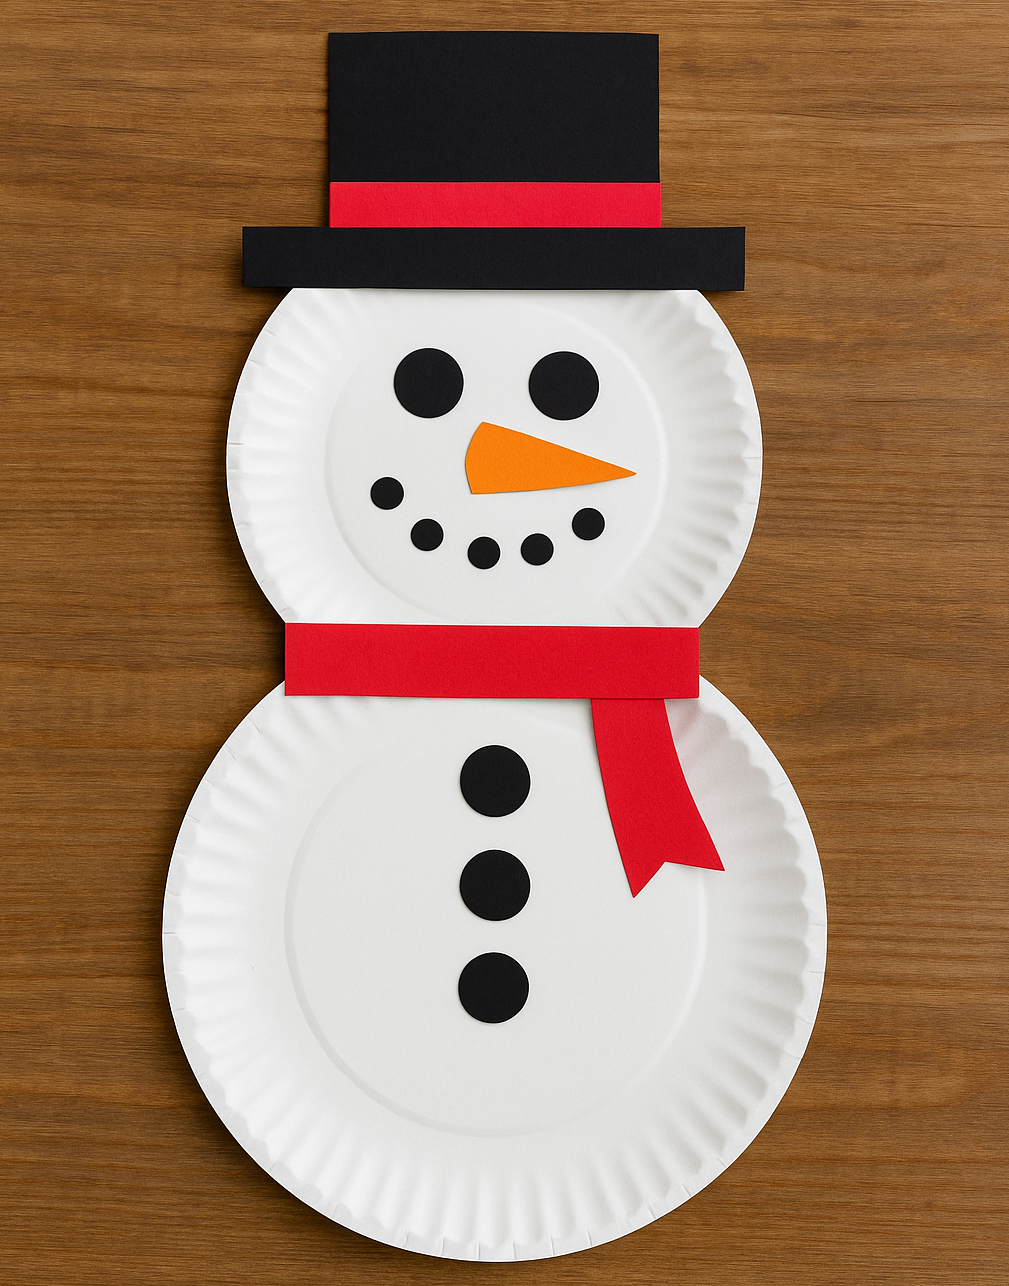
Supplies:
- One dinner size white paper plate
- One dessert size white paper plate
- Construction paper (orange, black, and red)
- Scissors
- Glue stick
Instructions:
1
Paste the smaller plate to the upper edge of the larger plate to create the snowman’s body.
2
Cut a hat from the construction paper: a large black rectangle, a long black rectangle for the brim, and a red strip for the ribbon. Glue together, then attach to the snowman’s head.
3
Cut round circles from black construction paper for eyes and buttons, and an orange triangle for the carrot nose. Attach them to your snowman.
4
Cut two long rectangles to form the scarf. Glue one horizontally across the snowman’s neck, and one vertically to represent the scarf hanging down.
Winter is the perfect time to bring the sparkle and magic of the season indoors with a craft that’s as fun to make as it is to play with! Get step-by-step instructions for the slime craft here.
Winter Hat and Mittens Garland

Supplies:
- ABCmouse winter hat and winter mittens coloring pages
- Crayons, markers, or colored pencils
- Cotton balls
- Ribbon or twine
- Scissors
- Glue
- Hole punch
Instructions:
1
Print multiple copies of the hat and mittens coloring pages, depending on how many you want for your garland.
2
Cut out the hats and mittens. Color them in any way you like, leaving the wrists and hat brims white.
3
Apply a thin layer of glue to the wrists and hat brims. Press cotton balls into place and let dry.
4
Punch holes in the hats and mittens, and string them along the ribbon or twine. Your garland is ready to hang!


Shaving Cream “Snow” Painting
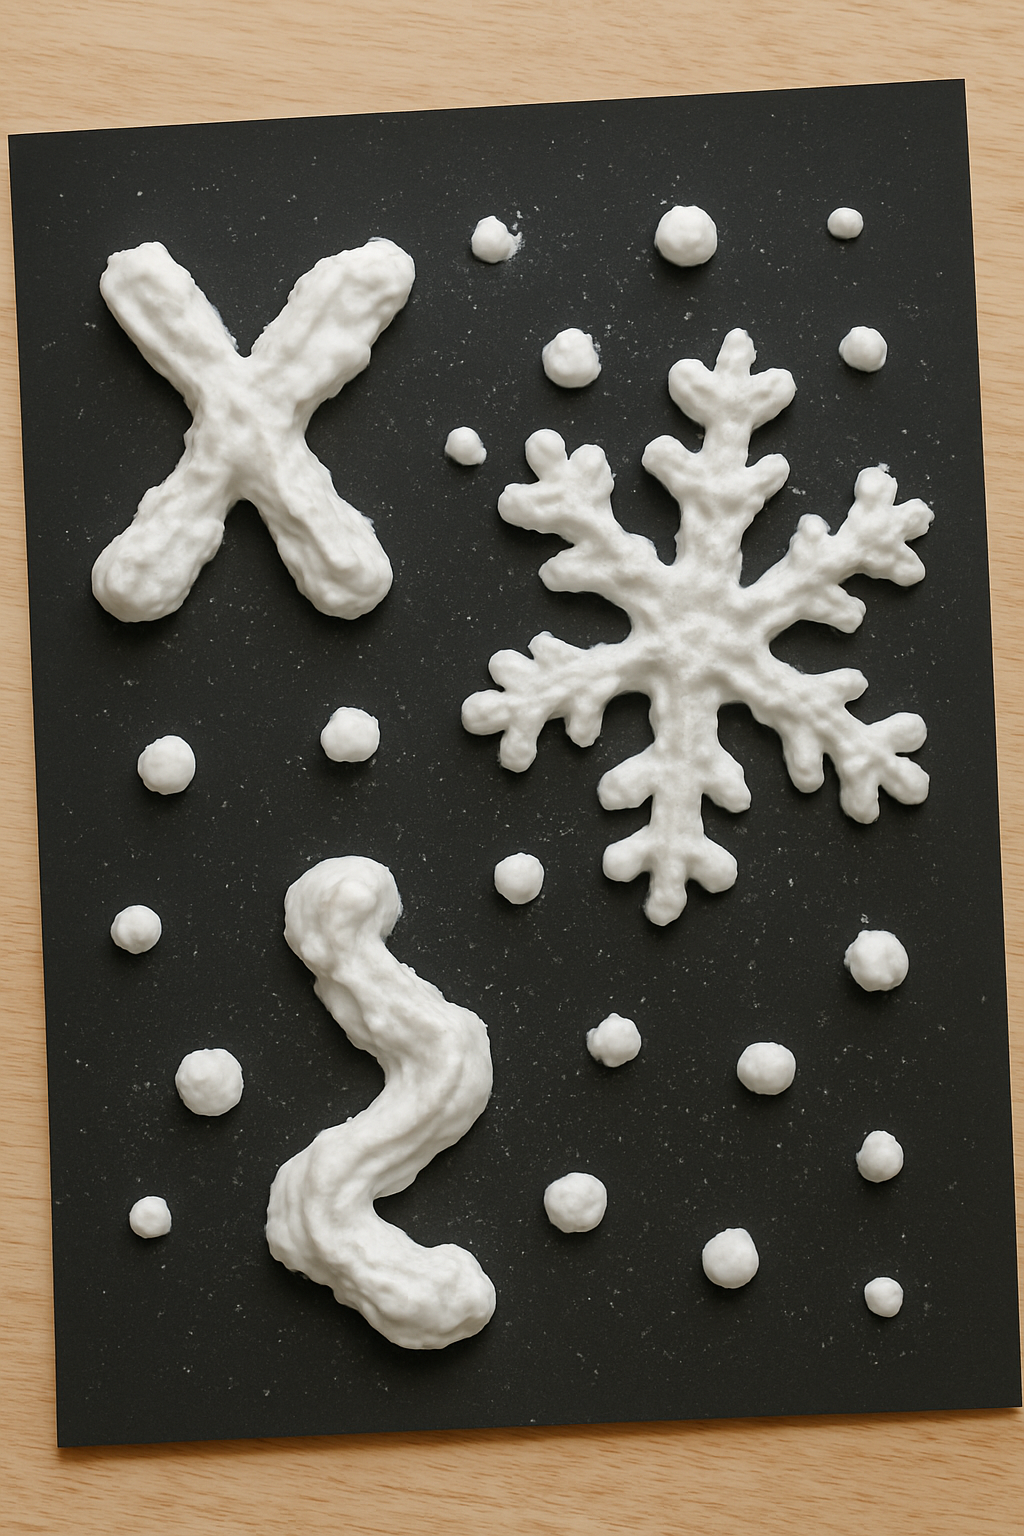
Supplies:
- Shaving cream
- White glue
- White glitter
- Black or blue construction paper
Instructions:
1
Mix together equal parts glue and shaving cream to form the paint. Add more shaving cream for a fluffier texture. Stir in some white glitter.
2
Use your fingers or other tools to paint snowy designs onto the construction paper. If you like, sprinkle more glitter on top.
3
Let the shaving cream paint dry completely. It will still be puffy and squishable—so cool!
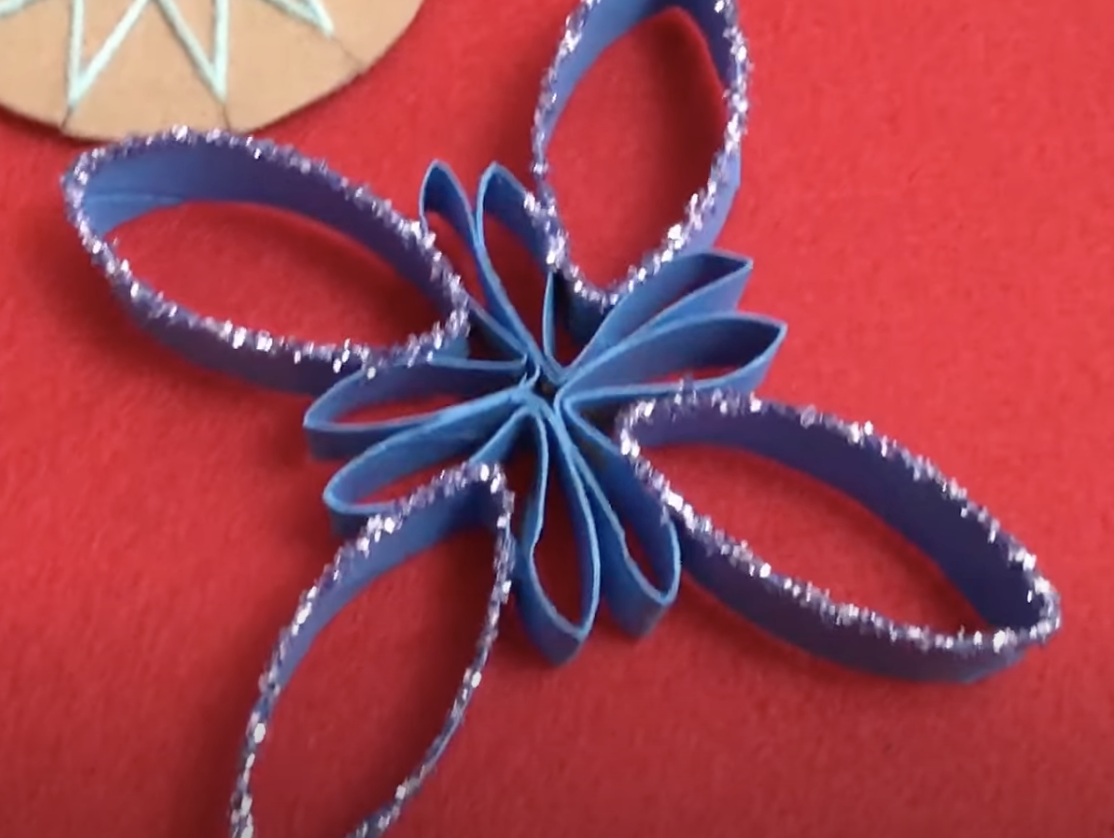
Supplies:
- Cardboard tube
- Craft paint and brush
- Pencil
- Ruler
- Scissors
- Glue
- Glitter
Instructions:
1
Paint the tube the color of your choice (white, blue, red, or green) and allow it to dry.
2
Mark the tube at half-inch intervals down the side. Press the tube flat gently and cut along the lines to make small loops.
3
Lay the loops into a design you like, then glue in place and let dry.
4
Give the whole surface, inside and out, another coat of paint. Allow it to dry. To apply glitter, paint the edges with glue, dip into glitter, let dry.
Toilet Paper Tube Snowman
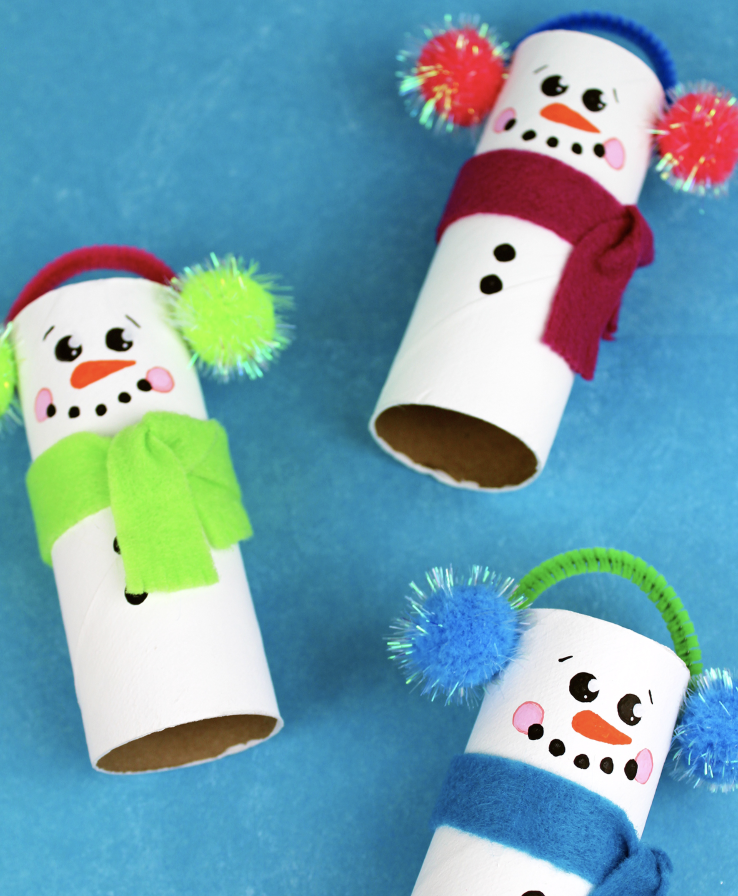
Supplies:
- Empty toilet paper tube
- White craft paint and brush
- Markers
- 2 pom poms
- Short piece of pipe cleaner
- Scrap of fabric for scarf
Instructions:
1
Paint the toilet paper tube white and let it dry completely.
2
Stand the toilet paper tube on end. Cut a short length of pipe cleaner and bend it into an arc. Glue it in place across one end, and add one pom pom on each side as shown. Let dry.
3
Use markers to add the face and buttons. Cut a short length of fabric and tie it just below the face for a scarf.
Make festive snowflakes to give as gifts or use as decorations around the house. All you need is pasta, paint, and a little glitter for a magical winter craft. Get step-by-step instructions for the pasta snowflake craft here.
Air-Dry Clay Snowman
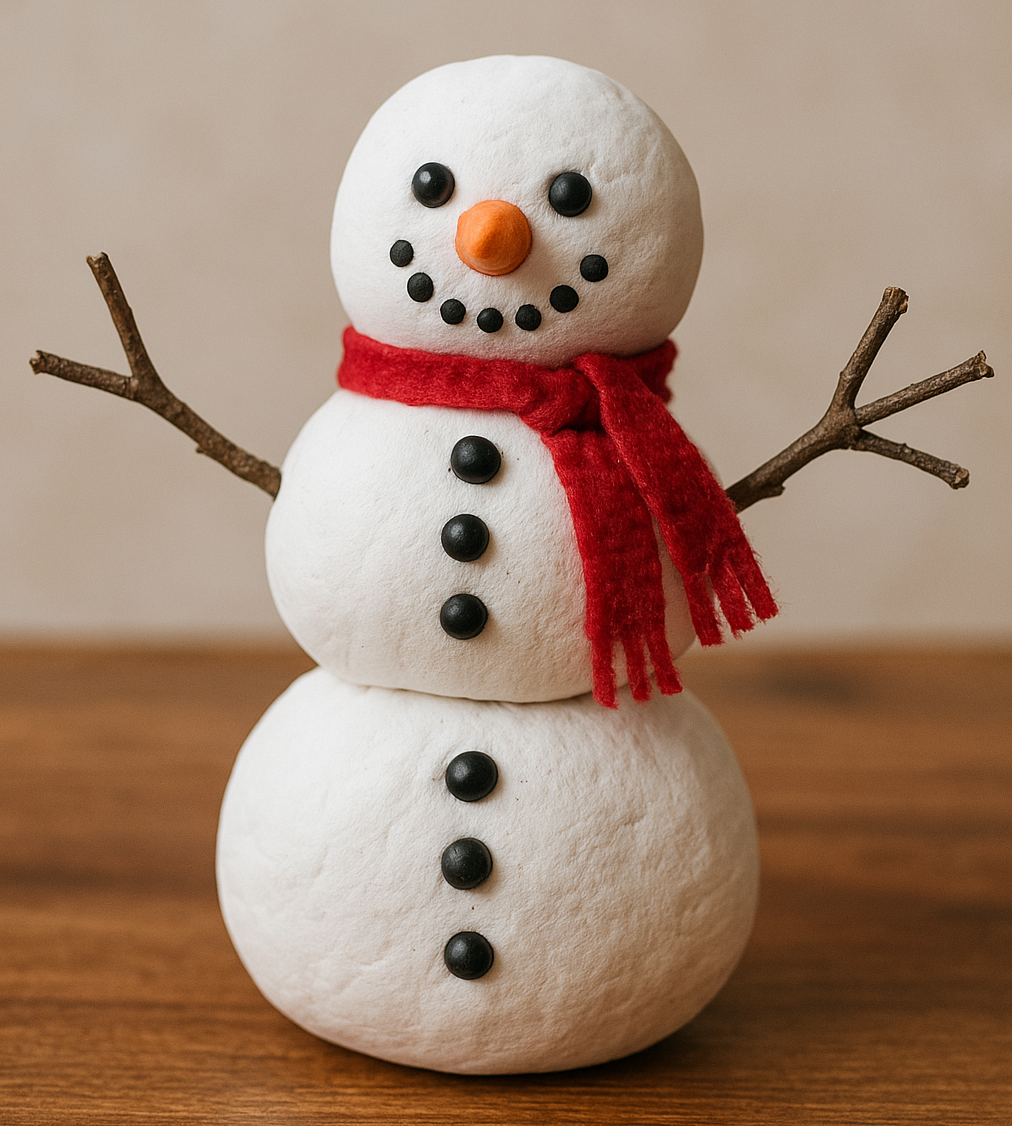
Supplies:
- White air dry clay
- Small black and orange beads
- Scrap of fabric for scarf
- Twigs
- Plastic knife
Instructions:
1
Roll three balls of air dry clay to form your snowman: small, medium, and large. Press the large ball into the table to slightly flatten the bottom.
2
Make small score marks on the top of the large ball and bottom of the medium ball. Stack the medium ball on the large ball, pressing the score marks together slightly to help them stick when the clay dries.
3
Repeat with the medium and small balls, scoring slightly before stacking them.
4
Gently press black beads into the snowman’s head to form the eyes and mouth. Add an orange bead for the nose.
5
Add black beads down the medium and large balls for buttons. Press the twigs into the medium ball, one in each side, for arms.
6
Let the clay air dry fully according to the directions. Cut a scrap of fabric and tie it around the snowman’s neck for a scarf.
Tip: If any beads come loose after the clay dries, use a small drop of glue to hold them in place.

Printable Winter Activities for Kids
With word searches, scrambles, crossword puzzles, and I Spy sheets, children can practice tracing, vocabulary, spelling, and problem-solving in fun, engaging ways. Each winter word search and scramble includes an answer key, and all crossword puzzles feature helpful word banks to support young learners.
Find snowflakes, polar bears, penguins, and more in this extensive collection of seasonal coloring pages. With images ranging from simple to intricate, there’s something here for kids young and old.
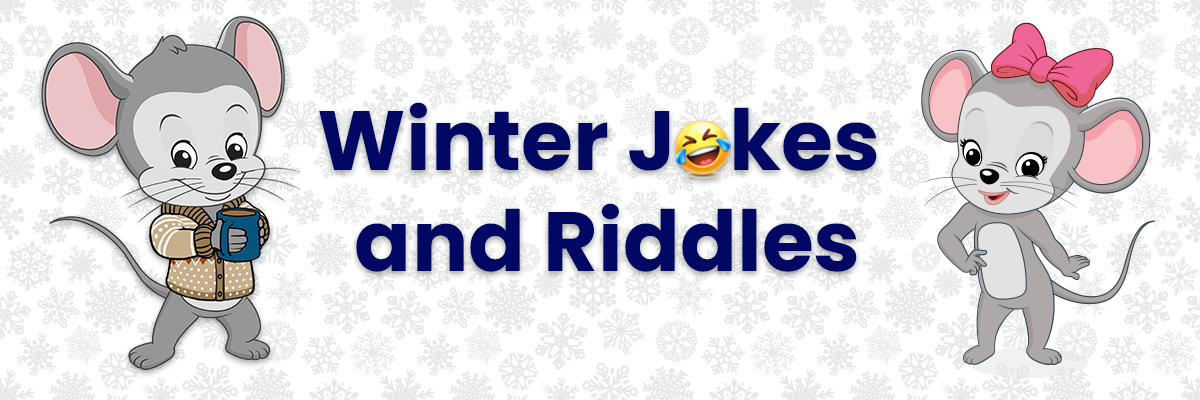
Laugh your way through this chilly season with the silliest wintertime jokes and puns. Let kids read them aloud to family and friends to practice their reading skills.
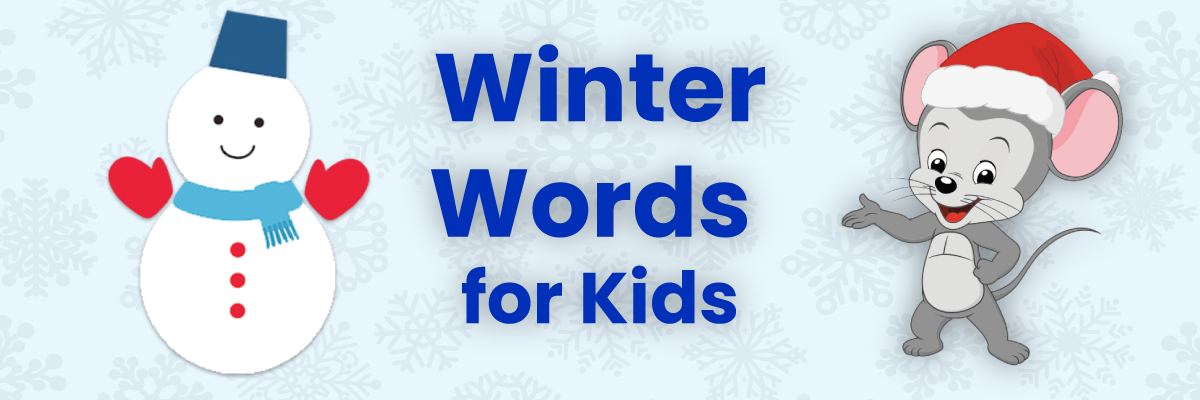
From soft blankets and hot cocoa to snowy weather and playful winter animals, these words capture everything we love and endure during wintertime. They’re a great way to connect vocabulary and spelling practice to a season kids enjoy!
Fun Family Winter Snacks and Treats
Snowman Popcorn Cup
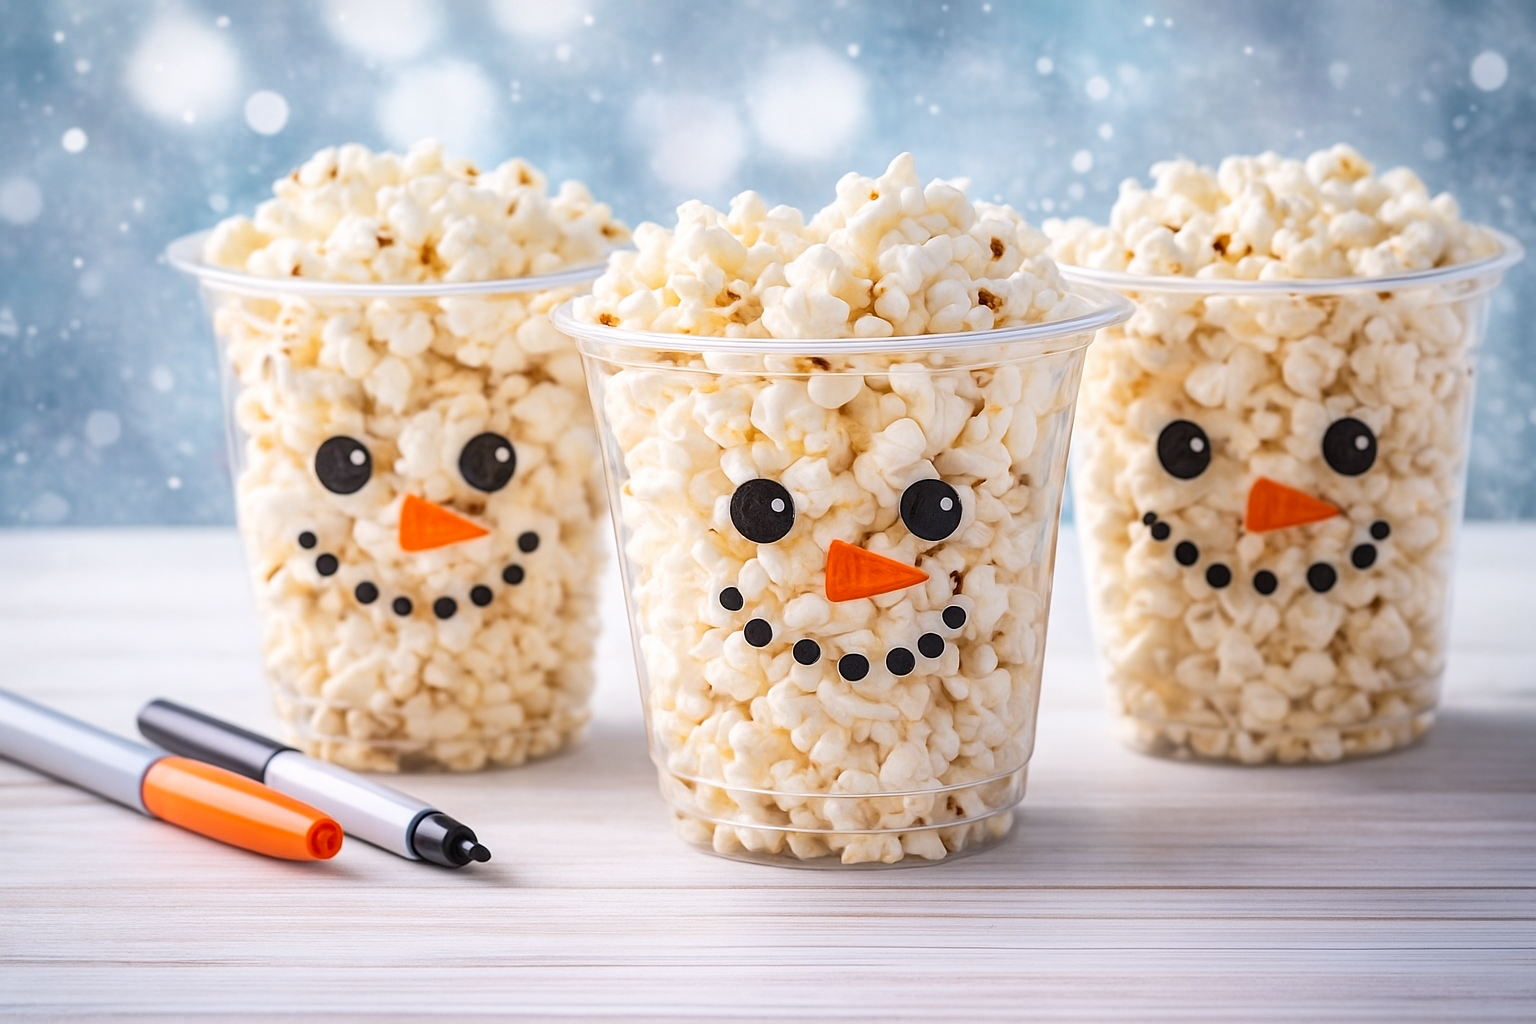
Supplies:
- Clear plastic cups
- Orange and black permanent markers
- Popped popcorn
Instructions:
Use the markers to draw a snowman mouth, eyes, and nose on each cup. Fill the cups with popped popcorn and enjoy your easy treat!
DIY Yogurt Snowman Face
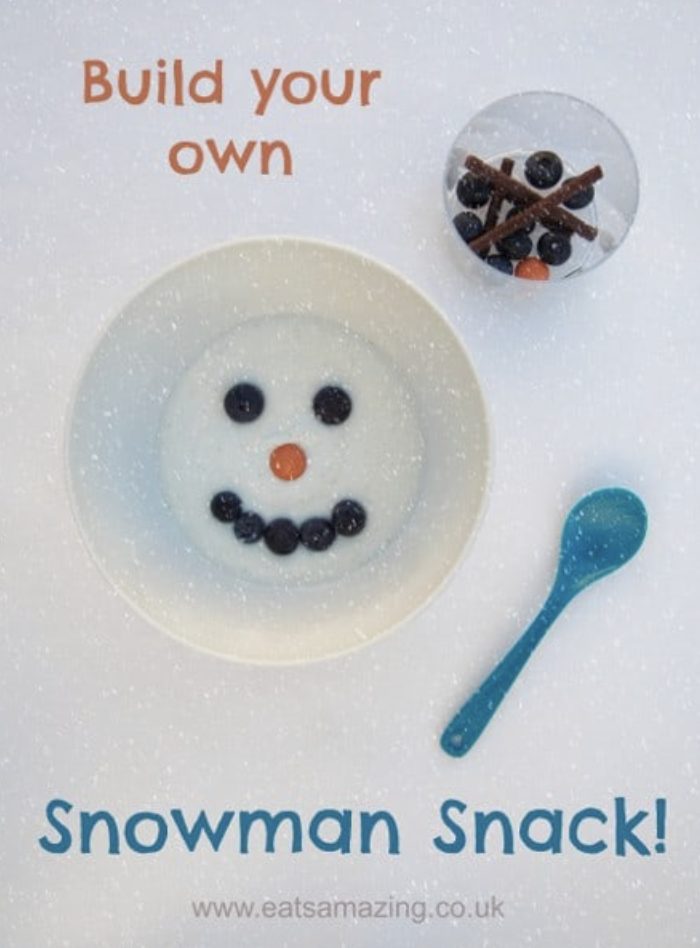
Supplies:
- Plain or vanilla yogurt
- Blueberries
- Strawberry halves
- Bowl
- Spoon
Instructions:
Spoon yogurt into the bowl and level it. Add blueberries for the snowman’s eyes and mouth, and a strawberry half for a nose. Enjoy your winter snack!
Marshmallow and Pretzel Snowflakes
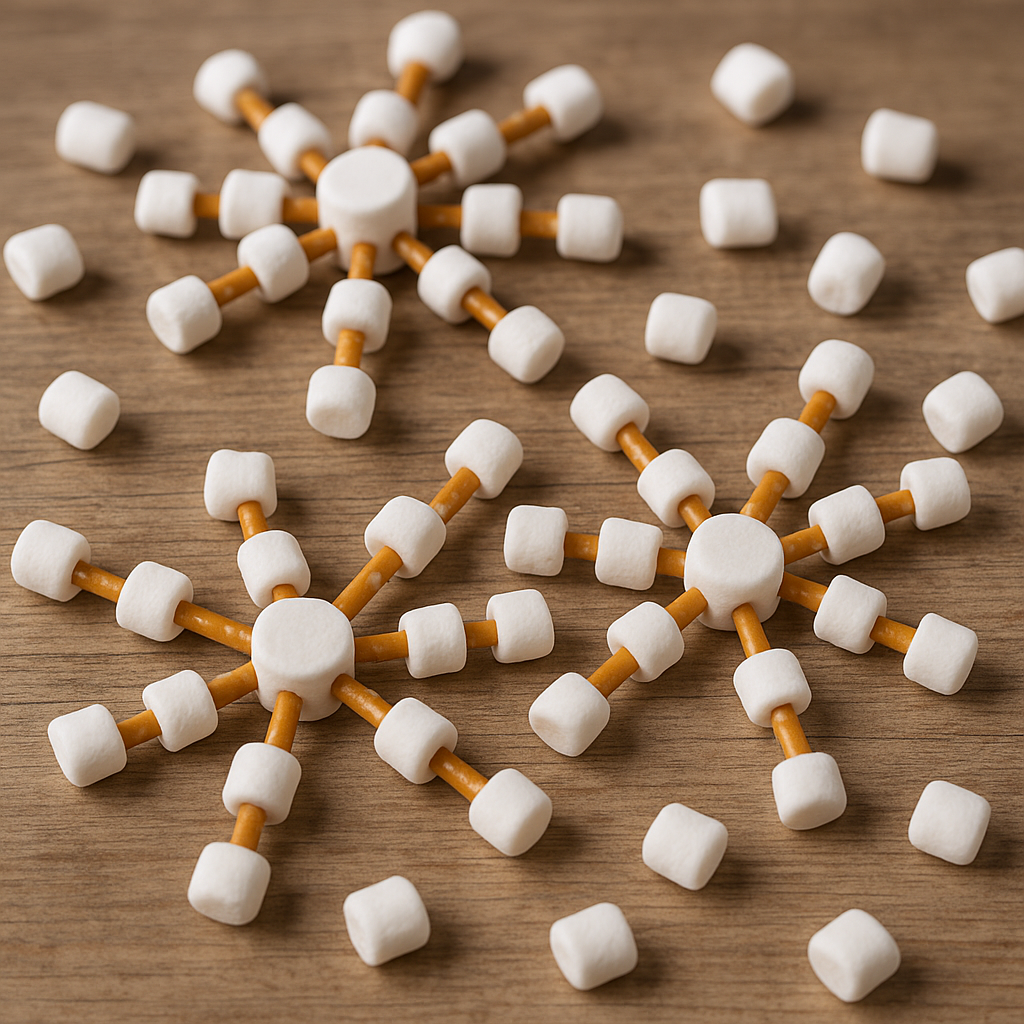
Supplies:
- Mini marshmallows and 1 large marshmallow per snowflake
- Mini pretzel sticks
Instructions:
Push pretzel sticks into one large marshmallow to form the branches of the snowflake. Then, push the smaller marshmallows onto the pretzel sticks to finish the design. Snack on your edible snowflakes!
Marshmallow Penguins
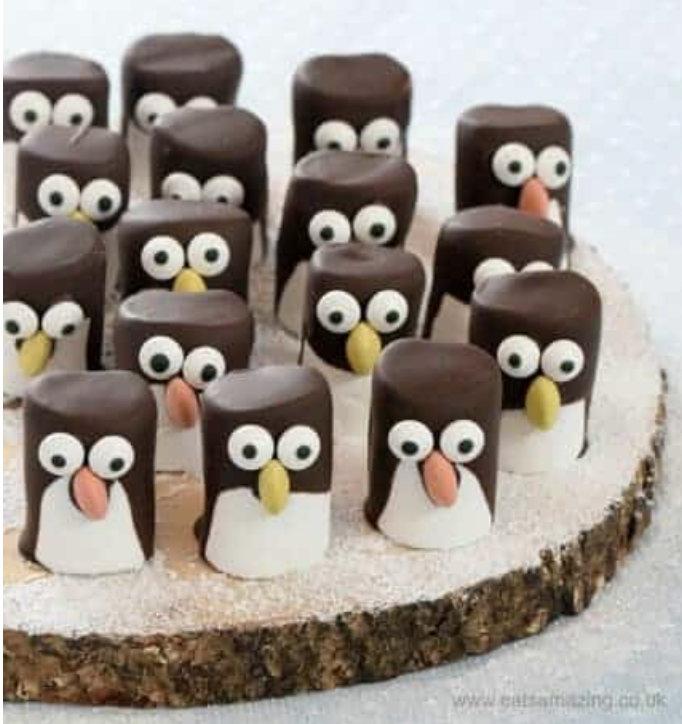
Supplies:
- Large marshmallows
- Chocolate melting wafers
- Orange and/or yellow M&Ms
- Candy eyes
- Wax paper
- Baking sheet
Instructions:
1
Lay a sheet of wax paper on the baking sheet. Melt the chocolate according to the instructions on the package.
2
Dip a marshmallow partway into the chocolate, leaving the penguin “belly” uncovered as shown. Set the marshmallow on the baking sheet.
3
Before the chocolate sets, add two candy eyes and a sideways M&Ms for the bill.
4
When you’ve made all the penguins, let the chocolate set. (You can put the tray in the fridge if needed.) Now they’re ready for your snack!
Mini Snowman Pizzas
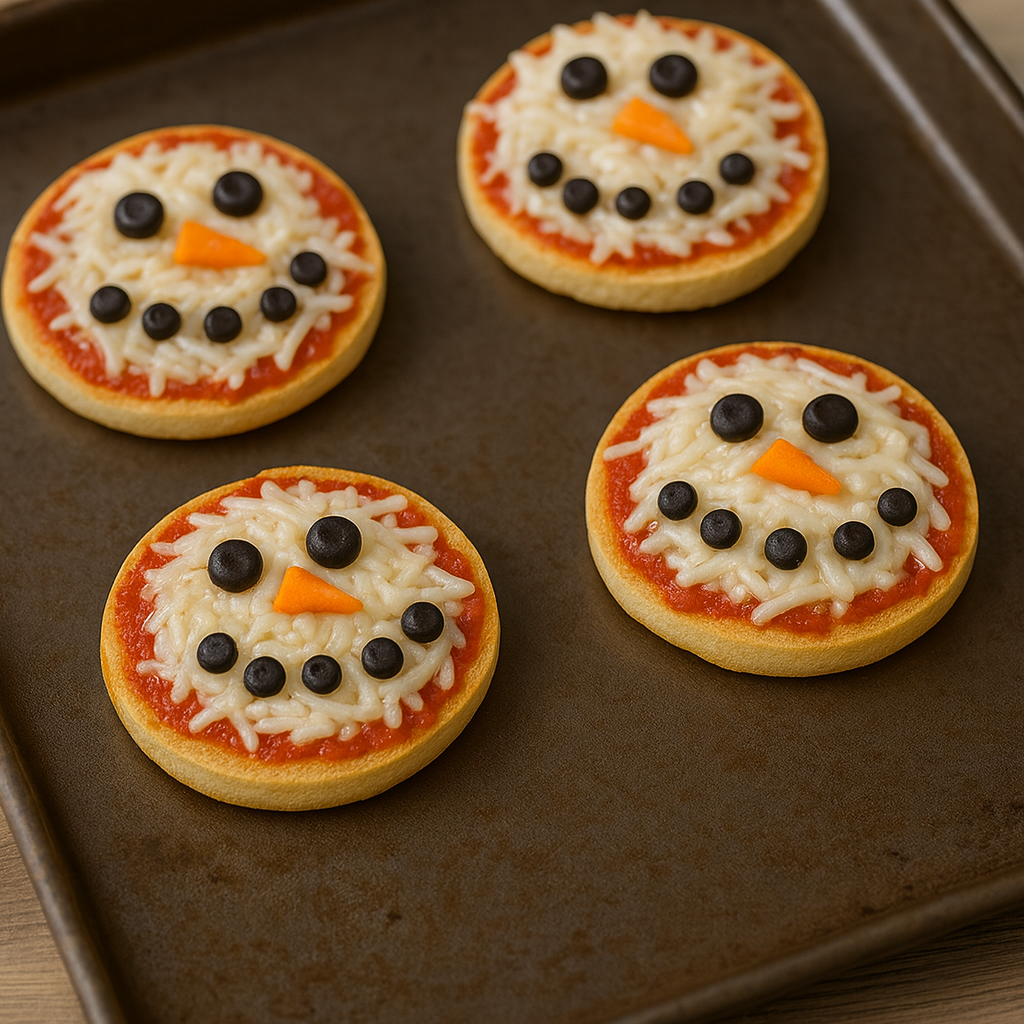
Supplies:
- English muffins
- Pizza sauce
- Shredded cheese
- Olives
- Carrot
- Knife
- Spoon
- Baking sheet
Instructions:
1
Split open the English muffins and lay them flat on a baking sheet. Spoon some pizza sauce onto each muffin half and spread it out. Sprinkle each muffin half with shredded cheese.
2
Chop olives into small pieces and use them to make the eyes and mouth of the snowman’s face. Slice small triangular pieces of carrot and add them to make noses.
3
Bake the muffin pizzas until they’re heated through and the cheese melted. Let cool a bit, then enjoy!
Fruity Snowmen
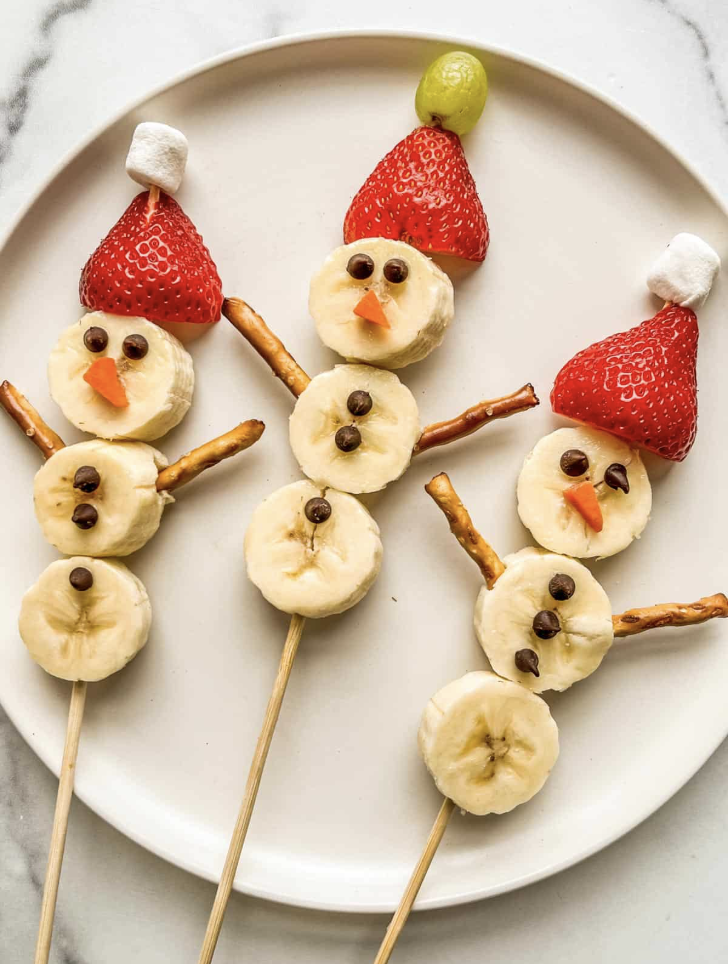
Supplies:
- Banana
- Strawberries
- Mini pretzel sticks
- Chocolate chips
- Carrot
- Grapes or mini marshmallows
- Wood skewers
- Knife
Instructions:
1
Cut the banana into slices. Slice each strawberry in half. Cut small triangular pieces of carrot.
2
Lay three banana slices flat on a plate. Slide the skewer through to pierce all three, then push it far enough to fit a strawberry slice and grape or mini marshmallow on the top for the hat.
3
Use the chocolate chips to make the eyes, mouth, and buttons, and add the carrot piece for the nose. Your healthy snack is ready!
Perfect for pairing with a warm cup of hot cocoa, kids will love making their very own marshmallow snowflake, animal, and snowman to enjoy. Get step-by-step instructions on creating this marshmallow craft here.
Creative Winter Learning Activities for Kids
Snow Painting
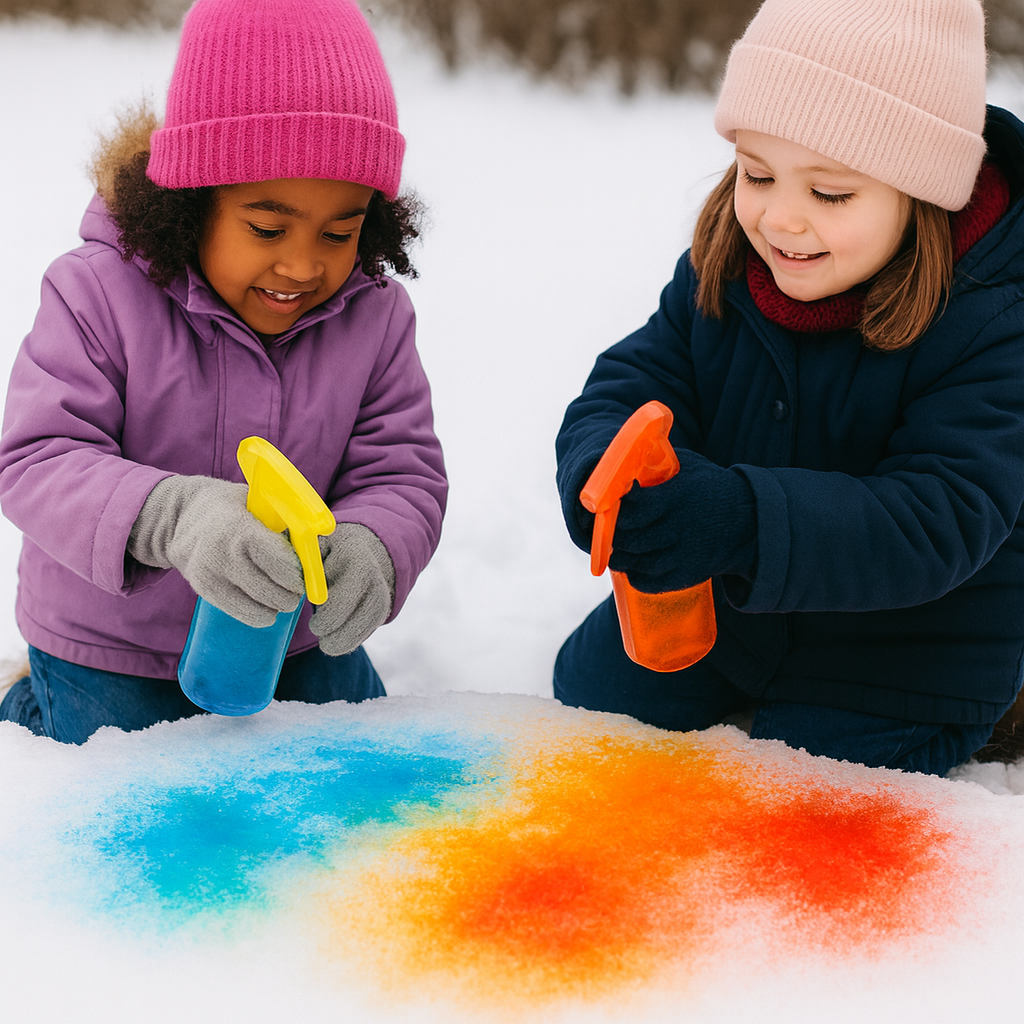
Supplies:
- Spray bottles
- Water
- Food coloring
- Snow
Instructions:
1
Add water to each spray bottle along with a few drops of food coloring, creating several different primary colors. Shake to mix, and screw the lids back on tightly.
2
Head outside and find a big patch of clean snow. Spray the colored water onto the snow, observing the new colors that form when two different primary colors are sprayed on top of each other.
Winter Word Collages
Supplies:
- ABCmouse Winter Words for Kids printable list
- Paper
- Old magazines, newspapers, or books
- Scissors
- Glue sticks
- Marker
Instructions:
1
Choose a winter word from the list and write it in the middle of a piece of paper.
2
Cut out pictures from the old magazines or books and use them to create a collage that represents the word. Glue the pictures into place once you have a design you like.
3
Repeat with as many different words as you like.
Bird Watching Sketchbook
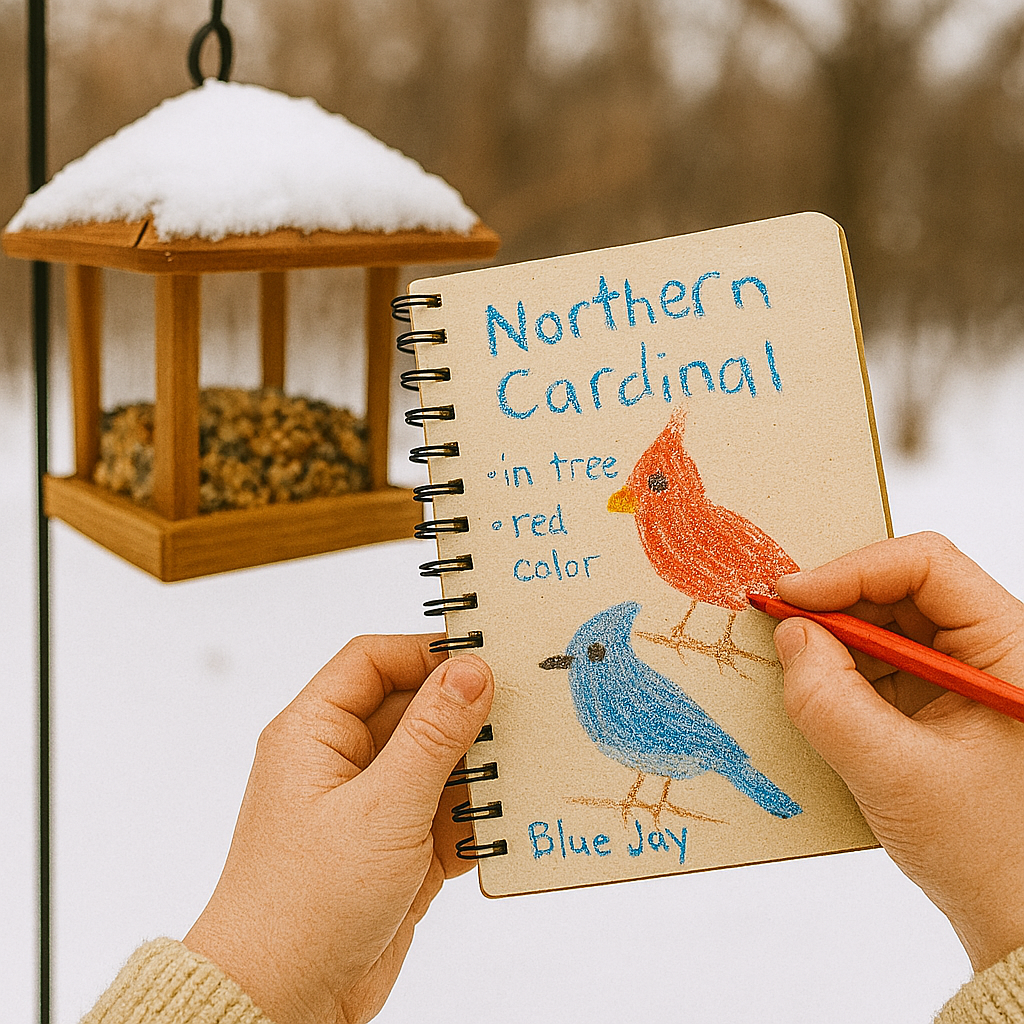
Supplies:
- Blank notebook
- Crayons or colored pencils
- Bird feeder or other birdwatching site
Instructions:
1
Head to your birdwatching site with your notebook and crayons or colored pencils.
2
Sit quietly and watch the birds as they come and go. Make notes about the birds you see and their activities.
3
Draw pictures of the birds to go along with your notes. Update your sketchbook regularly throughout the winter months!
Tip: Give birding fans even more to love with our 250+ free bird coloring pages!
Crystalized Icicles

Supplies:
- Pipe cleaners
- 2 cups hot water
- Large measuring cup
- 6 tbsp. Borax
- Scissors
- Large glass jar
- Pencil
- Wood skewer or chopstick
- String
Instructions:
1
Place two cups of hot water in the measuring cup. Add 6 tbsp. of Borax and stir until dissolved. Pour the solution into the jar.
2
Twist pipe cleaners around a pencil to form a spiral. Tie a piece of string to the top of each “icicle” in a loop.
3
Hang the pipe cleaner spirals from the wood skewer or chopstick. Suspend them in the jar, laying the skewer/chopstick across the top.
4
Leave the jar in a safe place overnight (or longer if desired). Crystals will begin to form in a few hours. When you’re pleased with the results, remove the “icicles” and let them dry. Discard the remaining Borax solution.
5
Hang your crystalized icicles in a sunny window and watch them sparkle!
Tip: This is a great way to explore the concept of supersaturation, or the idea that hot water can “hold” more of a substance than cold water. When the water is hot, a lot of Borax dissolves into it. As the water cools, it can’t “hold” as much of the Borax, so the Borax begins to crystalize.
Paper Snowflake Symmetry

Supplies:
- White square paper
- Scissors
- Pencil (optional)
Instructions:
For a basic four-sided snowflake: Fold the paper in half from corner to corner. Fold again to form a triangle. Cut bits from each of the folded edges. Unfold to reveal your snowflake and note the symmetrical shape.
Optional: Make more complicated snowflake shapes by experimenting with different folds. Draw shapes before trimming them if you like, planning your snowflake’s shape.
Winter Acrostic Posters
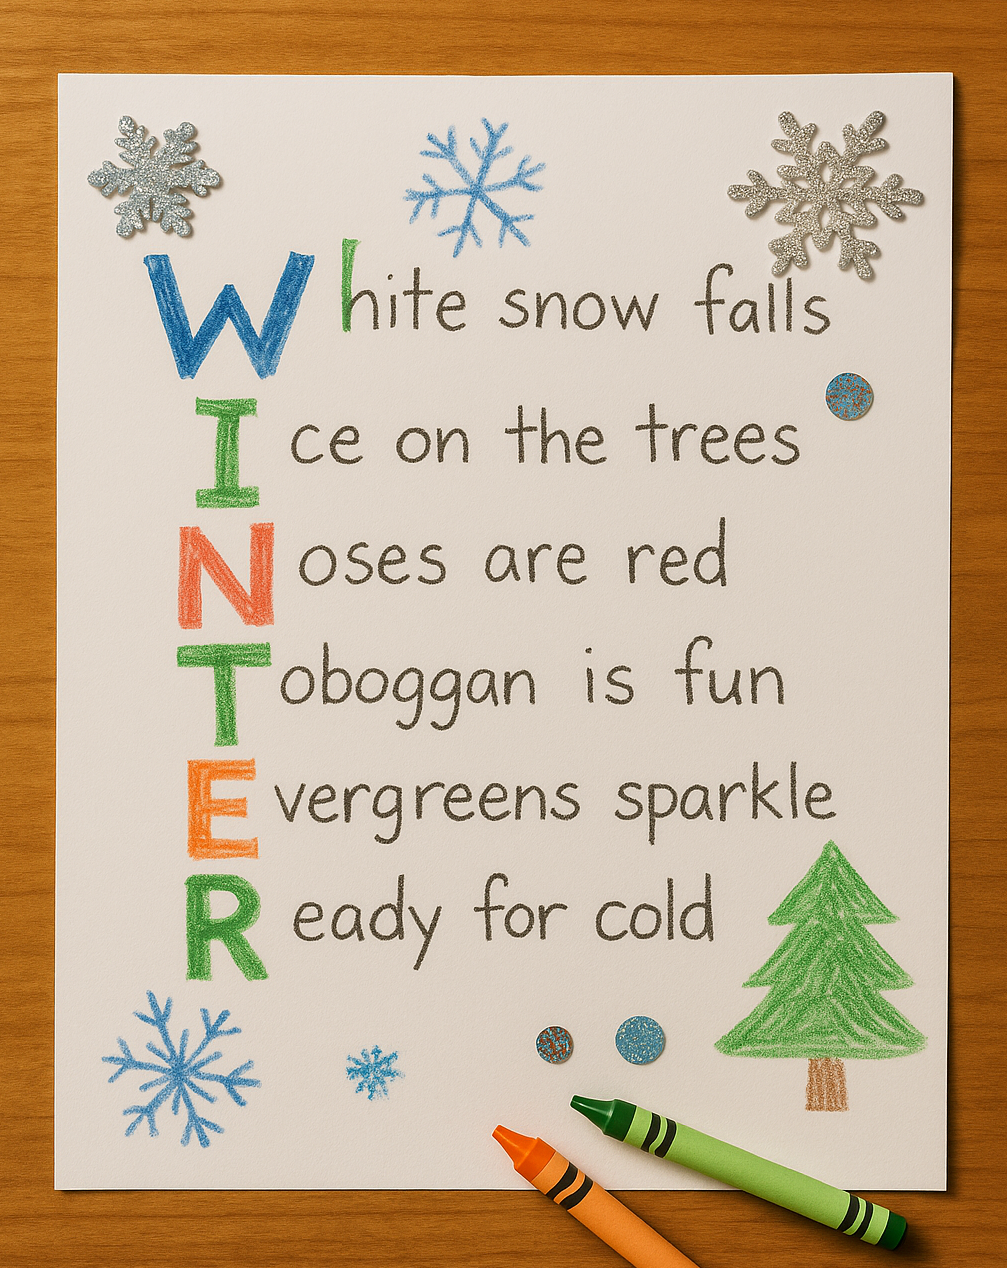
Supplies:
- ABCmouse Winter Words for Kids printable list
- Paper
- Crayons, markers, or colored pencils
- Glitter, stickers, or other embellishments
Instructions:
Choose a winter word and write it vertically down the left side of the paper. Write a poem, with the first word of each line beginning with the letter on that line. When your poem is finished, decorate the rest of the poster to match your word, then display your poetic art!
Legal disclaimer: Any links to third-party resources are provided for informational purposes only. We are not affiliated with and do not sponsor/endorse these third parties and bear no responsibility for the accuracy of content on any external site.
Related Activities
-

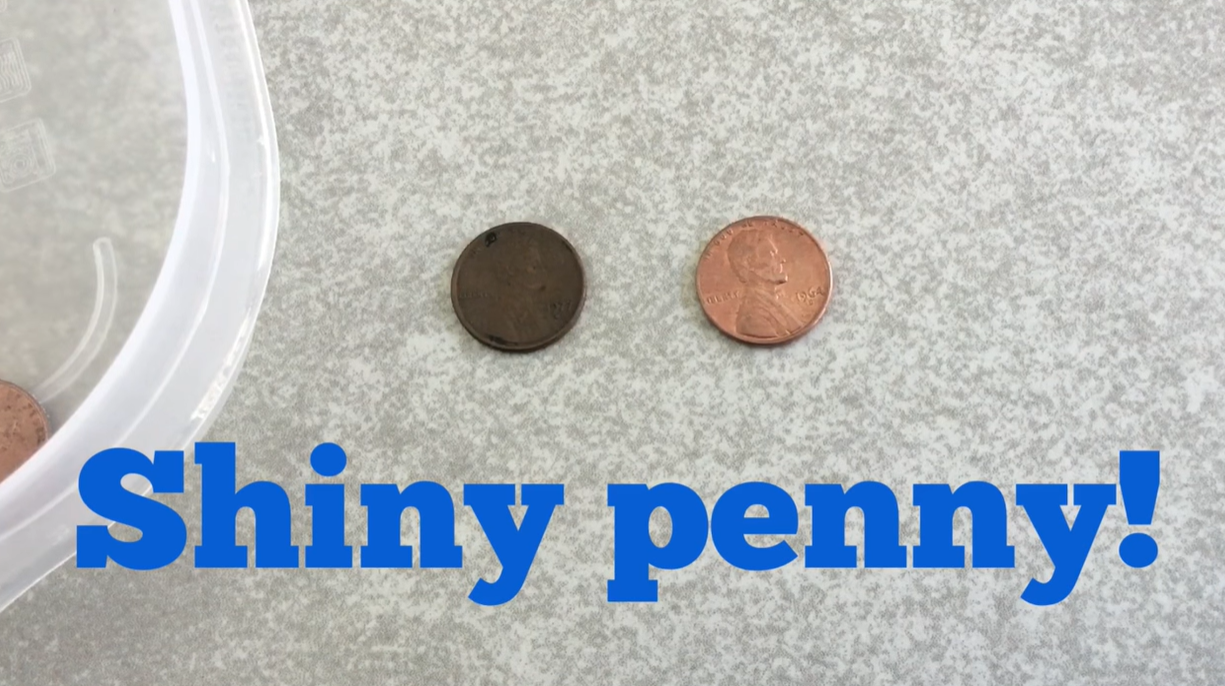
Penny Cleaning Science Experiment for Kids (Vinegar & Salt)
Clean pennies with vinegar and salt in this fun science experiment for kids. Explore chemical reactions with simple, hands-on steps.
-

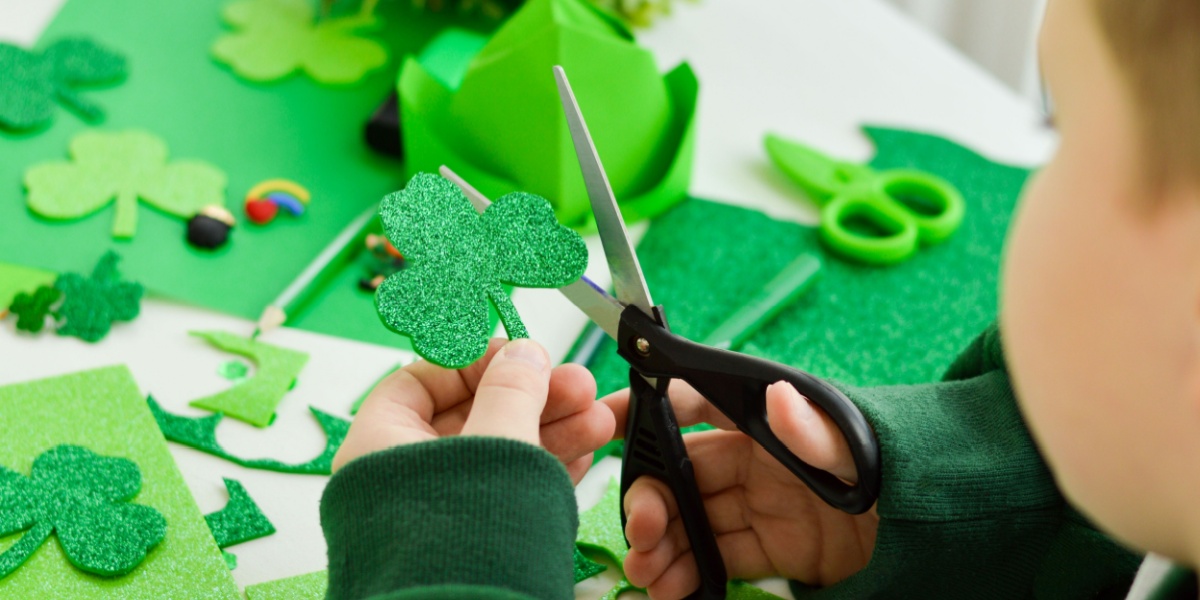
32 St. Patrick’s Day Crafts & Activities for Kids and Families
Celebrate St. Patrick’s Day with 30+ fun crafts for kids! Find leprechauns, rainbows, shamrocks, and easy activities for all ages.
-
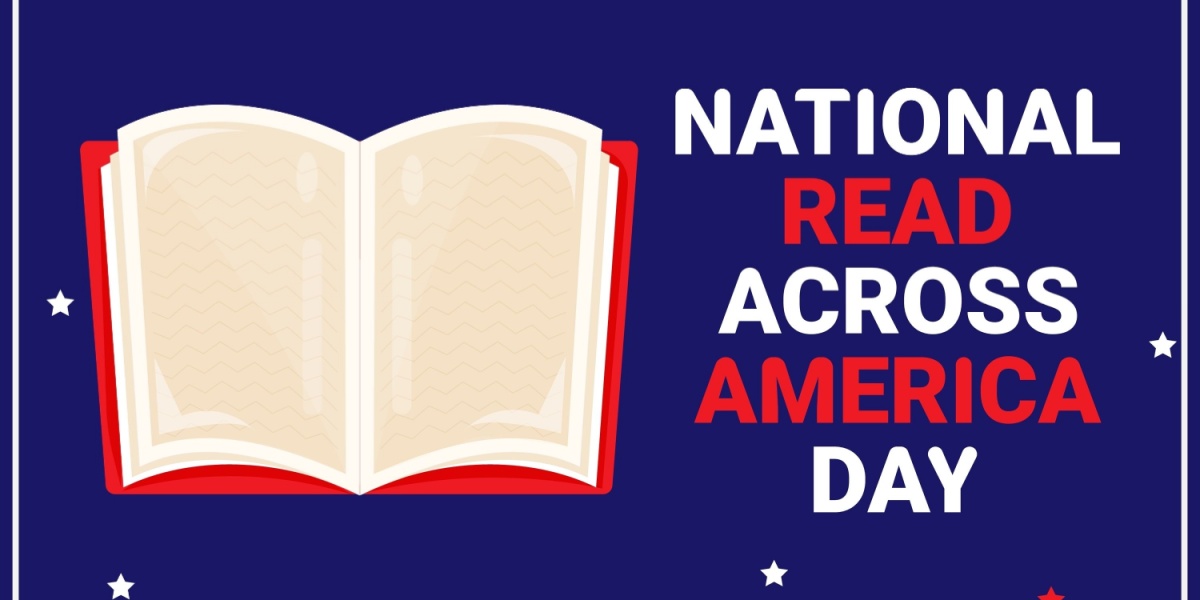
25+ Reading Activities for Read Across America Day (Free Printable List)
Celebrate Read Across America Day with over 25 fun reading activities for kids—perfect for classrooms, families, and literacy events.
-
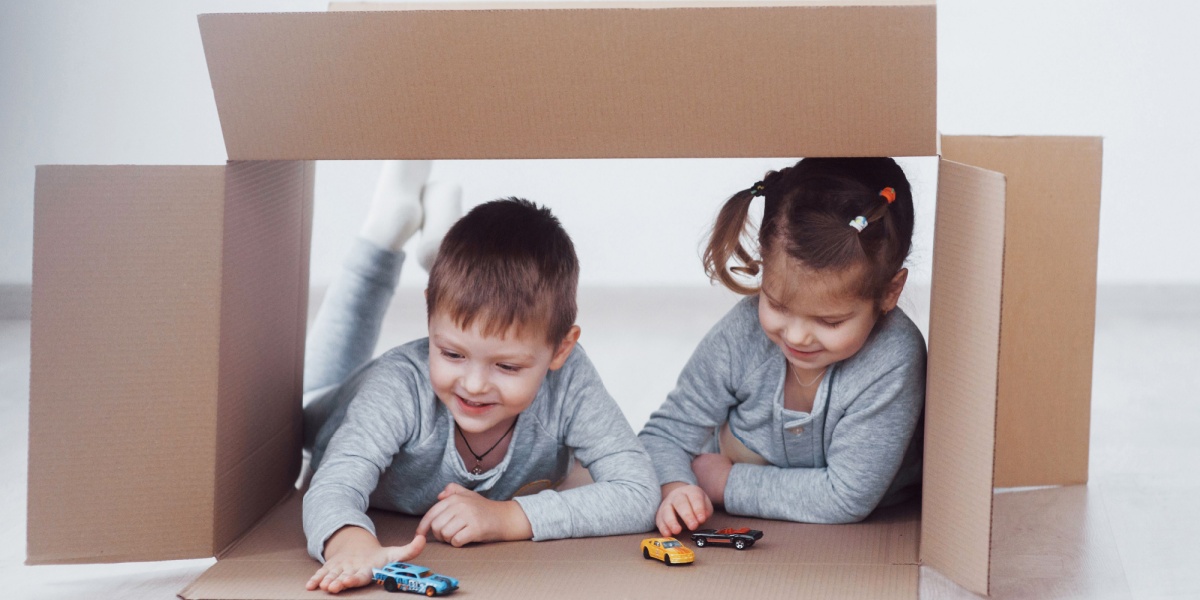
The Ultimate List of 70+ Indoor Activities for Kids
Discover 70+ fun indoor activities for kids—screen-free games, creative play, learning ideas, and movement for every age group.
-
10 Festive & Free Printable Christmas Crafts for Kids (with Templates!)
Download free printable Christmas crafts for kids—perfect for fun, festive, hands-on holiday activities at home or in the classroom.
-
Pattern Activities for Preschoolers and Kindergarteners
Explore fun pattern games, printables, and hands-on activities that help preschoolers build early math and logic skills through play.