20+ Homemade Mother’s Day Card Ideas
Make Moms and grandmothers feel extra special with DIY cards created with a few simple supplies and lots of love!
Table of Contents–Jump to Each Section
Homemade cards for Mother’s Day not only capture children’s creativity and art skills at various stages, they also make excellent keepsakes. Pick from the ideas below to let the special women in your life know how much they’re loved!

Tip: Try our free printable Mother’s Day Cards and Mother’s Day Coloring Pages for a simple way to to show your love and thanks!

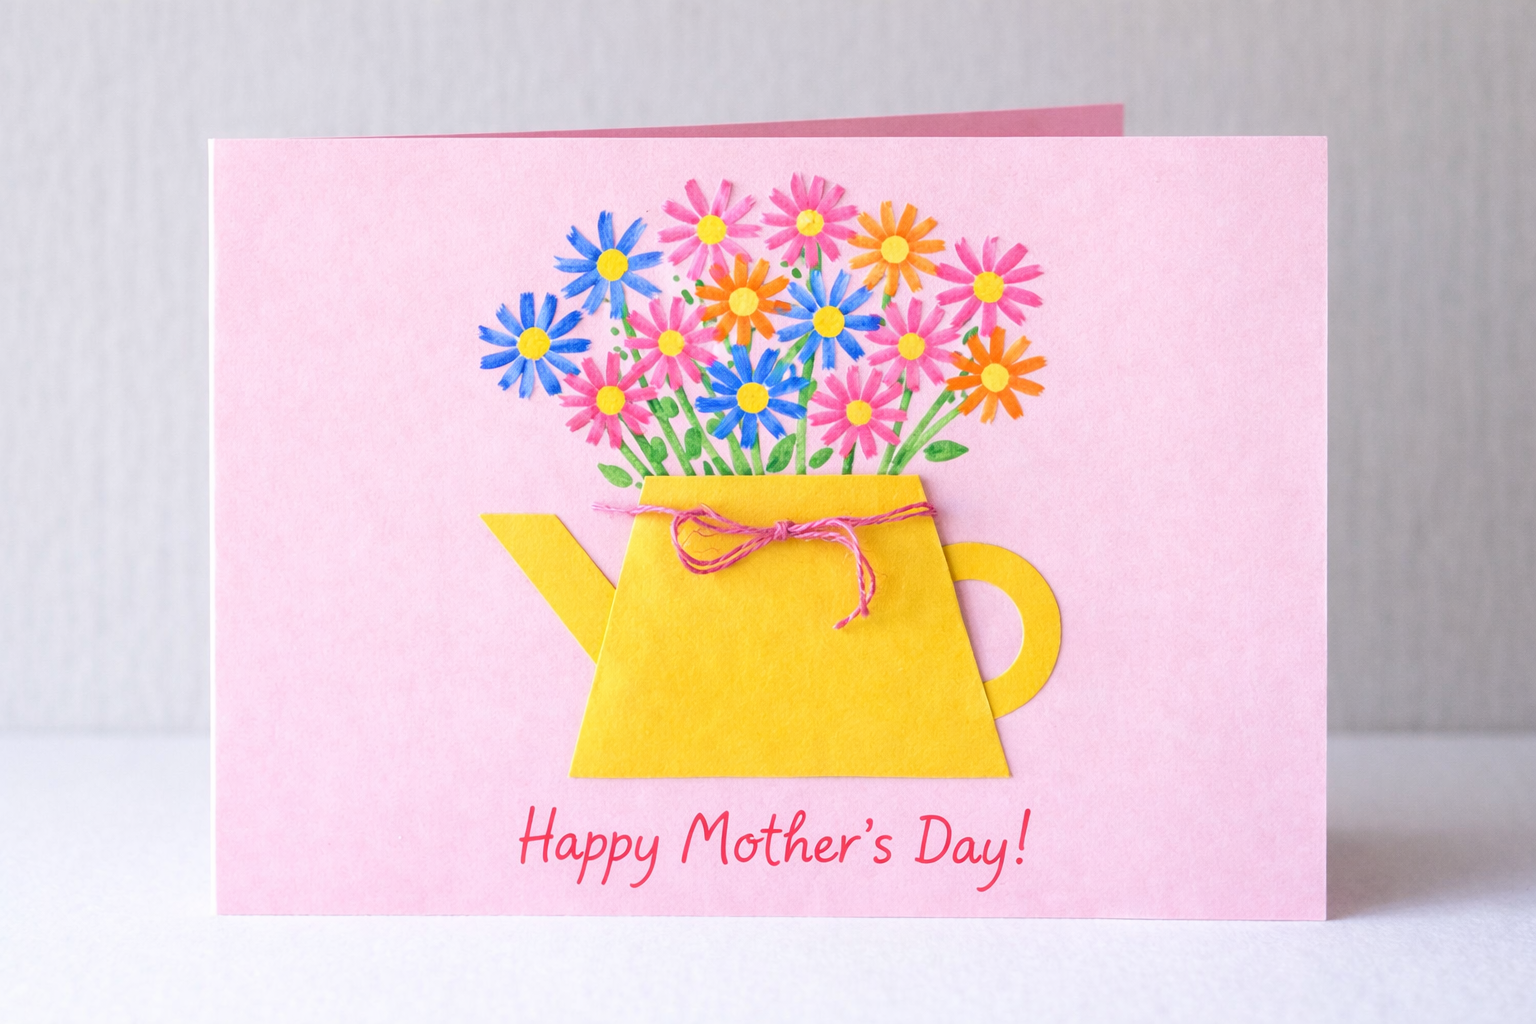
Flower-Themed Mother’s Day Cards
Bright flowers are one of the most classic ways to celebrate Mom, and these flower-inspired cards turn simple craft supplies into something truly special. From textured bouquets to 3D pop-up designs, these handmade cards are perfect for kids of all ages to create and gift. While these crafts are designed for children, we recommend adult supervision while they work.
Seed Paper Card
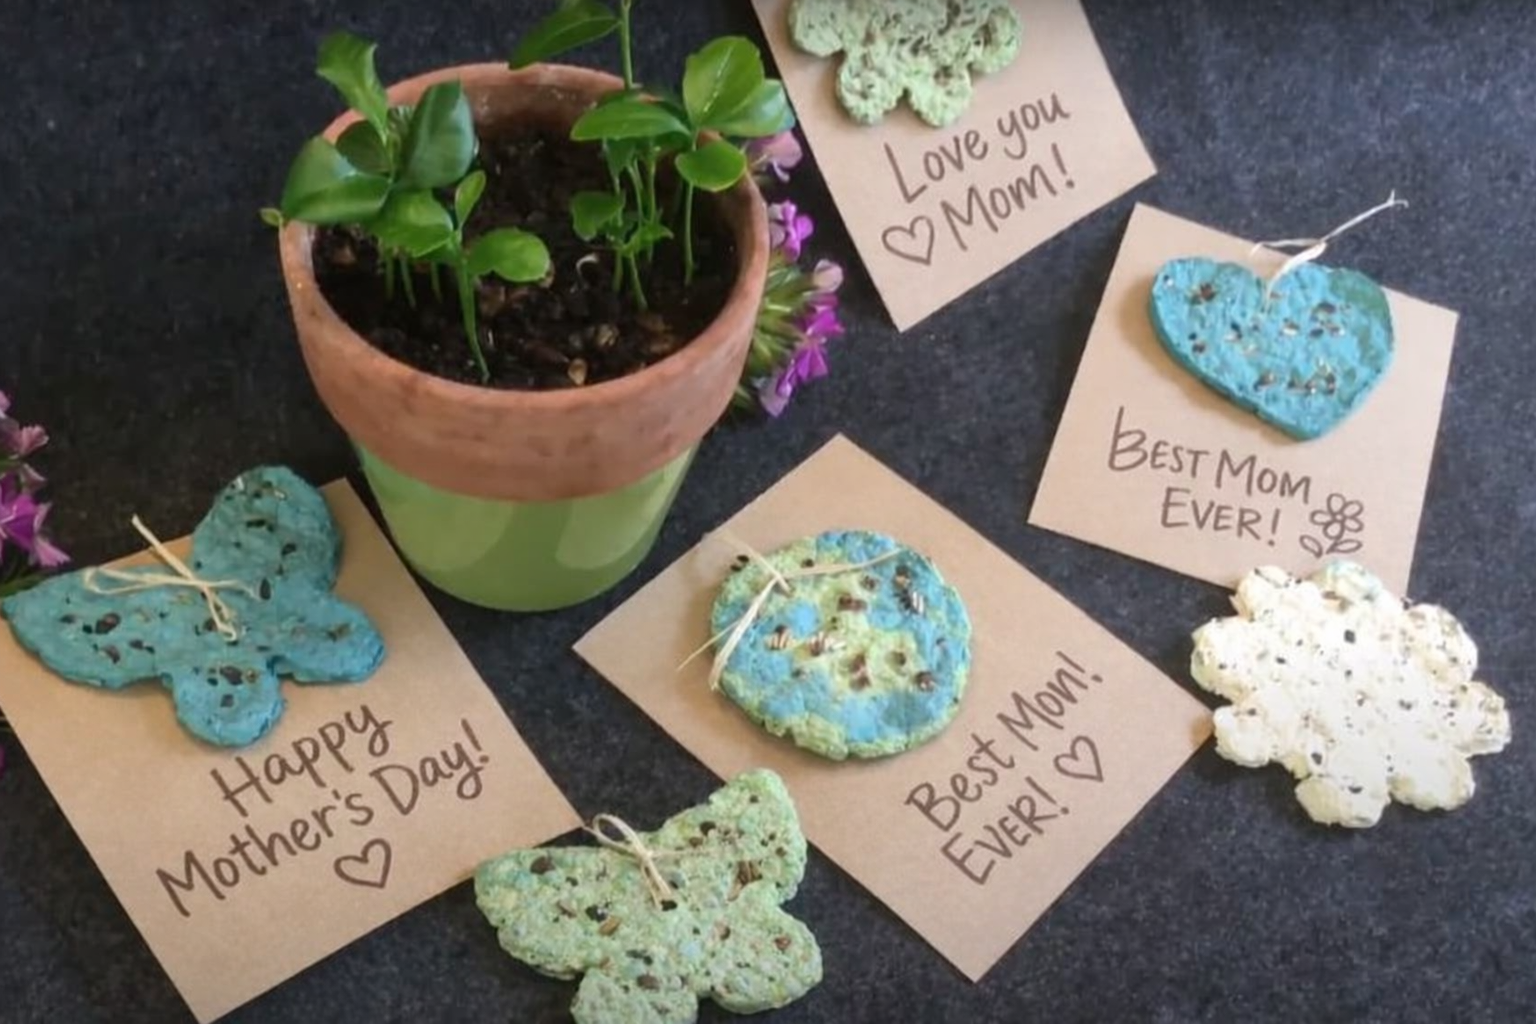
Supplies:
- Paper scraps
- Blender (adult use)
- Water
- Flower seeds
- Towel or mesh screen
- Cardstock (for backing)
- Glue
Instructions:
1
Tear paper scraps into small pieces and soak them in water. Blend into a pulp (adult help recommended). Mix in flower seeds gently (about a teaspoon of seeds should be enough).
2
Place the paper, water, and seed mixture into the strainer, and strain out most of the water.
3
On a non-stick surface, use cookie cutters to press shapes with your seed pulp. If you don’t have cookie cutters, you can always just create shapes with your own hands, too. Let dry completely.
4
Once dry, use a toothpick to put a hole in the top of your seed paper and thread yarn or twine through it. Tape it to the front of your card.
5
Write a message like “Plant this and watch my love grow!” inside.
Tip: See this craft in action by watching our video here.
Button Flower Craft
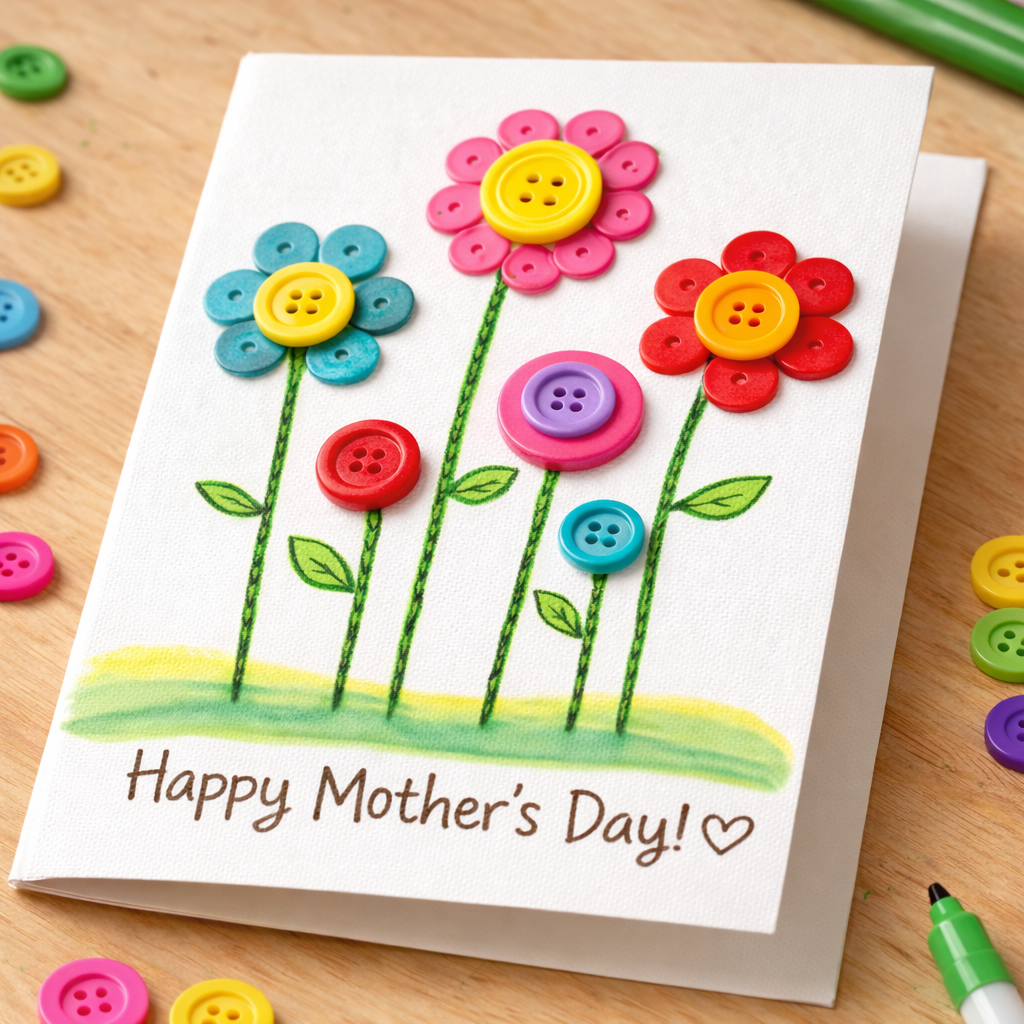
Supplies:
- Buttons in a variety of sizes and colors
- Glue
- Markers or crayons
- Card stock
Instructions:
1
Fold your card stock in half to create a card.
2
Arrange buttons on the front to form flower shapes.
3
Glue the buttons in place.
4
Draw stems, leaves, and a vase or bouquet wrapping.
5
Add a message inside your card.
Cupcake Wrapper Flowers
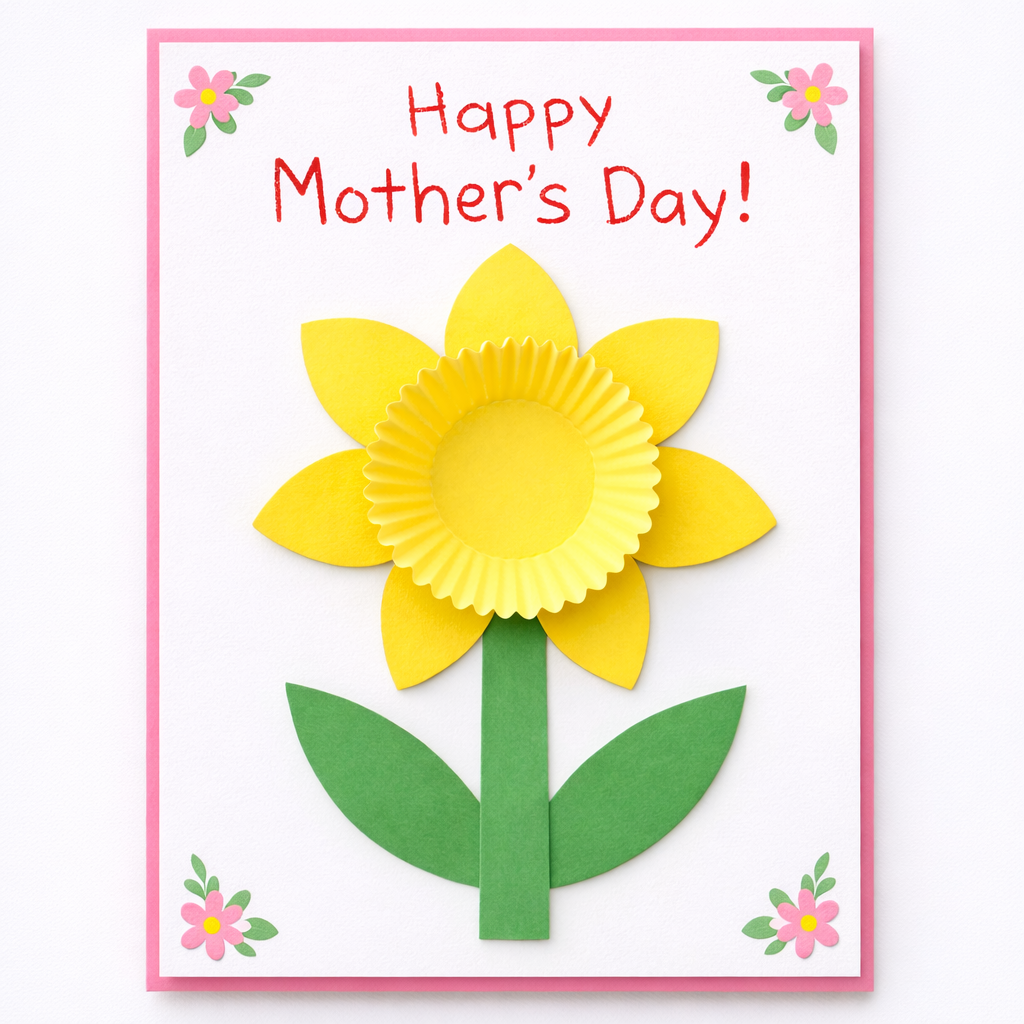
Supplies:
- Construction paper and card stock
- Colorful cupcake wrappers
- Green construction paper
- Scissors
- Pencil
- Glue stick
- Optional: Child’s photo sized and trimmed to fit inside cupcake wrapper
Instructions:
1
Fold card stock in half.
2
Draw and cut out the outer petals of a daffodil. Lay out the petals on the card, overlapping them slightly. Glue them together.
3
Glue the cupcake wrapper to the middle of the petals, creating the center petals of the daffodil.
4
Cut or draw a stem and leaves glue to the card under the flower. If you’d like glue a photo of your child to the inside of the cupcake wrapper.
Painted Pasta Flowers
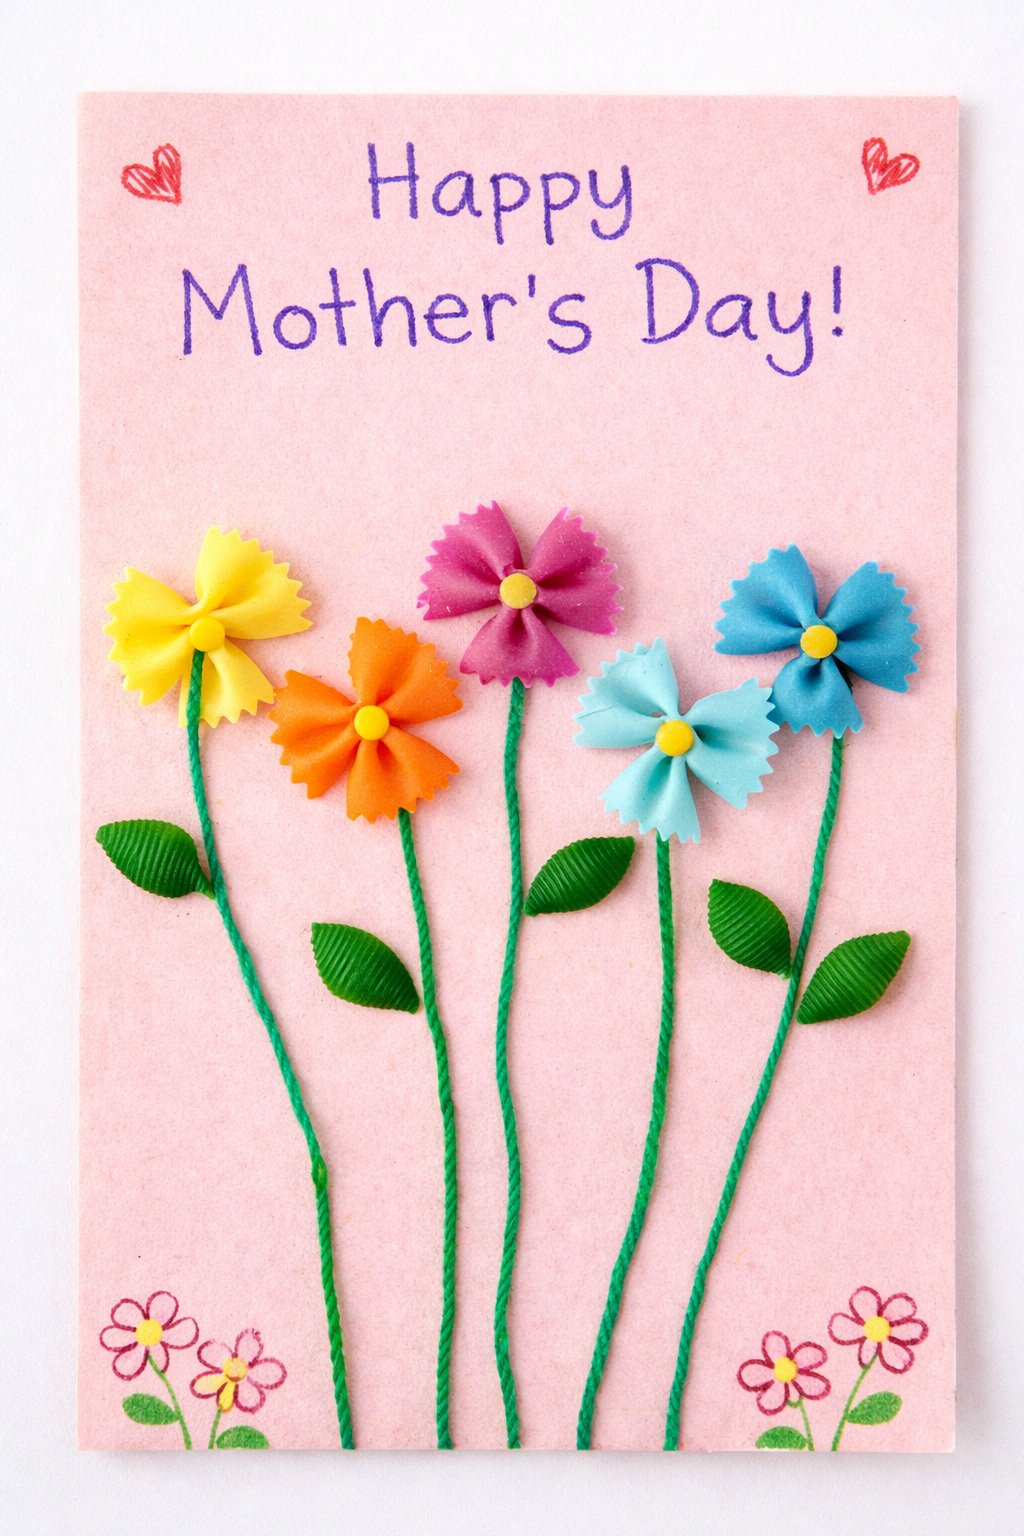
Supplies:
- Dried pasta in different shapes
- Paint in your choice of colors
- Paintbrushes
- Paint tray or paper plate
- Card stock, canvas, or cardboard
- Glue
- Yarn
Instructions:
1
Gather up an assortment of different types of pasta and try arranging them in the shape of flowers. Brainstorm what color you’d like each flower to be.
2
Add some paint to a paint tray or paper plate and paint your pasta. Remember to paint a few noodles green to act as leaves for your flowers. Let dry completely.
3
Paint your canvas, card stock, or cardboard whatever color or pattern you’d like. Let dry.
4
Arrange your flowers on the canvas. Once you’re happy with how they look, glue them into place. Then use a piece of yarn to create a stem and glue it down. Add the green pasta leaves and glue them down. Let dry completely, then display your pasta flowers!
Simple Pom Pom Flowers
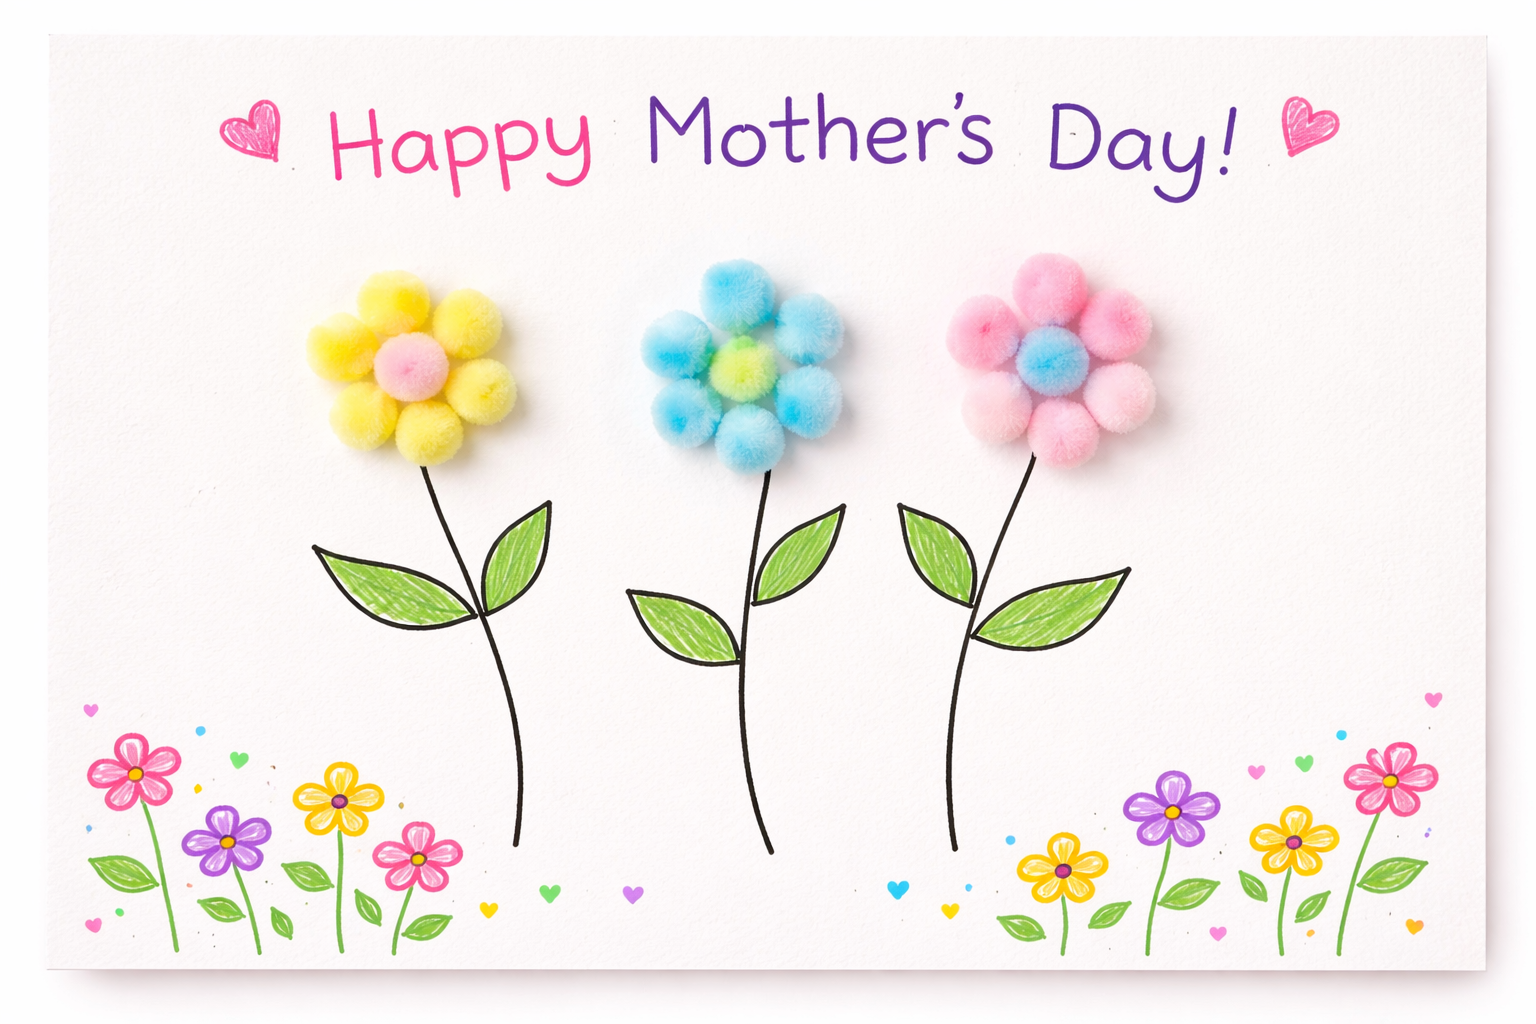
Supplies:
- Small pom poms
- Glue
- Marker
- Card stock or folded white paper
Instructions:
1
Fold your card stock in half to create a card. Arrange the pom poms on the front in the shape of flowers until you’re happy with how they look.
2
Glue the pom poms in place. Use the marker to draw stems and leaves. Write a loving Mother’s Day message inside your card.
Straw-Painting Flowers
Supplies:
- Paper or plastic disposable straws
- Small scissors
- Paint in your choice of colors
- Paintbrush
- Cardstock or folded white paper
- Paper plate
Instructions:
1
Fold your card stock in half to create a card. Use scissors to make small vertical cuts at the end of a straw, about one inch long. Press the strips outward to form a flower shape. Repeat with several straws for different flower styles.
2
Squirt paint onto a paper plate. Dip the cut end of a straw into the paint, then press it onto the front of the card to stamp flower shapes.
3
Repeat using different colors and straw shapes to create a bouquet of flowers.
Handprint Flower Craft
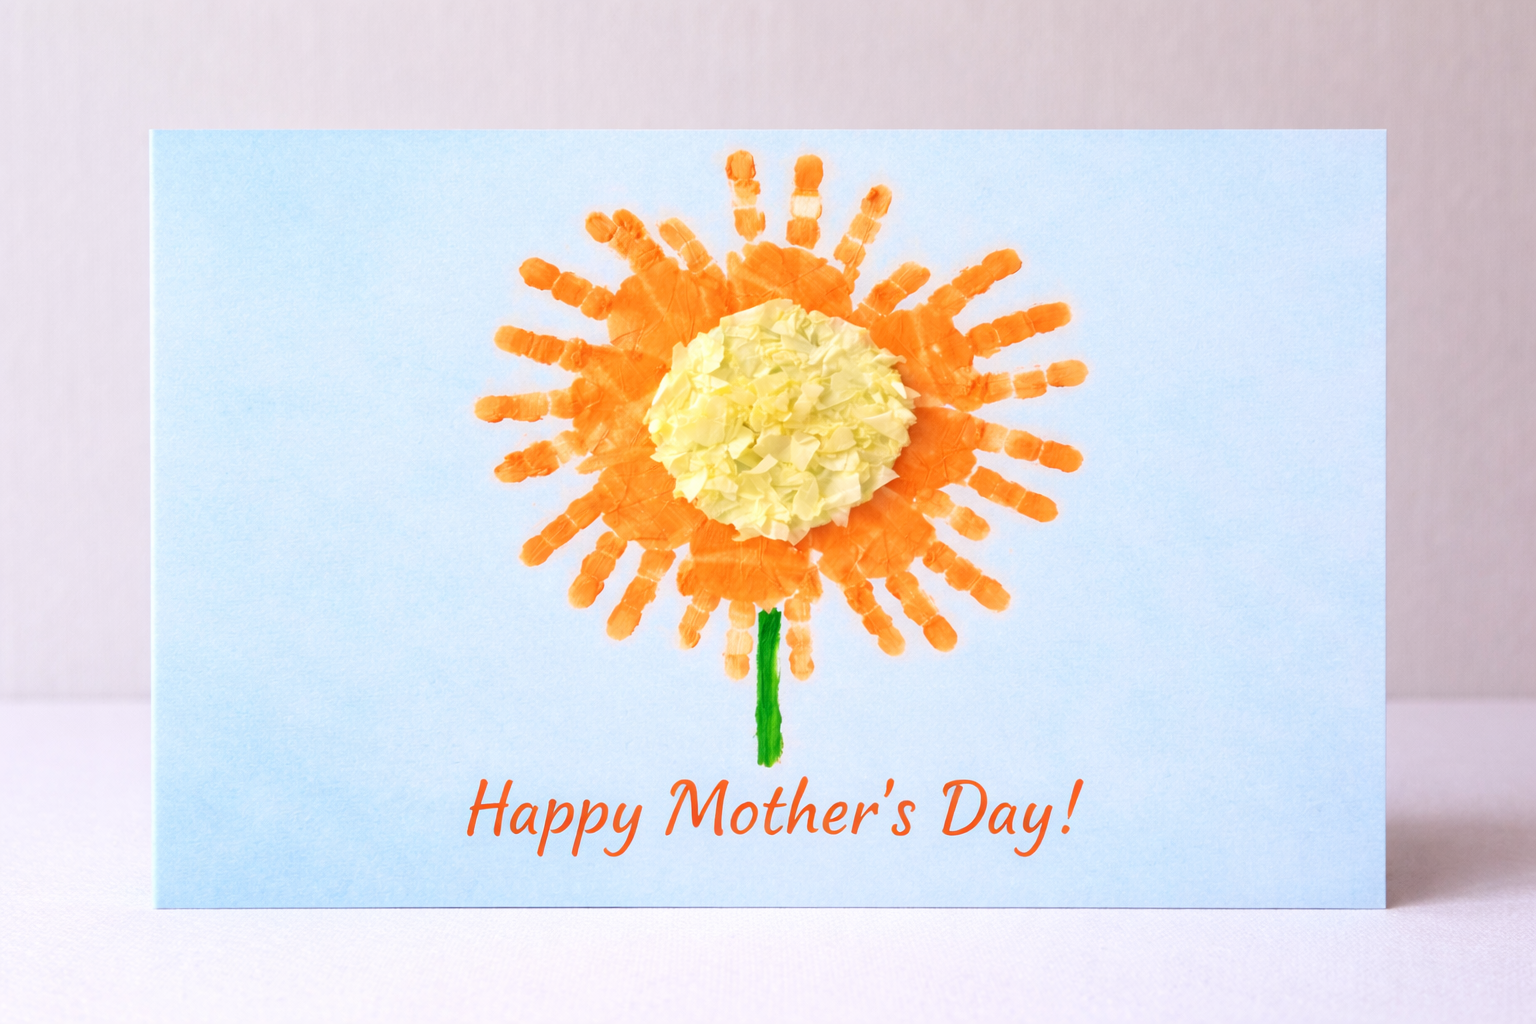
Supplies:
- Paint (any color)
- Paper plates
- Yellow tissue paper
- Card stock (folded into a card)
- Glue
- Soapy water or wet wipe
Instructions:
1
Fold a piece of card stock in half to create your Mother’s Day card. Add a small amount of paint to a paper plate.
2
Gently dip your child’s hand into the paint or use a paintbrush to cover their hand.
3
Press the hand onto the front of the card with fingers pointing outward. Repeat in a circle to create flower petals. Let dry, then draw or paint a green stem.
4
Crumple small pieces of yellow tissue paper and glue them in the center of the handprints to form the middle of the flower. Let dry.
5
Write a sweet message like “Happy Mother’s Day!” on the front or inside of the card.
Painted Pistachio Flowers
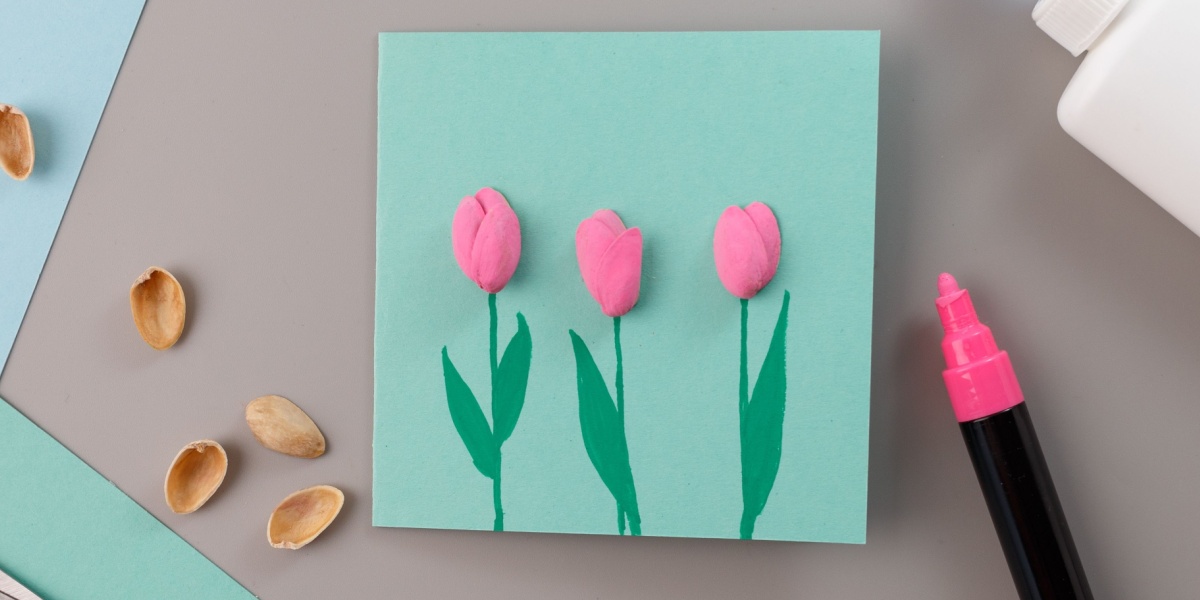
Supplies:
- Rinsed and dried pistachio shells
- Paint or paint pen
- Canvas or card stock
Instructions:
1
First, eat some pistachios! Using a damp paper towel, wipe out the inside and outside of a few shells and let them dry completely.
2
Paint the shells whatever color you’d like using craft paint or paint pens. Glue them down.
3
Using paint or marker, add stems and leaves under your pistachio flowers. Then write a Mother’s Day message to your mom or grandma!
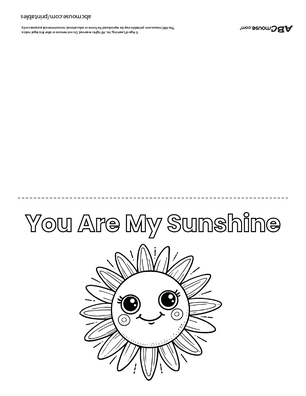
Snail and Sunflower Photo Frame
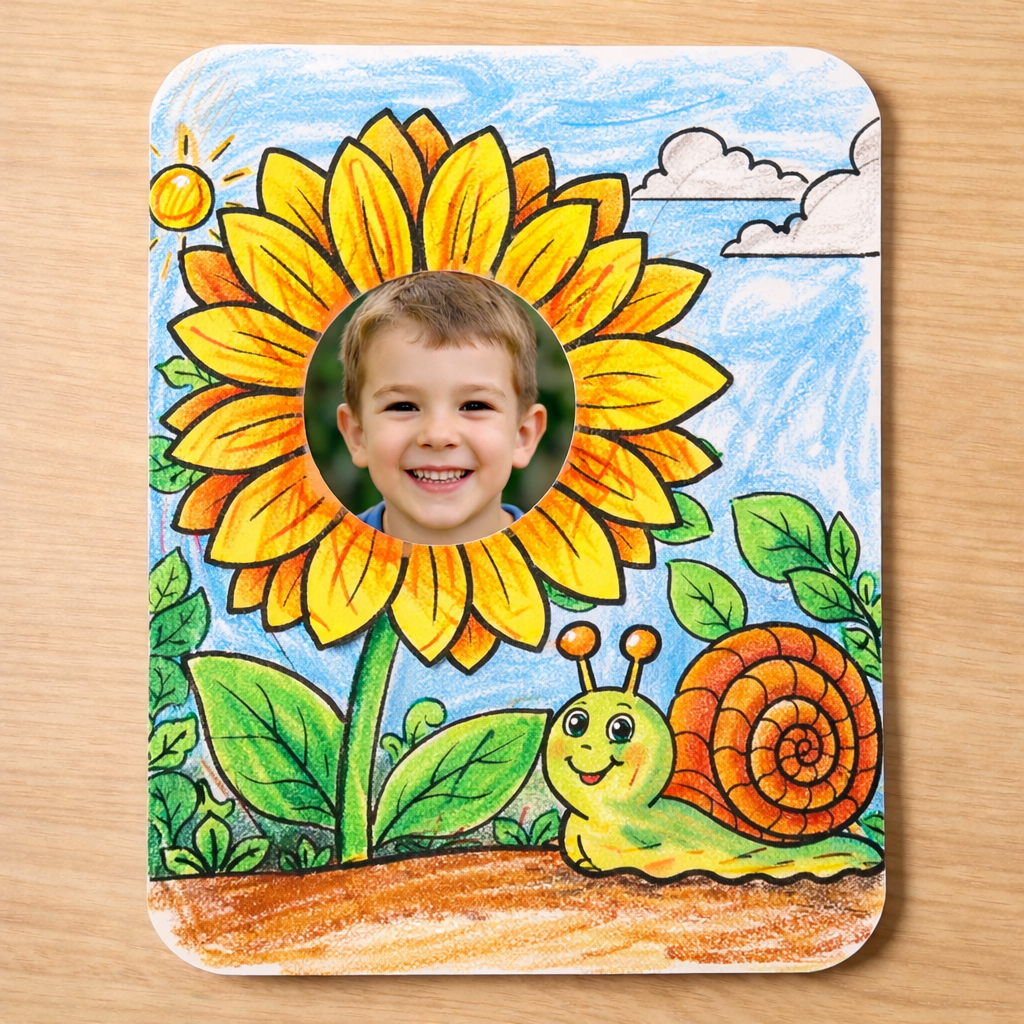
Supplies:
- Snail Crawling Past a Sunflower coloring page from ABCmouse
- Cardstock
- Photo of child’s face, sized and trimmed to fit the circle in the middle of the sunflower
- Crayons, markers, or colored pencils
- Glue stick
Instructions:
1
Print the sunflower coloring page onto card stock, or print on regular paper and glue it onto folded card stock to create a card base.
2
Color the page any way you like, leaving the center of the sunflower blank.
3
Glue the photo into the center of the sunflower.
4
Write a loving Mother’s Day message inside the card to complete your keepsake gift.
Paper Hand Flower Card
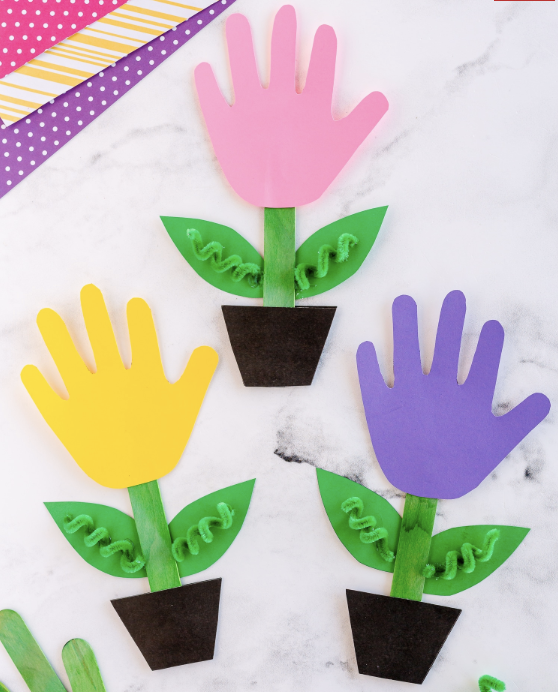
Supplies:
- Construction paper in various colors
- Green craft sticks
- Scissors
- Glue
- Pencil
- Green pipe cleaner (optional)
Instructions:
1
Pick a color of construction paper to be the flower. Have your child press their hand down onto the paper with their fingers slightly spread apart. Use a pencil to trace the outline of their hand, creating a faint line. Cut the handprint out.
2
Cut out leaves from green construction paper. Create green curly cue leaf tendrils by wrapping pipe cleaners around a pencil and sliding them off
3
Glue down the flower handprint on top of the green craft stick stem. Glue down the green leaves and curly cues behind the craft stick.
4
Write a note to Mom on the flower!
Heart & Love-Themed Cards
Heart-themed Mother’s Day cards are a sweet and simple way for kids to express love and appreciation. From messy splatter art to soft tissue paper creations, each project offers a fun, hands-on way for children to make something meaningful. These cards are perfect for reminding Mom just how loved she is.
Woven Heart Card
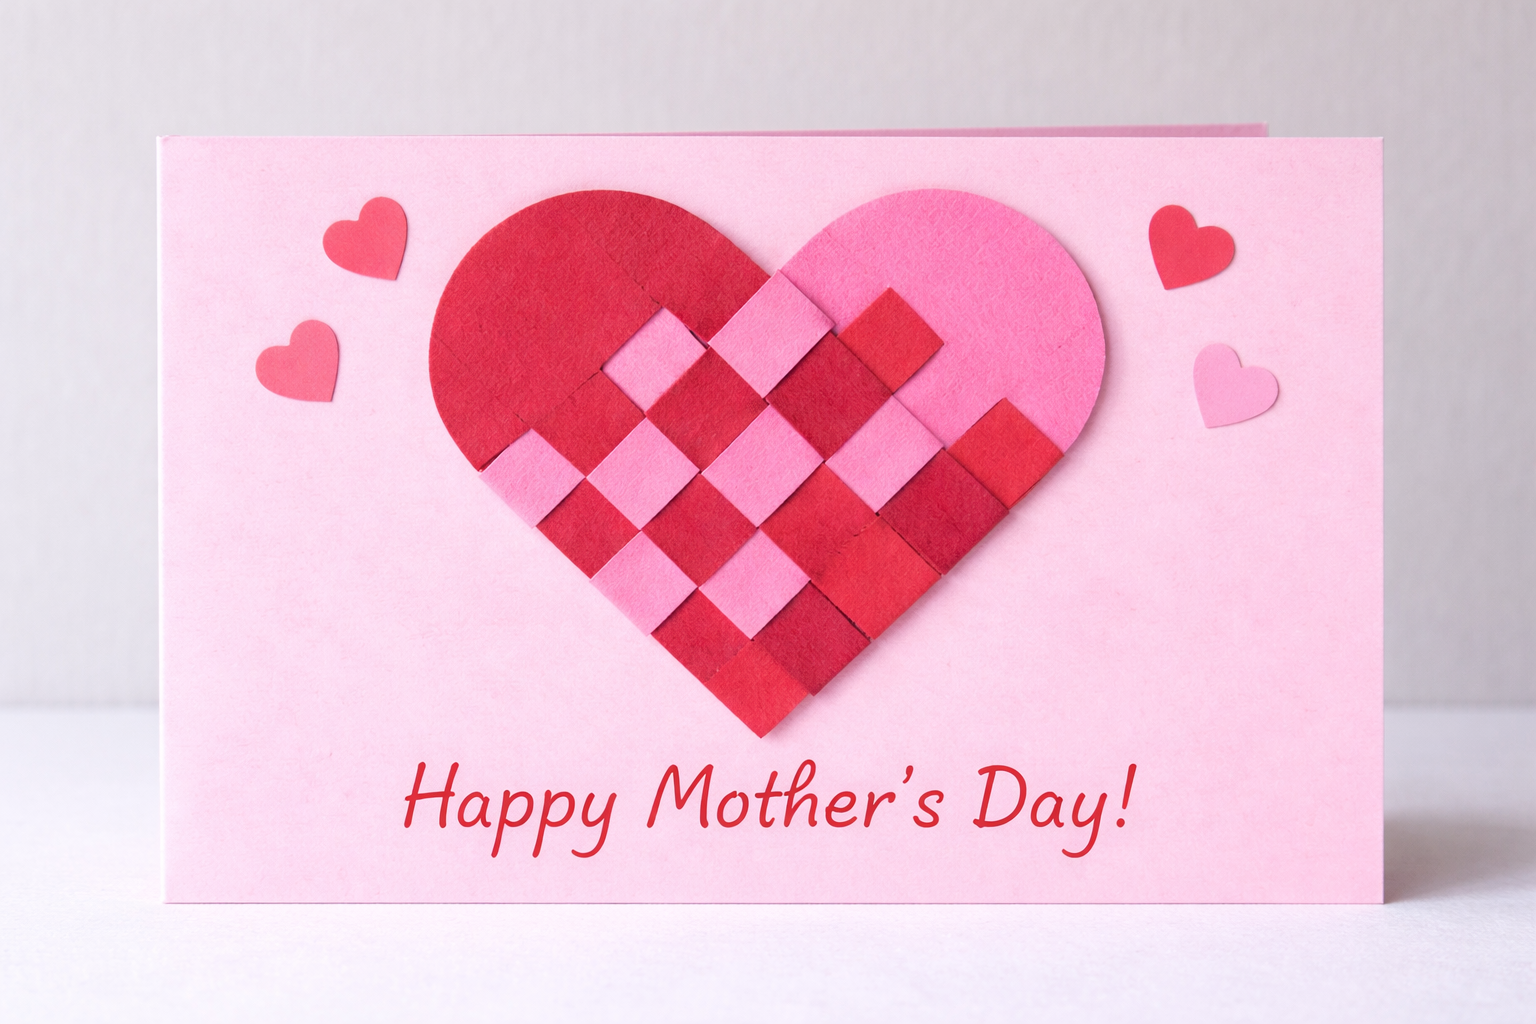
Supplies:
- Construction paper (two different colors)
- Card stock (for card base)
- Scissors
- Printable heart template
- Glue or tape
- Markers or crayons
Instructions:
1
Fold a piece of card stock in half to create your Mother’s Day card. Set it aside while you make the woven heart.
2
Use a heart template to trace and cut two heart shapes from different colors of construction paper.
3
Fold each heart in half and carefully cut evenly spaced slits along the folded edge, stopping before you reach the outer edge.
4
Open both hearts and weave the strips together, alternating over and under until the heart is fully woven.
5
Glue the woven heart onto the front of the card. Decorate and write a message like “Happy Mother’s Day!”
Tip: See this craft in action by watching our video here.
Salt Painting Hearts Card
Supplies:
- Card stock (for the card base)
- Pencil
- Glue
- Salt
- Watercolor paints
- Paintbrush
- Heart templates (optional)
- Art tray (optional, for less mess)
Instructions:
1
Fold a piece of cardstock in half to create your Mother’s Day card and place it on a flat surface.
2
Print out your choice of heart templates, or lightly hand draw one or more heart shapes on the front of the card with a pencil, then trace over the hearts with glue.
3
Place the card on an art tray and sprinkle salt over the glue until it is completely covered, then gently shake off any extra salt.
4
Dip a paintbrush into watercolor paint and lightly touch it to the salted glue hearts, watching as the color spreads through the design; repeat with different colors to create a bright, colorful effect.
5
Allow the card to dry completely, then open it and write a sweet Mother’s Day message inside.
Heart Animal Mother’s Day Card
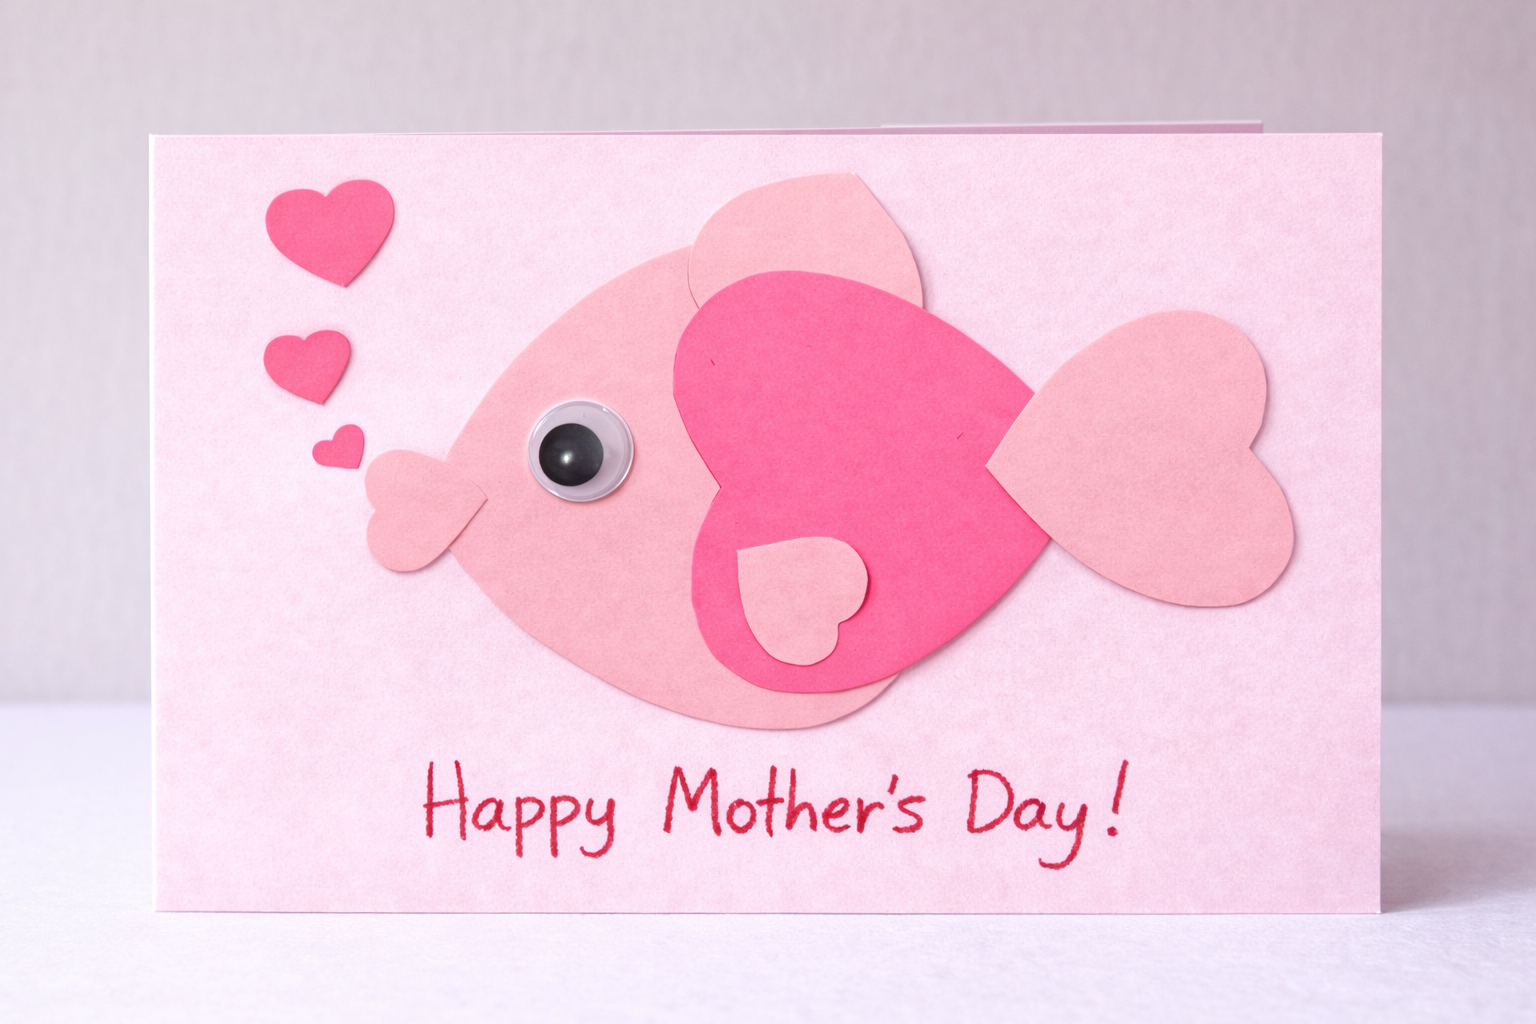
Supplies:
- Colored paper
- Scissors
- Glue or tape
- Googly eyes, pom poms, or other decorations (optional)
- Markers or crayons
- Card stock (for card base)
Instructions:
1
Fold a piece of card stock in half to create your Mother’s Day card and gather all your supplies.
2
Cut out several heart shapes in different sizes using colored paper, with larger hearts for the body and smaller hearts for details like ears, wings, or tails.
3
Arrange the hearts on the front of the card to create an animal shape, such as a butterfly, puppy, or another favorite animal.
4
Glue the hearts in place, layering the smaller hearts onto the larger ones to build your animal design.
5
Add decorations like googly eyes or draw on details with markers, then write a sweet message such as “Happy Mother’s Day!” on the front or inside of the card.
Tip: See this craft in action by watching our video here.
Splatter Heart Mother’s Day Card
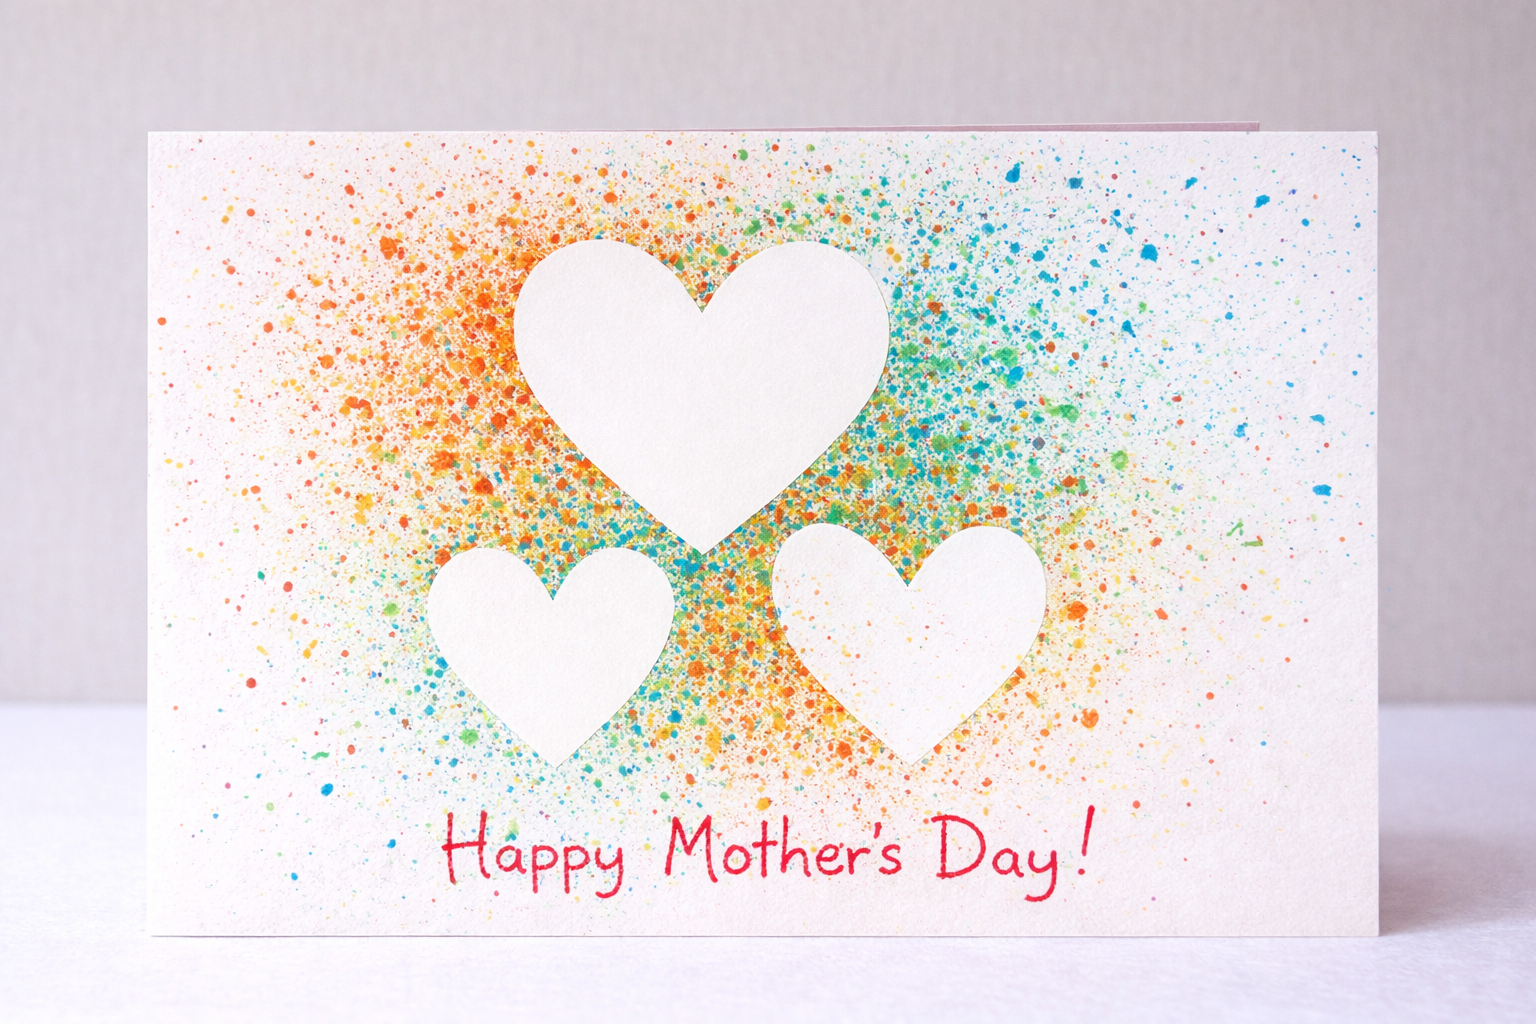
Supplies:
- Heart templates (use heart coloring pages or cut your own)
- Masking tape
- Plain white card stock or thick paper (for a card)
- Craft paint
- Water Small cups (one for each color)
- Paint brushes and/or toothbrushes
- Marker or pen (for your message)
Instructions:
1
Fold your card stock in half to create your card. On the front, place your heart templates in a design you like. These will block the paint and create your heart shapes. Use small loops of masking tape to hold them in place. Leave plenty of open space around the hearts for the splatter effect.
2
Mix a few drops of paint with water in each cup to make it slightly runny. Dip your brush into the paint, then flick, tap, or run your thumb across the bristles to splatter paint across the front of your card.
3
Continue layering colors until you love the look. Let the paint dry completely, then gently remove the heart templates to reveal clean heart shapes surrounded by colorful splatter.
4
Open the card and write a sweet message inside, or add a note on the front like “Happy Mother’s Day!” or “I love you, Mom!”
Tip: This craft can get messy, cover your workspace, wear old clothes, and use washable paint for easy cleanup.
Tissue Paper Heart Mother’s Day Card

Supplies:
- Tissue paper (any colors you like)
- Card stock or thin cardboard (for the card base)
- Pencil (optional)
- Glue
Instructions:
1
Fold a piece of card stock in half to create your Mother’s Day card. On the front, draw or cut out a large heart shape.
2
Cut tissue paper into small squares. To make them easier to place, gently wrap each square around the end of a pencil to create a soft point.
3
Dip the pointed end of each tissue paper piece into glue, then press it onto the heart on the front of your card. Continue filling the entire heart with tissue paper pieces to create a fluffy, colorful design.
4
Allow the glue to dry completely. Then write a sweet message inside your card like “Happy Mother’s Day!” or “I love you, Mom!”
Heart Stamped Mother’s Day Card
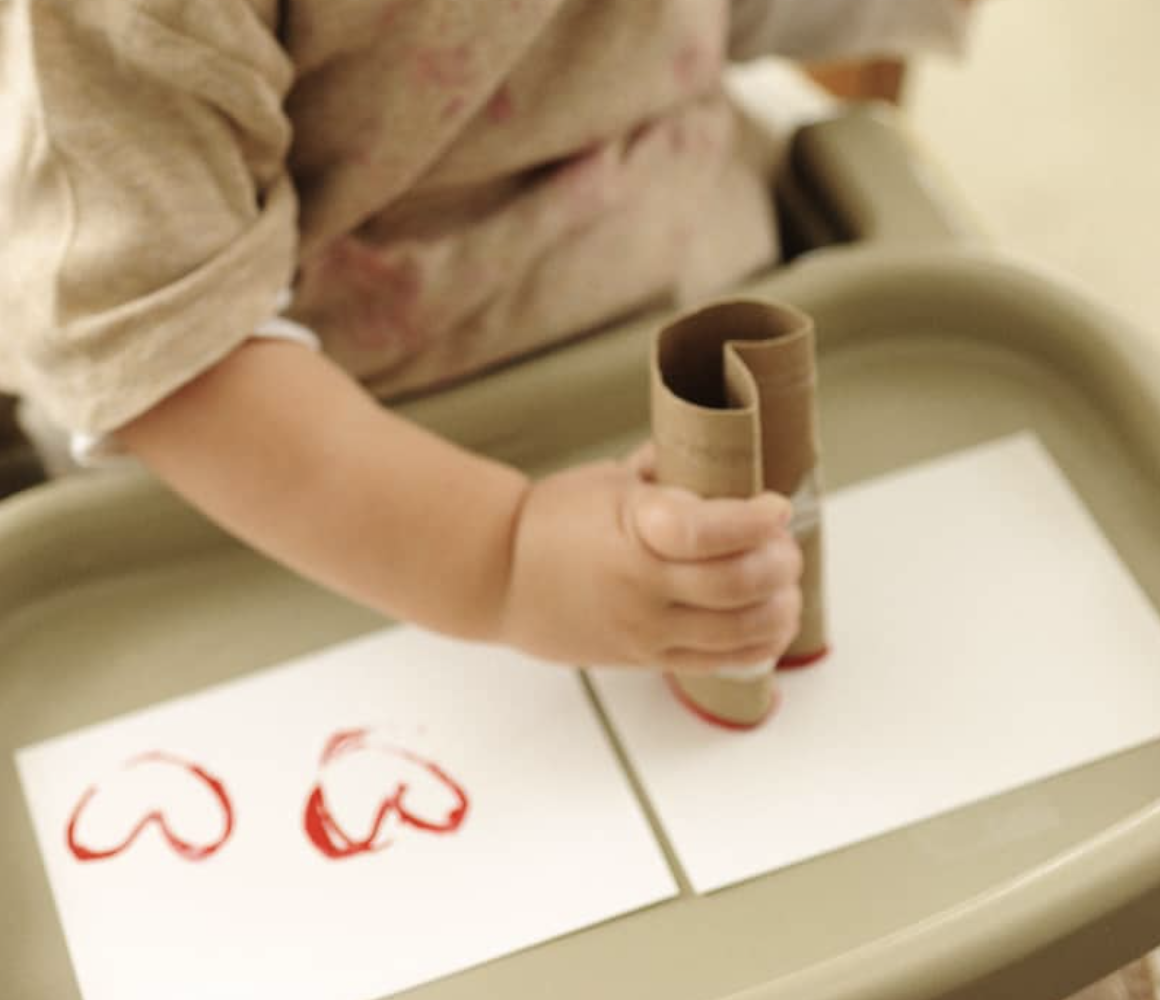
Supplies:
- Card stock or thick paper (for the card)
- Empty toilet paper tube
- Red and pink paint (or any colors Mom loves)
- Paper plate (for paint)
Instructions:
1
Fold your card stock in half to create your Mother’s Day card. Squeeze small amounts of paint onto a paper plate.
2
Take the cardboard tube and flatten it lengthwise to create two creases. Push one crease inward to form the top of a heart, and leave the other as a “V” shape for the bottom.
3
Dip the heart-shaped end of the tube into the paint, then press it onto the front of your card to make heart prints.
4
Fill the front with heart stamps in different colors and patterns. You can overlap colors or create a border of hearts around the edge.
5
Once the paint is dry, write a message like “Happy Mother’s Day!” or “Love You, Mom!” on the front or inside your card.
Mother’s Day Cards Little Kids Can Make
These easy Mother’s Day cards are perfect for younger children who are just beginning to explore crafting. With simple techniques using everyday objects, kids can create colorful and heartfelt cards with minimal frustration. The result is a one-of-a-kind card that Mom or Grandma will love.
Marble Painted Mother’s Day Card
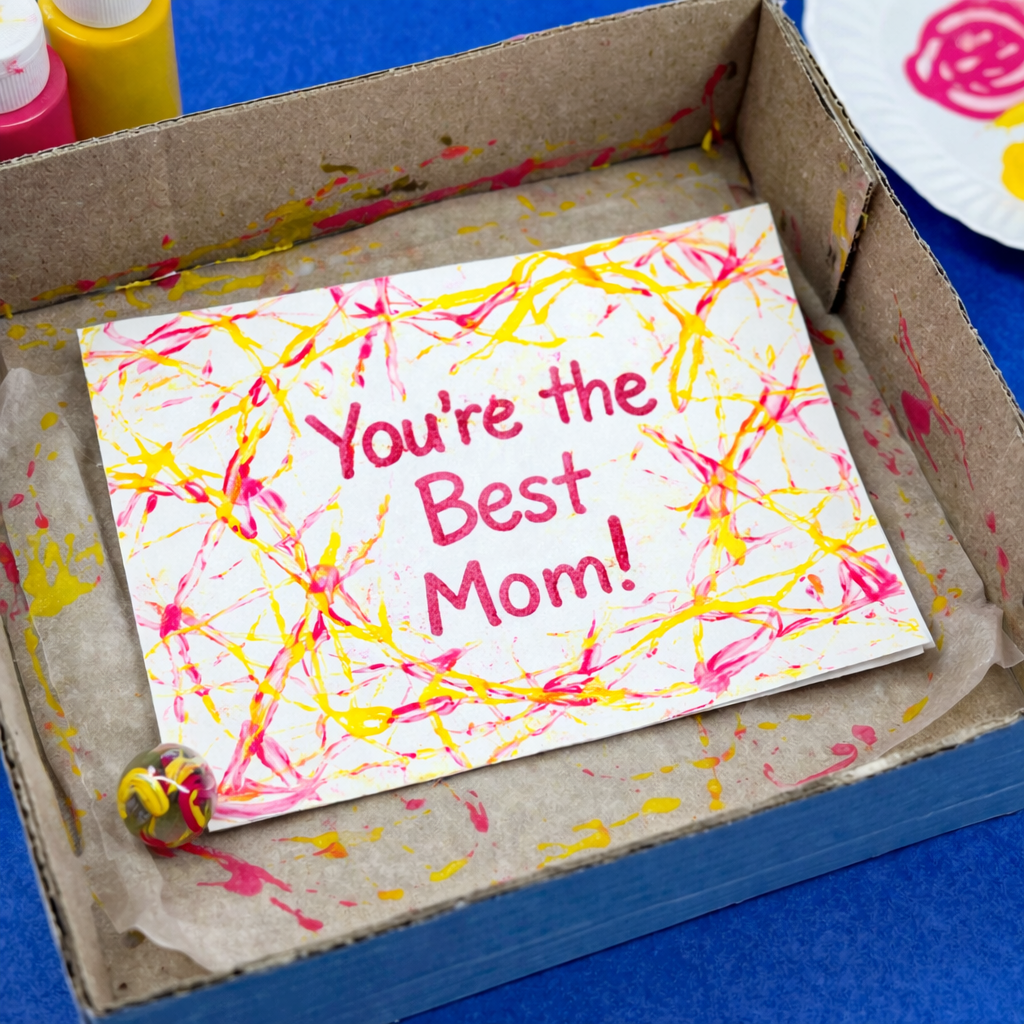
Supplies:
- two colors of paint
- paper plate
- thicker paper or card stock
- shallow box
- marble
Instructions:
1
Write a message on the front of the card and on the inside too if you’d like.
2
Have your child select two colors paint, and squirt a bit of each color onto a paper plate. Dip the marble into the paint and set it on the paper in the box.
3
Then, have your child tilt the box around, causing the marble to roll all over the paper, leaving a colorful trail behind it.
4
Repeat the process with the other paint color, reloading the marble as needed.
5
Let the card dry completely, then give it to your mom or grandma!
Fantastic & Feathered Mother’s Day Card
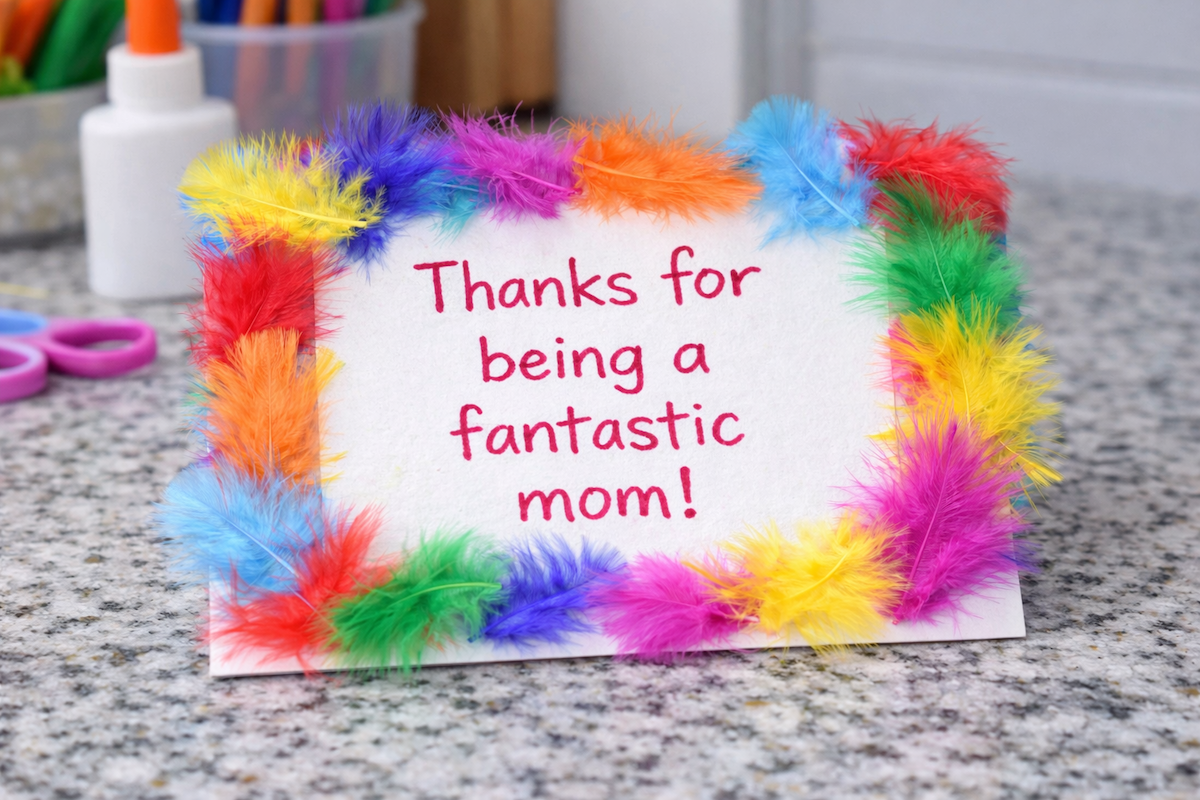
Supplies:
- thicker paper or card stock
- liquid school glue
- Paper plate or scrap paper
- craft feathers
- marker or crayon
Instructions:
1
Write a message on the front of the card and on the inside too if you’d like.
2
Pick either one color of craft feathers for your card or a variety of colors. Think about the colors the card’s recipient would most enjoy.
3
Squeeze a little bit of the glue onto a paper plate or craft paper. Dip the pointy, unfeathered end of the feather into the glue, then attach to the card.
4
Repeat the process with the other feathers until you’re happy with how it looks.
5
Let the card dry completely, then give it to your mom or grandma!
Pencil Eraser Polka Dots Mother’s Day Card

Supplies:
- thicker paper or card stock
- variety of paint colors
- Paper plate
- several pencils with erasers
- marker or crayon
Instructions:
1
Use the pencils, marker, or crayons to write a message on the front of the card and on the inside too if you’d like.
2
Squeeze several colors of paint onto a paper plate. Get one pencil with an eraser for each paint color you choose.
3
Dip a pencil eraser into one of the paint colors and then dab the eraser onto the card, leaving small polka dots behind.
4
Repeat the process with the other paint colors until you’re happy with how it looks.
5
Let the card dry completely, then give it to your mom or grandma!
Colorful MOM Card
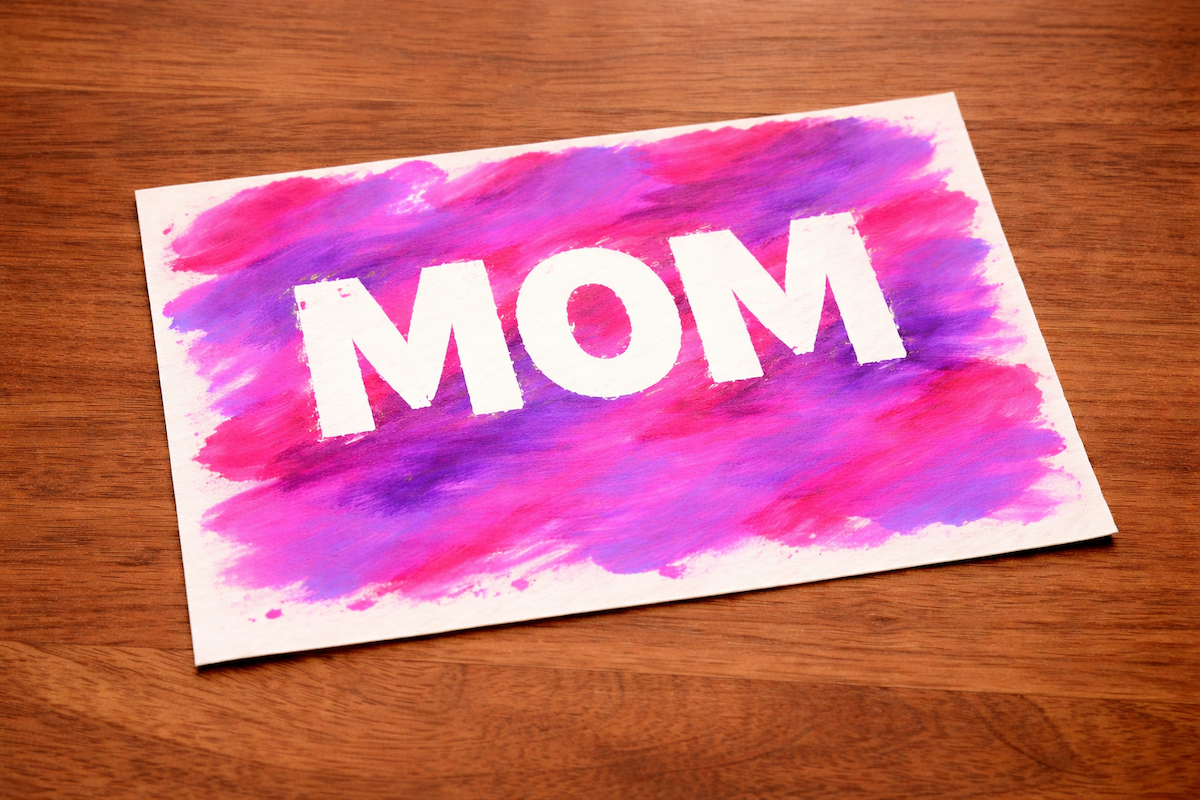
Supplies:
- thicker paper or card stock
- variety of paint, crayon, or marker colors
- painter’s tape (optional)
- pencil
Instructions:
1
Use the pencil to create an outline of the word MOM on the card stock. You can also use the painter’s tape to create the letters or to fill the letters in.
2
Invite your child to fill the card stock with color using their art tool of choice. The only rule is that they need to leave the letters MOM completely white.
3
Let your Mother’s Day masterpiece dry completely, and erase any visible pencil lines before before giving your card.
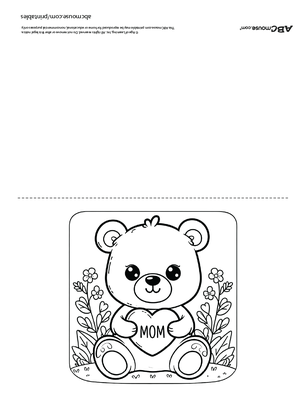
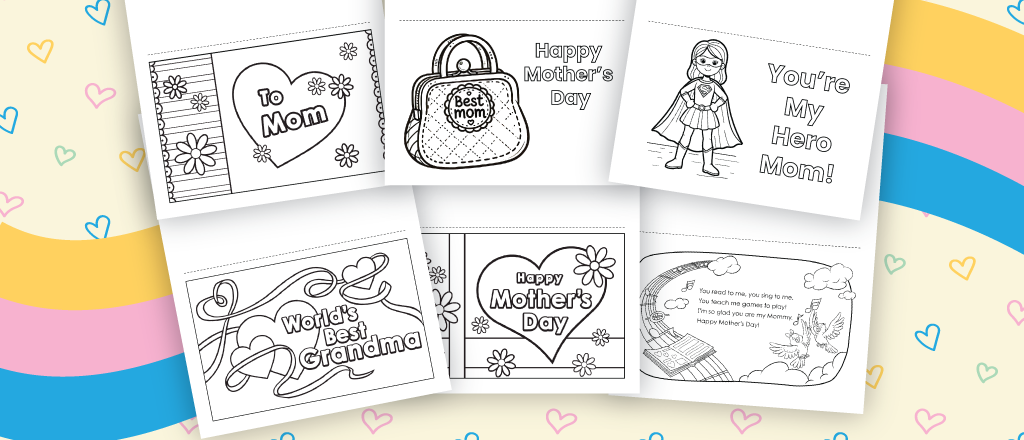
Easy Print and Color Cards for Kids
Celebrate Mom with this collection of free printable Mother’s Day cards that kids can color, customize, and proudly give as a gift. From playful characters to meaningful messages, including options for grandmas and even Spanish-language cards, these printables make it easy for children to create something personal and special. Just print, color, and add a loving note or poem to turn a simple card into a cherished keepsake Mom will adore.
Legal disclaimer: Any links to third-party resources are provided for informational purposes only. We are not affiliated with and do not sponsor/endorse these third parties and bear no responsibility for the accuracy of content on any external site.
Related Activities
-

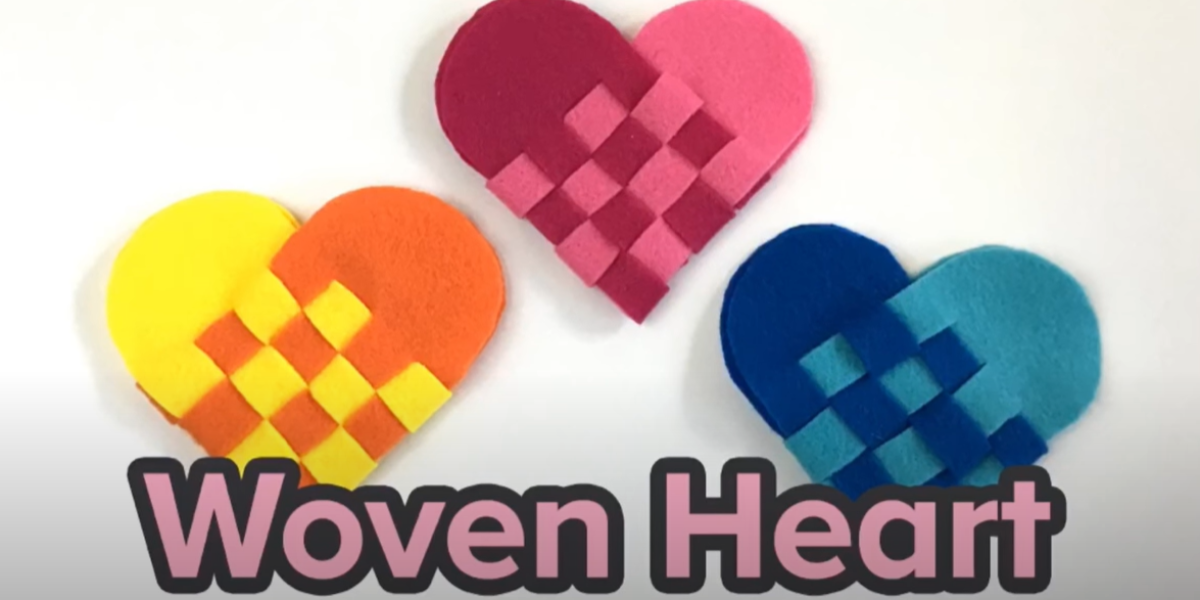
Woven Heart Craft for Kids
Make Valentine’s Day special with a woven heart craft for kids. This guide shows how to create colorful hearts with paper or felt, perfect for filling…
-

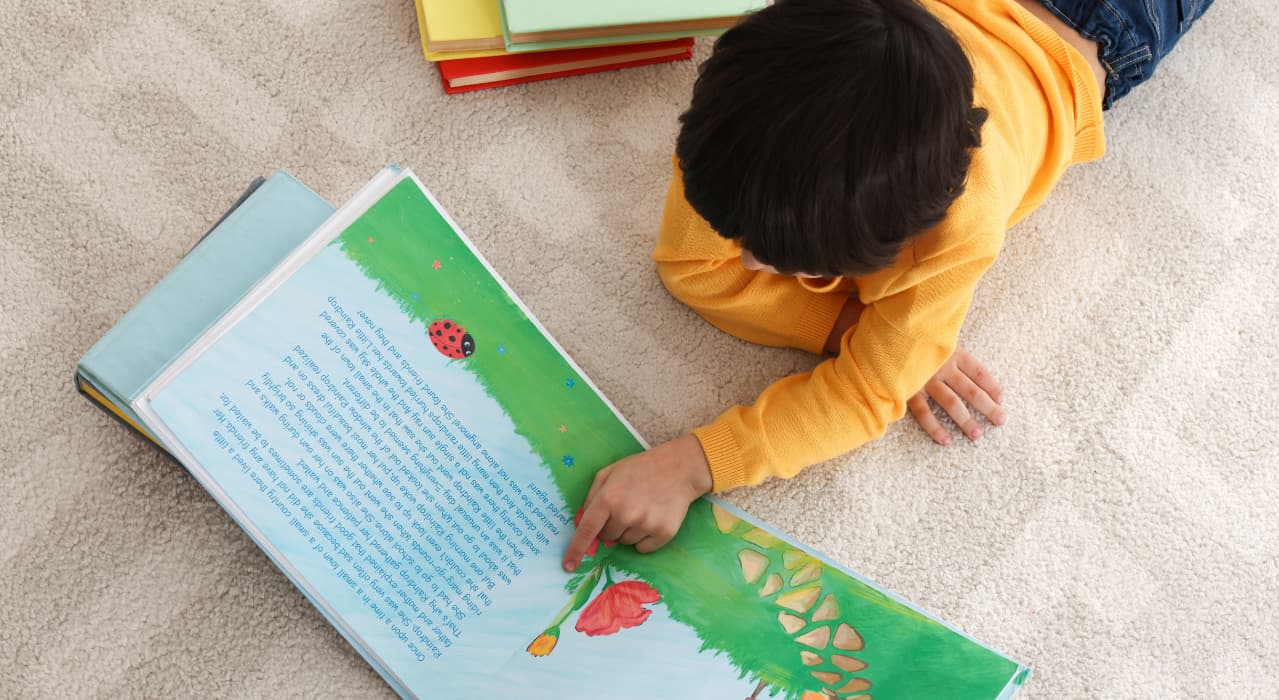
50+ PreK and Kindergarten Phonics Activities for Young Readers
Explore over 50 fun, effective phonics activities for PreK and Kindergarten! This collection features active games, online tools, printable worksheets, and hands-on ideas designed to build…
-

Heart Animals Valentine’s Day Craft for Kids
Celebrate Valentine’s Day with heart-shaped animal crafts kids can make with paper, scissors, and glue! From puppies to butterflies, these easy and fun crafts are perfect…
-

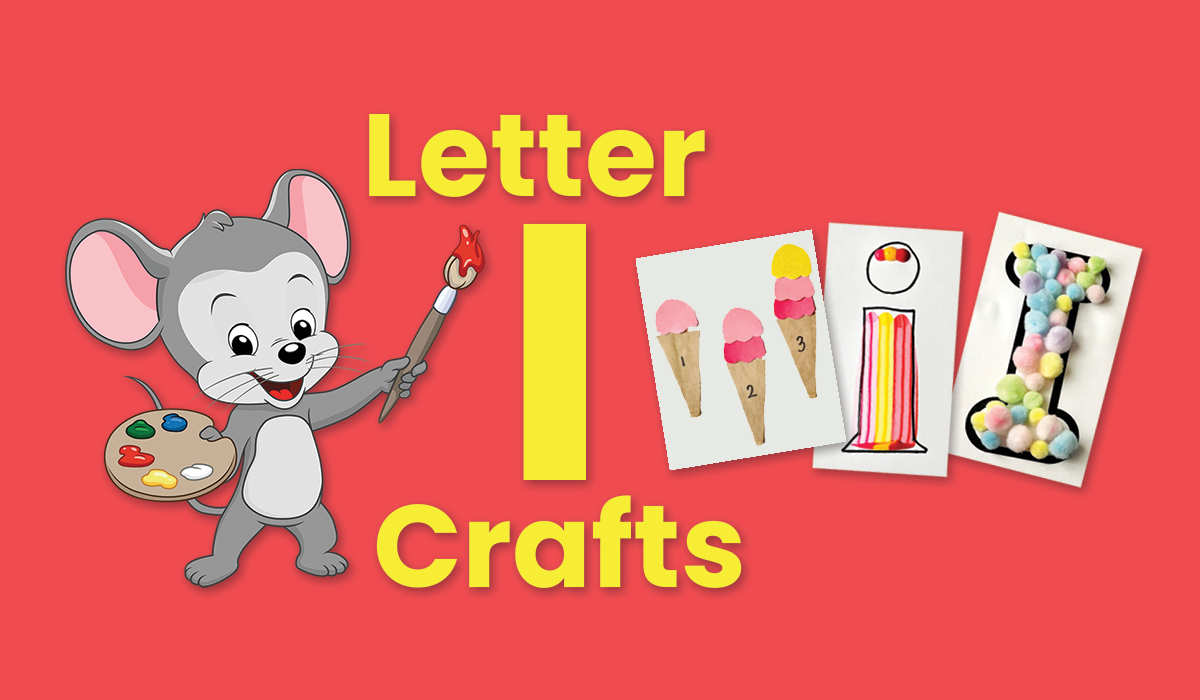
Letter I Crafts and Activities
Explore fun, hands-on letter I crafts and activities for preschoolers! From igloo stamping to ice painting, these creative ideas teach letter recognition and sounds through engaging…
-
Letter H Crafts and Activities
Explore hands-on letter H crafts and activities perfect for preschoolers! From bubble painting to horse-building, these projects introduce the shape and sound of H through engaging,…
-

100+ Nursery Rhymes and Song Lyrics for Toddlers and Preschoolers
Explore 100 fun nursery rhymes and song lyrics for kids from ABCmouse, including classic and educational tunes to inspire young learners. Perfect for playtime, sing-alongs, and…